By Lerpong Intaraworrapath | January 31th ,2022

Information regarding CVE-2021-44228 & CVE-2021-45046 in NSX-T Data Center (2.5.0-3.1.3) (87086)
ในบทความนี้ เราจะมาทำ workaround ในการแก้ปัญหา instructions to address CVE-2021-44228 and CVE-2021-45046 in NSX-T Data Center (2.5.0-3.1.3)โดยจะ followup วิธีการ จาก KB87086.
Note: ในส่วนของ Product อื่นของ VMware และ ข้อมูล CVE-2021-44228 and CVE-2021-45046 ให้ อ่านได้จาก VMSA-2021-0028.
Impact / Risks
- Internal NSX-T processes/JVM’s เป็นการป้องกัน จากการสร้าง connection จากภายนอก ผ่านการ configured iptables ใน NSX-T Unified Appliance.
- Version ของ Java JDK ใน NSX-T Datacenter version 3.0.2 และสูงกว่า จะป้องกัน remote code execution publicized (ie. LDAP attack vector).
All versions of NSX-T Data Center จะมี log4js. Further exploit of the log message lookup feature may be possible.
Note: NSX-T Edge VM’s และ Bare Metal Edge Nodes จะไม่กระทบจาก issue นี้.
Note: ถ้ามีการ upgraded หรือ deployed ใหม่ก็จำเป็นจะต้อง re-applied workaround อีกครั้ง.
Note: หากมีการ Restored NSX-T managers หรือ NSX-T Cloud Service Managers จาก backup ก็จำเป็นจะต้อง re-applied workaround อีกครั้ง.
Resolution
Workaround ในบทความนี้เป็น Temporary solution เท่านั้น แนะนำ.
NSX-T Data Center 2.5.3.4, 3.0.3.1 and 3.1.3.5 provide resolution for CVE-2021-44228 & CVE-2021-45046.
VMware recommends the following upgrade paths.
- NSX-T 2.5.x should upgrade to 2.5.3.4
- NSX-T 3.0.x should upgrade to 3.0.3.1
- NSX-T 3.1.x should upgrade to 3.1.3.5
NSX-T 2.5.3.4 Release Notes: https://docs.vmware.com/en/VMware-NSX-T-Data-Center/2.5.3/rn/VMware-NSX-T-Data-Center-2534-Release-Notes.html
NSX-T 3.0.3.1 Release Notes:https://docs.vmware.com/en/VMware-NSX-T-Data-Center/3.0/rn/VMware-NSX-T-Data-Center-3031-Release-Notes.html
NSX-T 3.1.3.5 Release Notes: https://docs.vmware.com/en/VMware-NSX-T-Data-Center/3.1/rn/VMware-NSX-T-Data-Center-3135-Release-Notes.html
Workaround
ในการ apply workaround สำหรับ CVE-2021-44228 & CVE-2021-45046 ให้ทำการ connect ไปที่ NSX-T Data Center Manager หรือ NSX-T Cloud Service Manager.
Imortant: ในทำการ apply workaround สำหรับ NSX-T Manager Cluster ให้ทำทีละ ตัวและให้ NSX-T Manager ตัวที่ทำ มี status “STABLE” ก่อนจะไปทำตัวถัดไป.
โดย version NSX-T Manager ที่เราทำการ apply workaround จะเป็น
NSX-T Manager 3.1.2.0.0.17883600
Account access
| Account | Access |
| admin | NSX-T UI |
| admin | SSH |
| root | SSH |
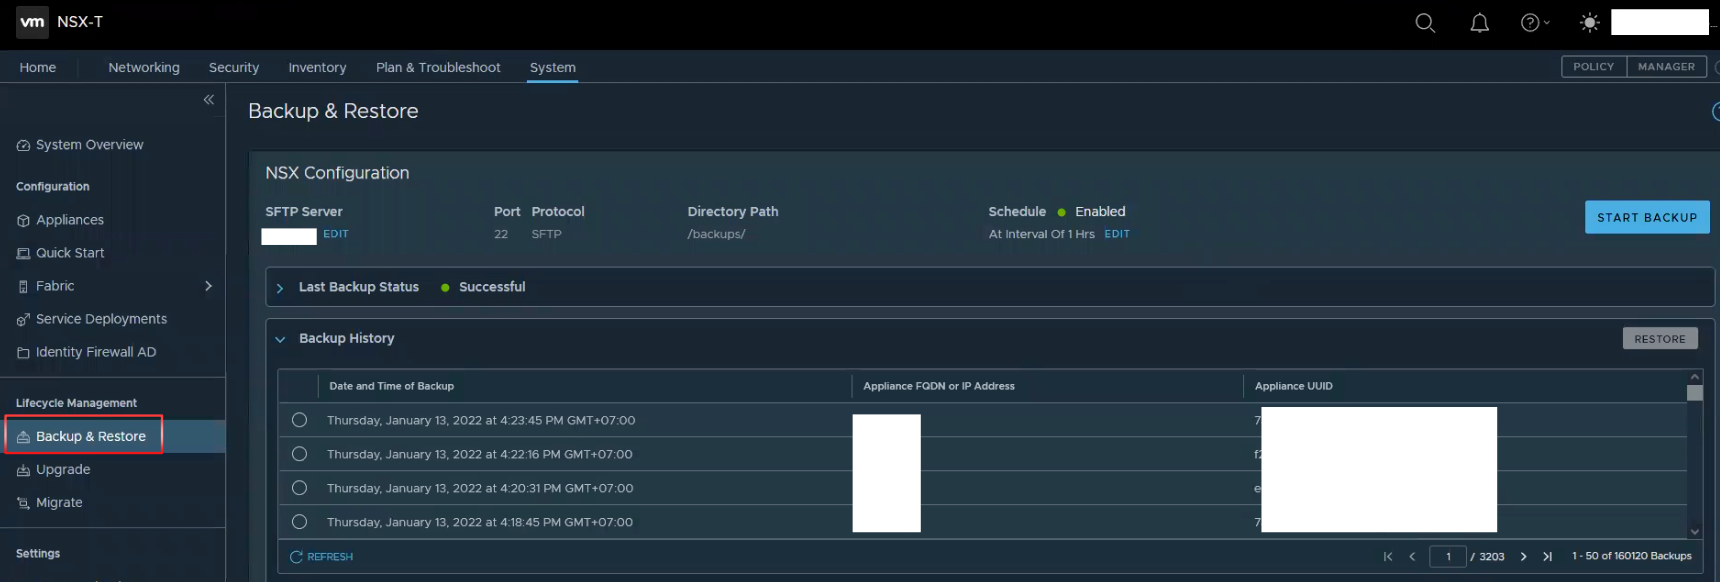
1.ให้ทำการ Backup NSX-T manager ผ่าน SFTP.
Reference the following document for guidance, if needed: https://docs.vmware.com/en/VMware-NSX-T-Data-Center/3.2/administration/GUID-E6181BF1-2CB7-4870-B508-BFAF5B47D702.html
2.ทำการ download Debian package “unified-appliance-log4j2-patch_3.1.3.6.0.19099859_all.deb” จาก KB87086.
3.ทำการ copy Debian package ไปไว้ NSX-T Manager appliances ทั้ง 3 NSX-T Manager appliances โดยใช้ WinSCP หรือ Linux based SCP หรือ tool ที่สามารถ transfer files ได้.
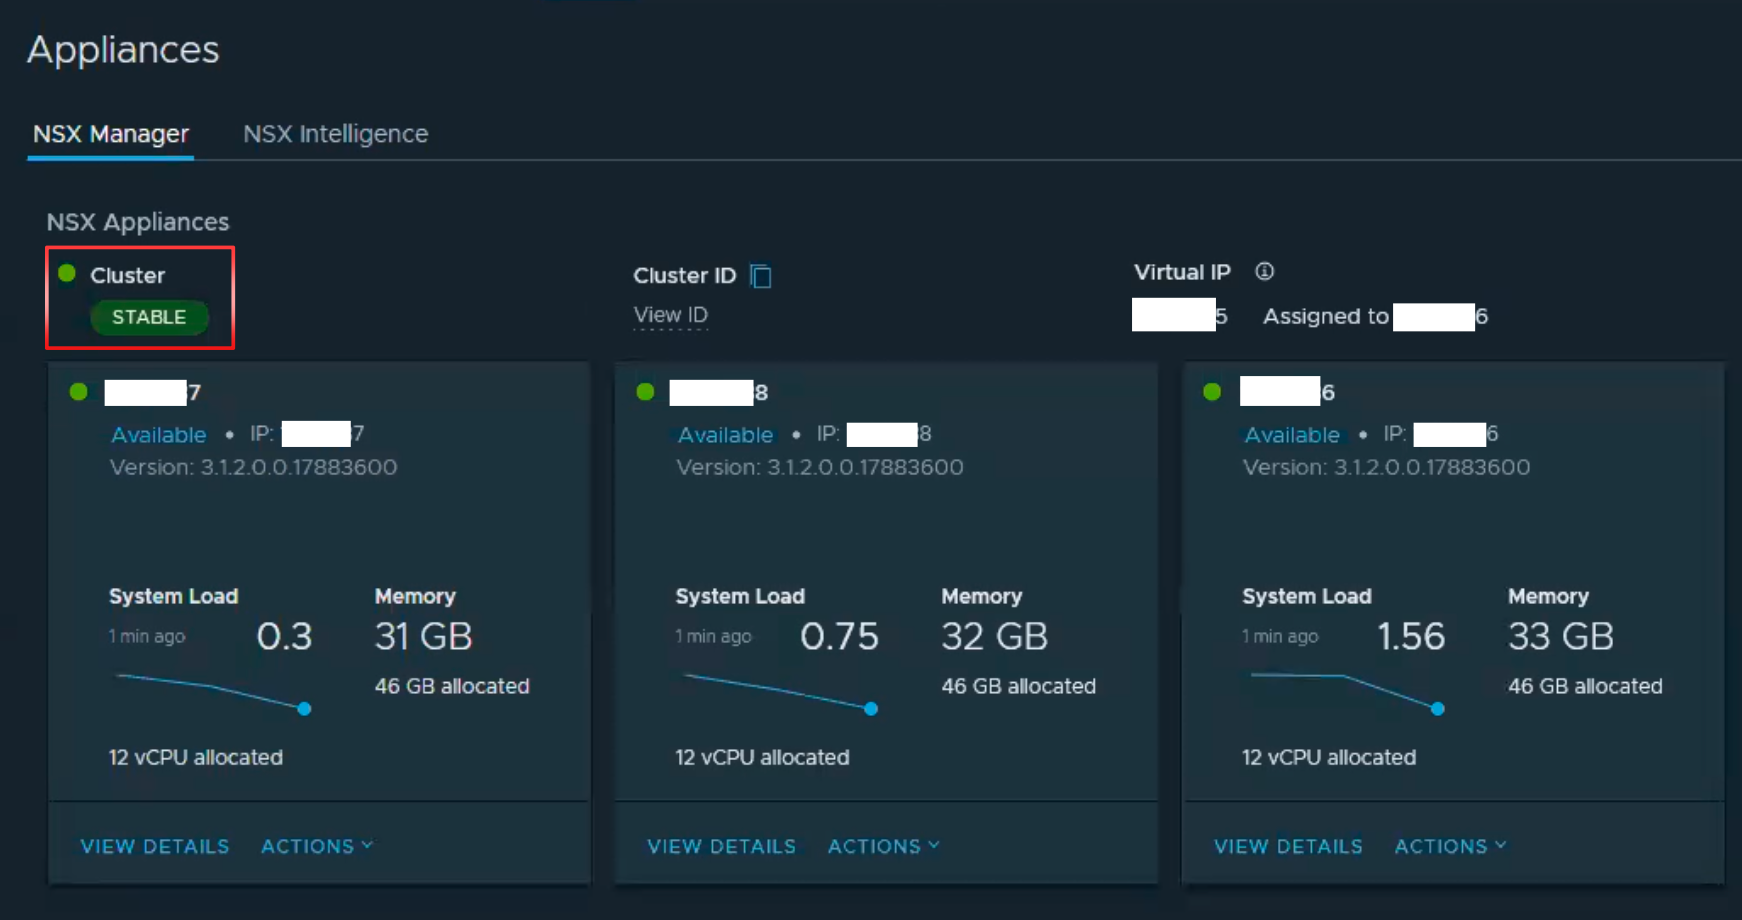
4.ให้ทำการ check status NSX-T Manager appliances.
โดย Cluster status จะต้อง เป็น “STABLE” และ NSX-T Manager จะต้องเป็น “Available“.
5.Login NSX-T Manager appliance โดย SSH ใช้ user account “admin“.

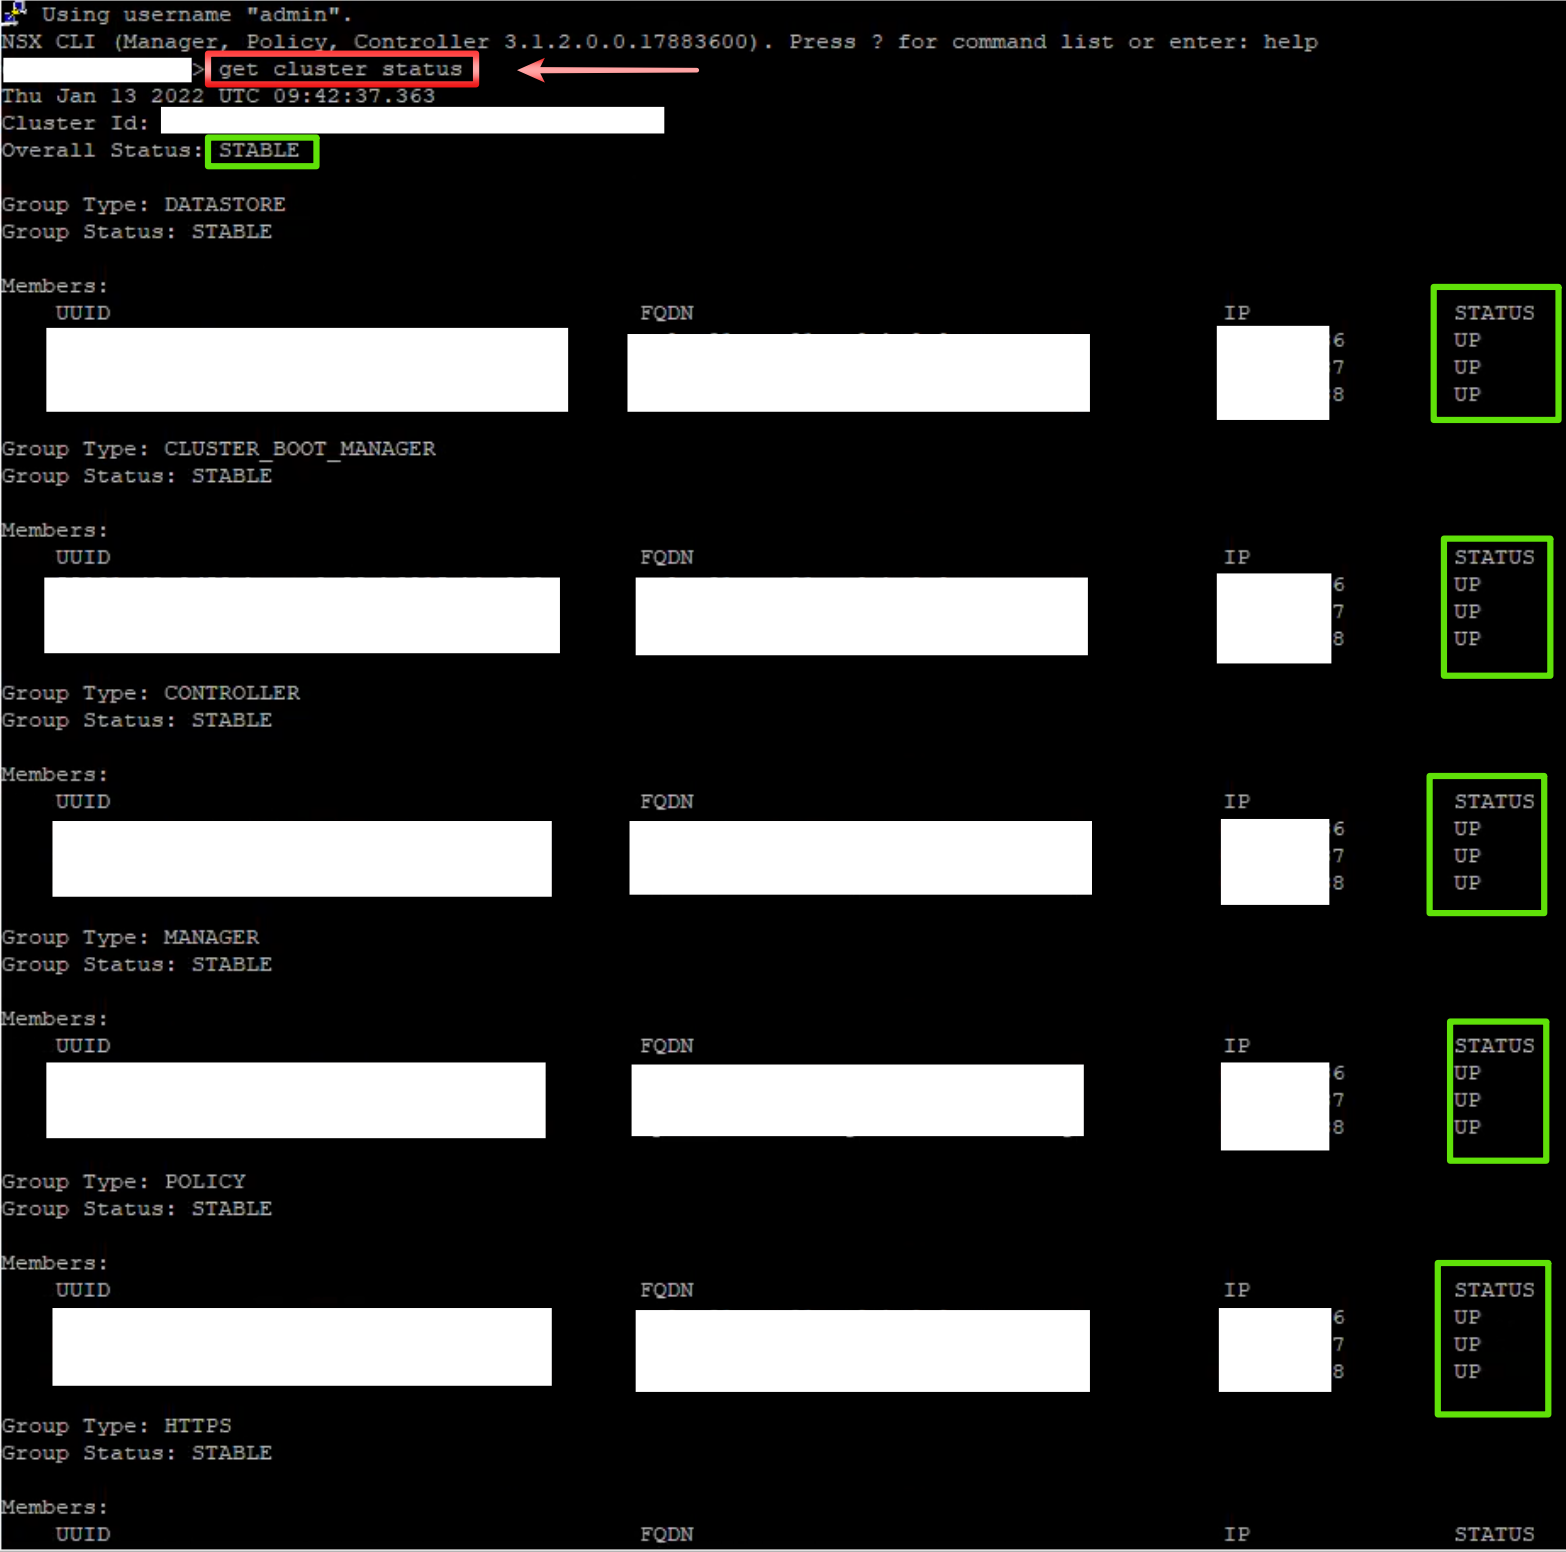
6.ให้ใช้ command check cluster status เพื่อตรวจสอบ cluster status อีกครั้ง โดย Overall Status จะต้องเป็น “STABLE” และ Status ต้อง “UP” ทั้ง 3 nodes ทุก services.
get cluster status
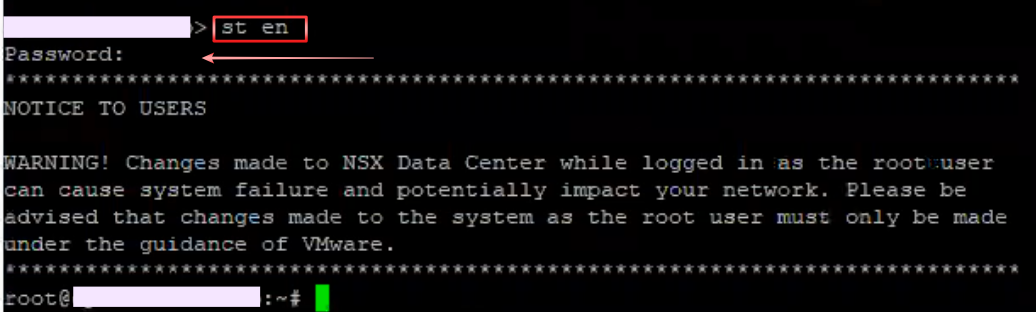
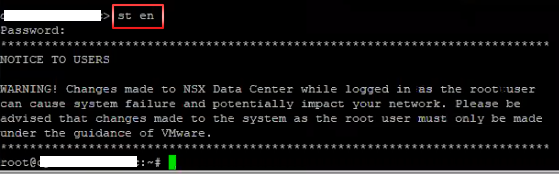
6.ให้ switch to account “root“.
st en
Enter the root password.
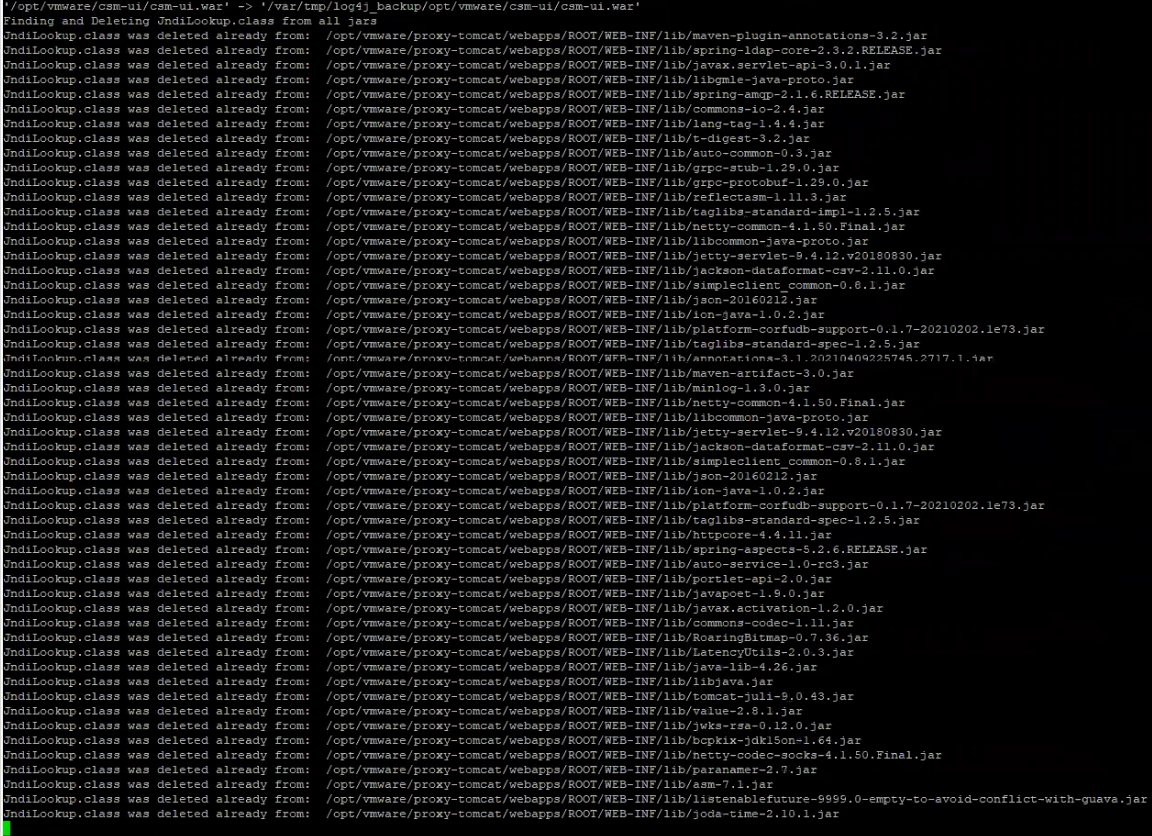
7.Install Debian package ด้วย command ด้านล่าง ใน directory ที่เราเก็บ ไฟล์ไว้
dpkg -i unified-appliance-log4j2-patch_3.1.3.6.0.19099859_all.deb


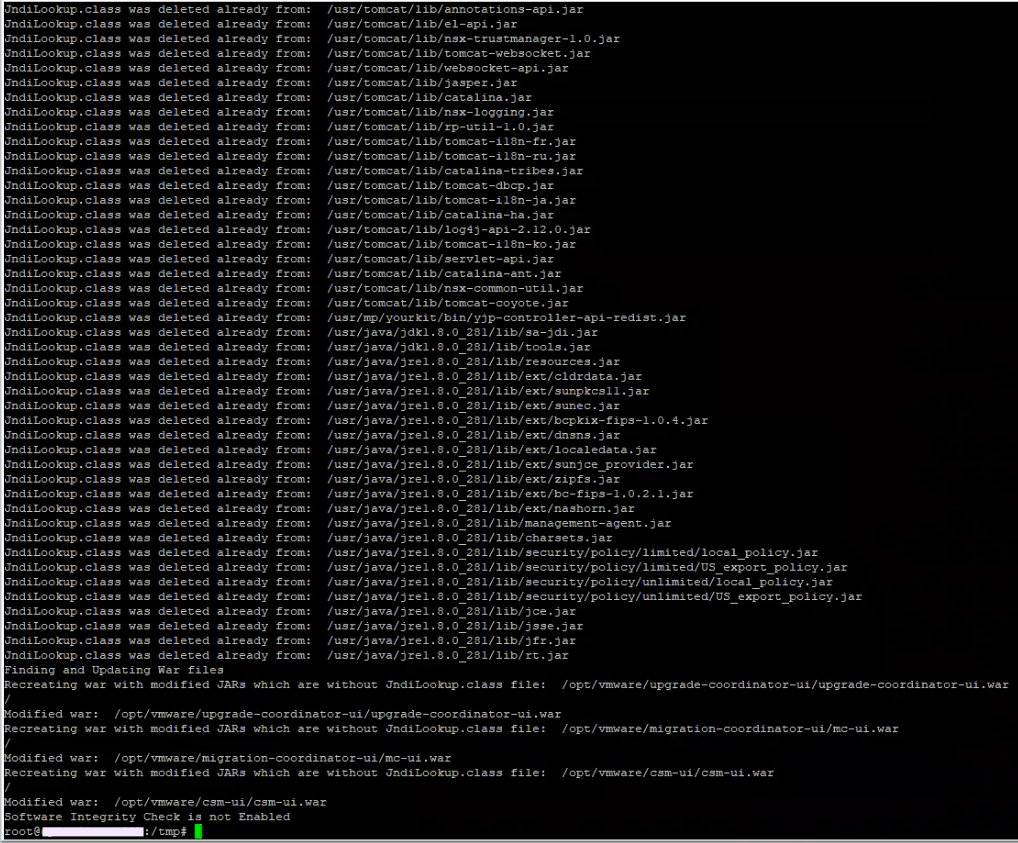
8.เมื่อกด Enter แล้ว script ก็จะทำการ check ไฟล์ JndiLookup ให้ทำการ รอ จนเสร็จสิ้น script.
9.ทำการ reboot system.
/sbin/reboot

Note: ให้ทำทีละ NSX-T Manager appliances ห้ามทำพร้อมกัน. ให้แน่ใจว่า NSX-T Manager หลังจาก ที่เราทำการ reboot แล้ว status “STABLE” แล้วจึงจะทำตัวถัดไป.
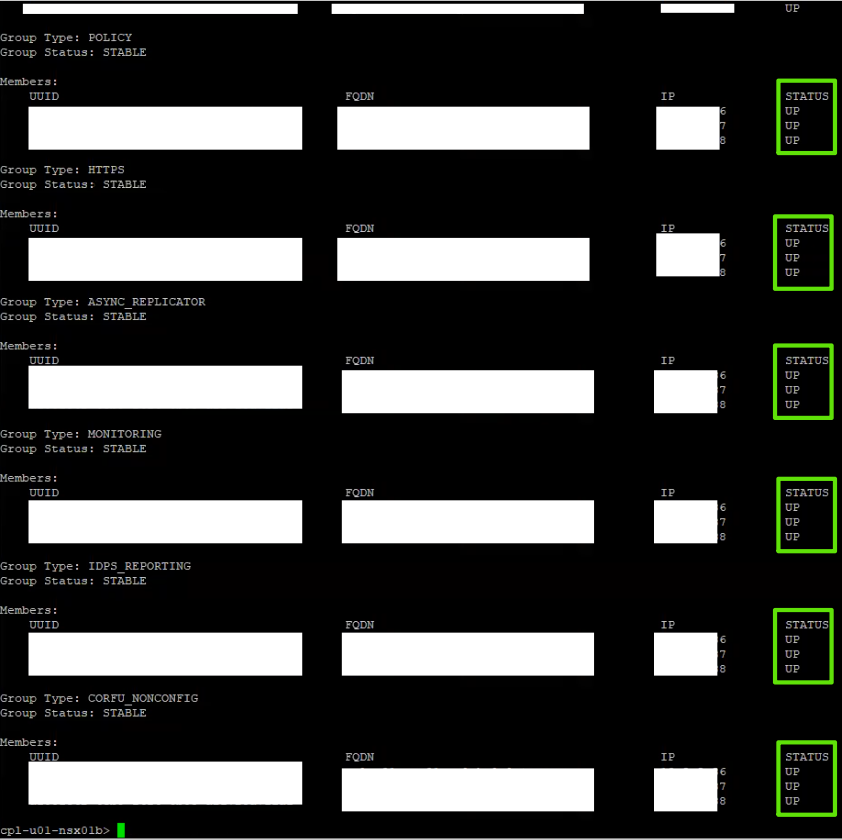
10.ในการ Monitor status NSX-T Manager cluster services เราจะใช้ command หรือ ใช้การ Monitor จาก หน้าจอ NSX-T Manager UI ก็ได้.
Command
get cluster status

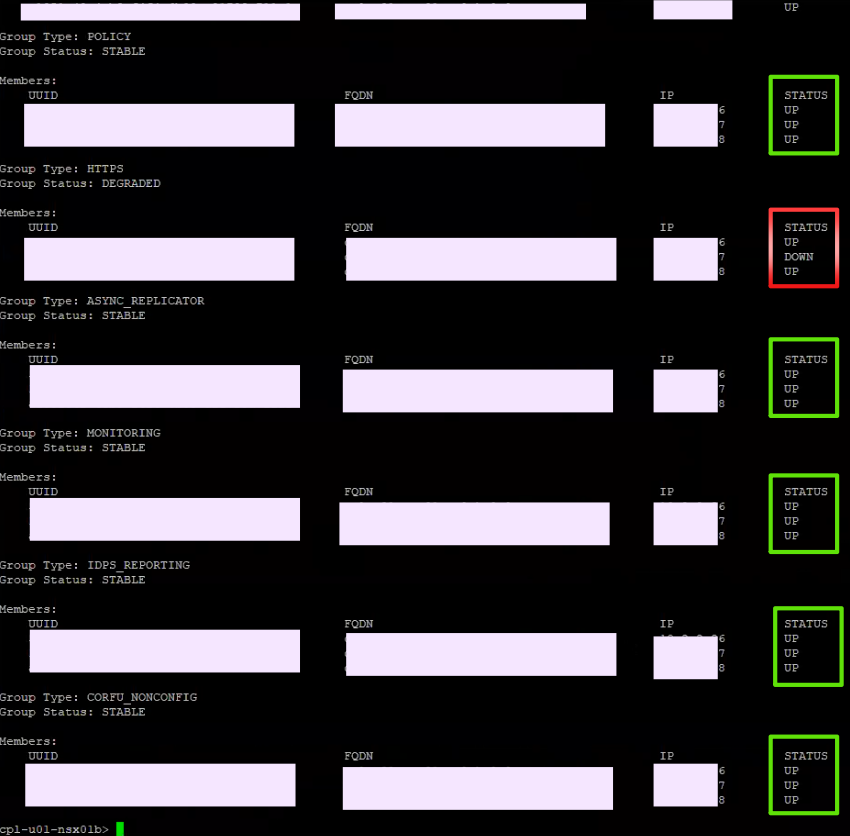
ให้แน่ใจว่าทุก status “UP” ทั้งหมด.
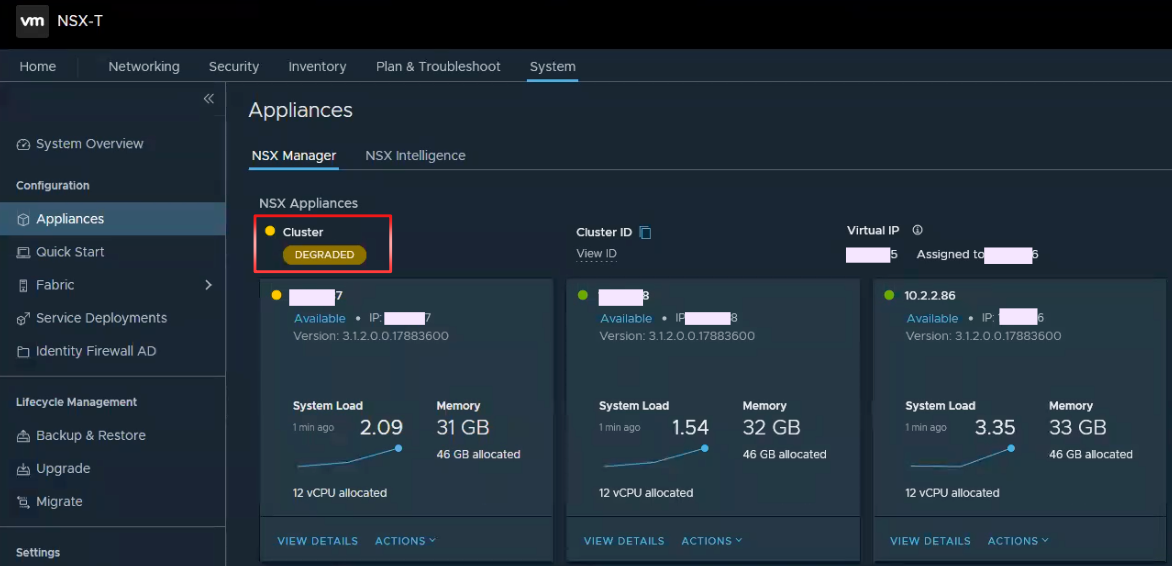
NSX-T UI
เราจะพบว่า ที่หน้า NSX-T Manager appliance status จะเป็น “DEGRADED“.
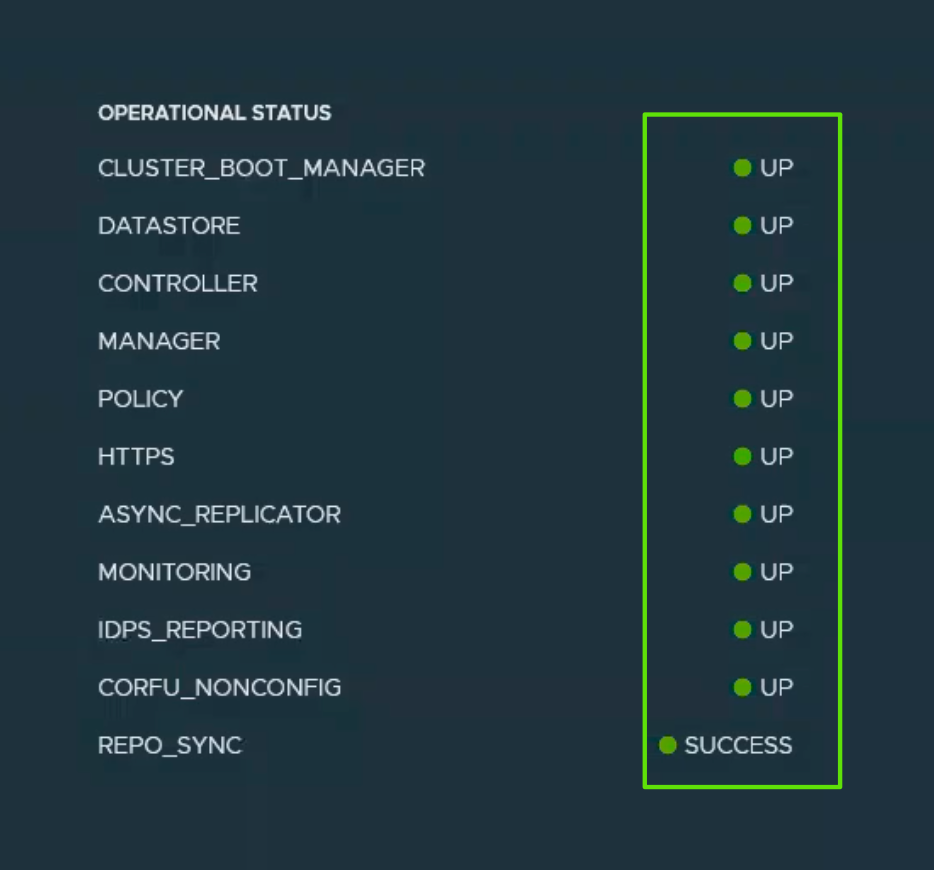
ให้ Click ที่ “VIEW DETAILS” เพื่อดู services status.

ให้แน่ใจว่าทุก status “UP” ทั้งหมด.
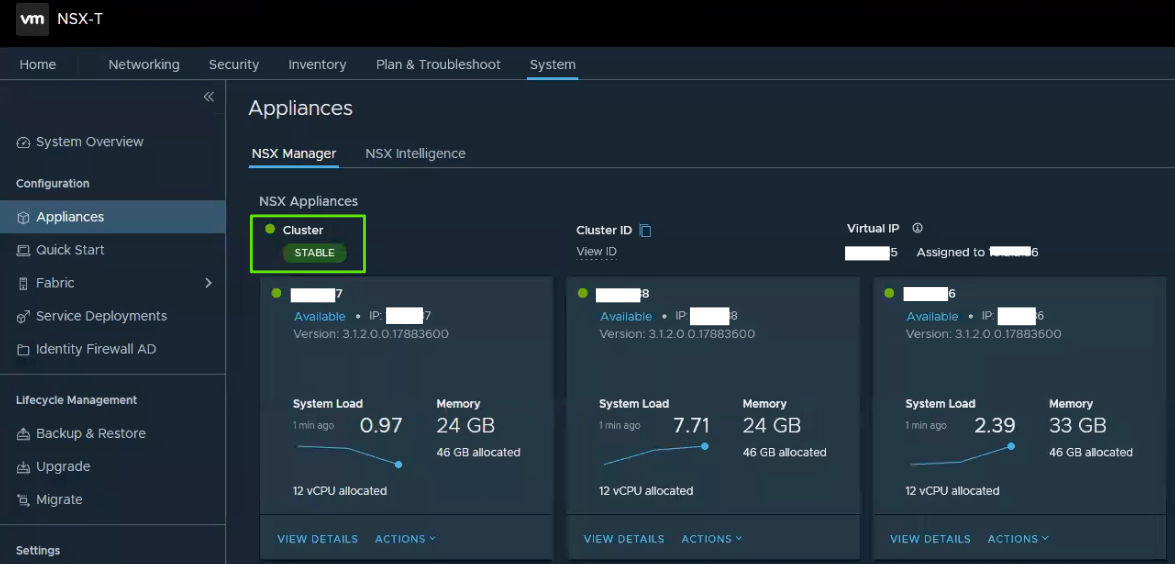
หลังจากนั้นให้ทำการ check status ของ NSX-T Manager appliances ให้ เป็น status “STABLE“.
Verification Steps
1.ให้ทำการ verify workaround ที่ apply ไปถูกต้องหรือไม่ โดยให้ login ด้วย account “root“.
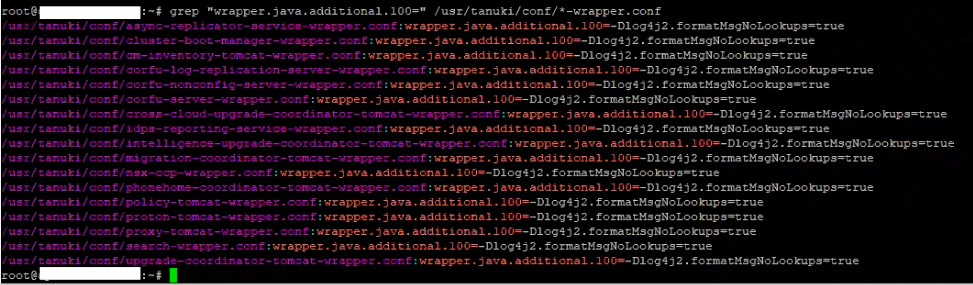
2.ทำการ verify configuration โดย updated ด้วย “formatMsgNoLookup=true” flag โดยใช้ command ด้านล่าง.
grep "wrapper.java.additional.100=" /usr/tanuki/conf/*-wrapper.conf
3.ทำการ verify ไฟล์ “JndiLookup class” จะต้อง removed ออกจาก Jar files บน appliances โดยใช้ command ด้านล่าง.
find /usr /opt -xdev -iname "*.jar" | while read l; do unzip -l $l|grep "JndiLookup.class"; if [[ ${PIPESTATUS[1]} -eq 0 ]]; then echo $l; fi; done
โดยผลลัพธ์ จะไม่แสดงผลอะไร ออกมา (None) แบบด้านล่าง.

Repeat step
ให้ ทำการ repeat step จากหัวข้อ Workaround เริ่มจากข้อ 4 ไปจนถึง Verification Step ในข้อ 3 จนครบทุกตัว (ให้ทำทีละตัว).
Revert the workaround
CVE-2021-44228 & CVE-2021-45046 to VMware NSX-T Data Center perform the following steps on each NSX-T Manager or NSX-T Cloud Service Manager.
โดยให้ restore จาก NSX-T Manager backup ที่เราทำการ backup ก่อนจะ apply the workaround.
Reference the following document for guidance, if needed: https://docs.vmware.com/en/VMware-NSX-T-Data-Center/3.2/administration/GUID-9749F041-15E5-4662-85E7-756D4B071C17.html
Conclusion
ในบทความนี้จะเป็น workaround instructions to address CVE-2021-44228 and CVE-2021-45046 in NSX-T Data Center (2.5.0-3.1.3)โดยจะ followup วิธีการ จาก KB87086 เท่านั้น โดย fix version สามารถเข้าไป download และ apply ตาม version ที่ท่านใช้งานอยู่ โดย ให้ทุกท่านติดตาม VMSA-2021-0028 ในการทำ workaround หรือ fix version รวมถึง Product อื่นๆ ของ VMware ที่ได้รับผลกระทบ เช่นกัน.