VMware Aria Operations updates address a local privilege escalation vulnerability (CVE-2025-22231)
Issue date:
2025-04-01
Updated on:
2025-04-01 (Initial Advisory)
CVE(s)
CVE-2025-22231
Impacted Products:
VMware Aria Operations
VMware Cloud Foundation
VMware Telco Cloud Platform
VMware Telco Cloud Infrastructure
Introduction:
A local privilege escalation vulnerability in VMware Aria Operations was responsibly reported to VMware. Patches are available to remediate this vulnerability in affected VMware products.
Local Privilege escalation vulnerability (CVE-2025-22231)
Description:
VMware Aria Operations contains a local privilege escalation vulnerability. VMware has evaluated the severity of this issue to be in the Important severity range with a maximum CVSSv3 base score of 7.8.
Known Attack Vectors:
A malicious actor with local administrative privileges can escalate their privileges to root on the appliance running VMware Aria Operations.
Resolution:
To remediate CVE-2025-22231 apply the patches listed in the ‘Fixed Version’ column of the ‘Response Matrix’ found below.
Workarounds:
None.
Additional Documentation:
None.
Acknowledgements:
VMware would like to thank thiscodecc of MoyunSec Vlab and Bing for reporting this issue to us.
VMware issued a security alert for VMware vRealize Operations (vROps) due to the VMSA-2022-0034 severity. According to the advisory, VMware vRealize Operations (vROps) updates address privilege escalation vulnerabilities (CVE-2022-31707, CVE-2022-31708).
Solution
To remediate CVE-2022-31707 apply the fixes listed in the ‘Fixed Version’ column of the ‘Response Matrix’ below.
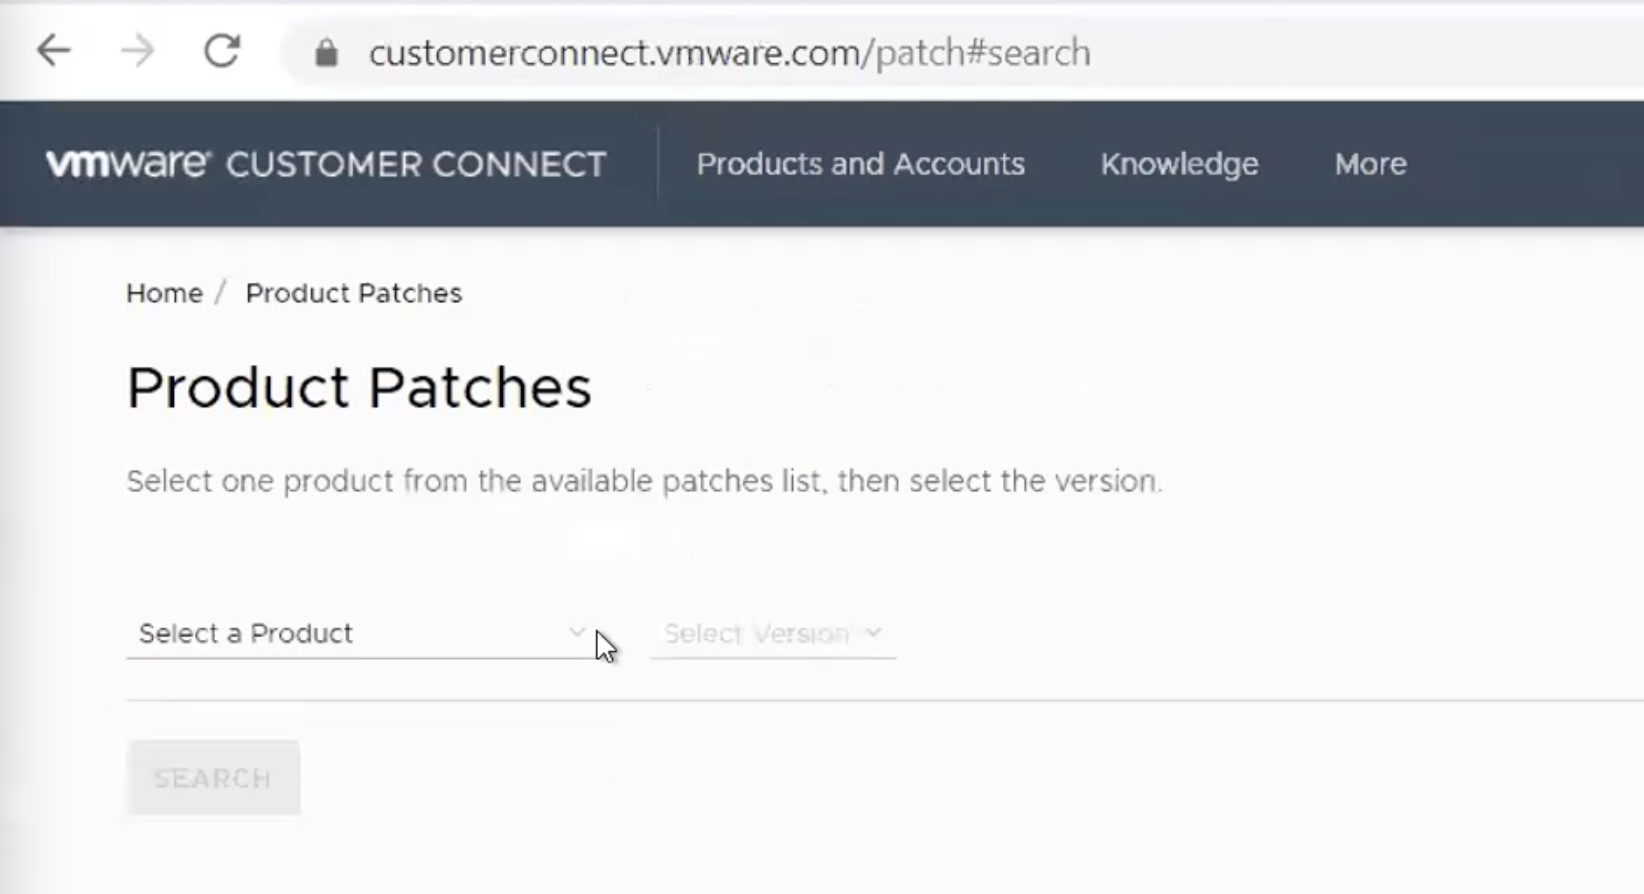
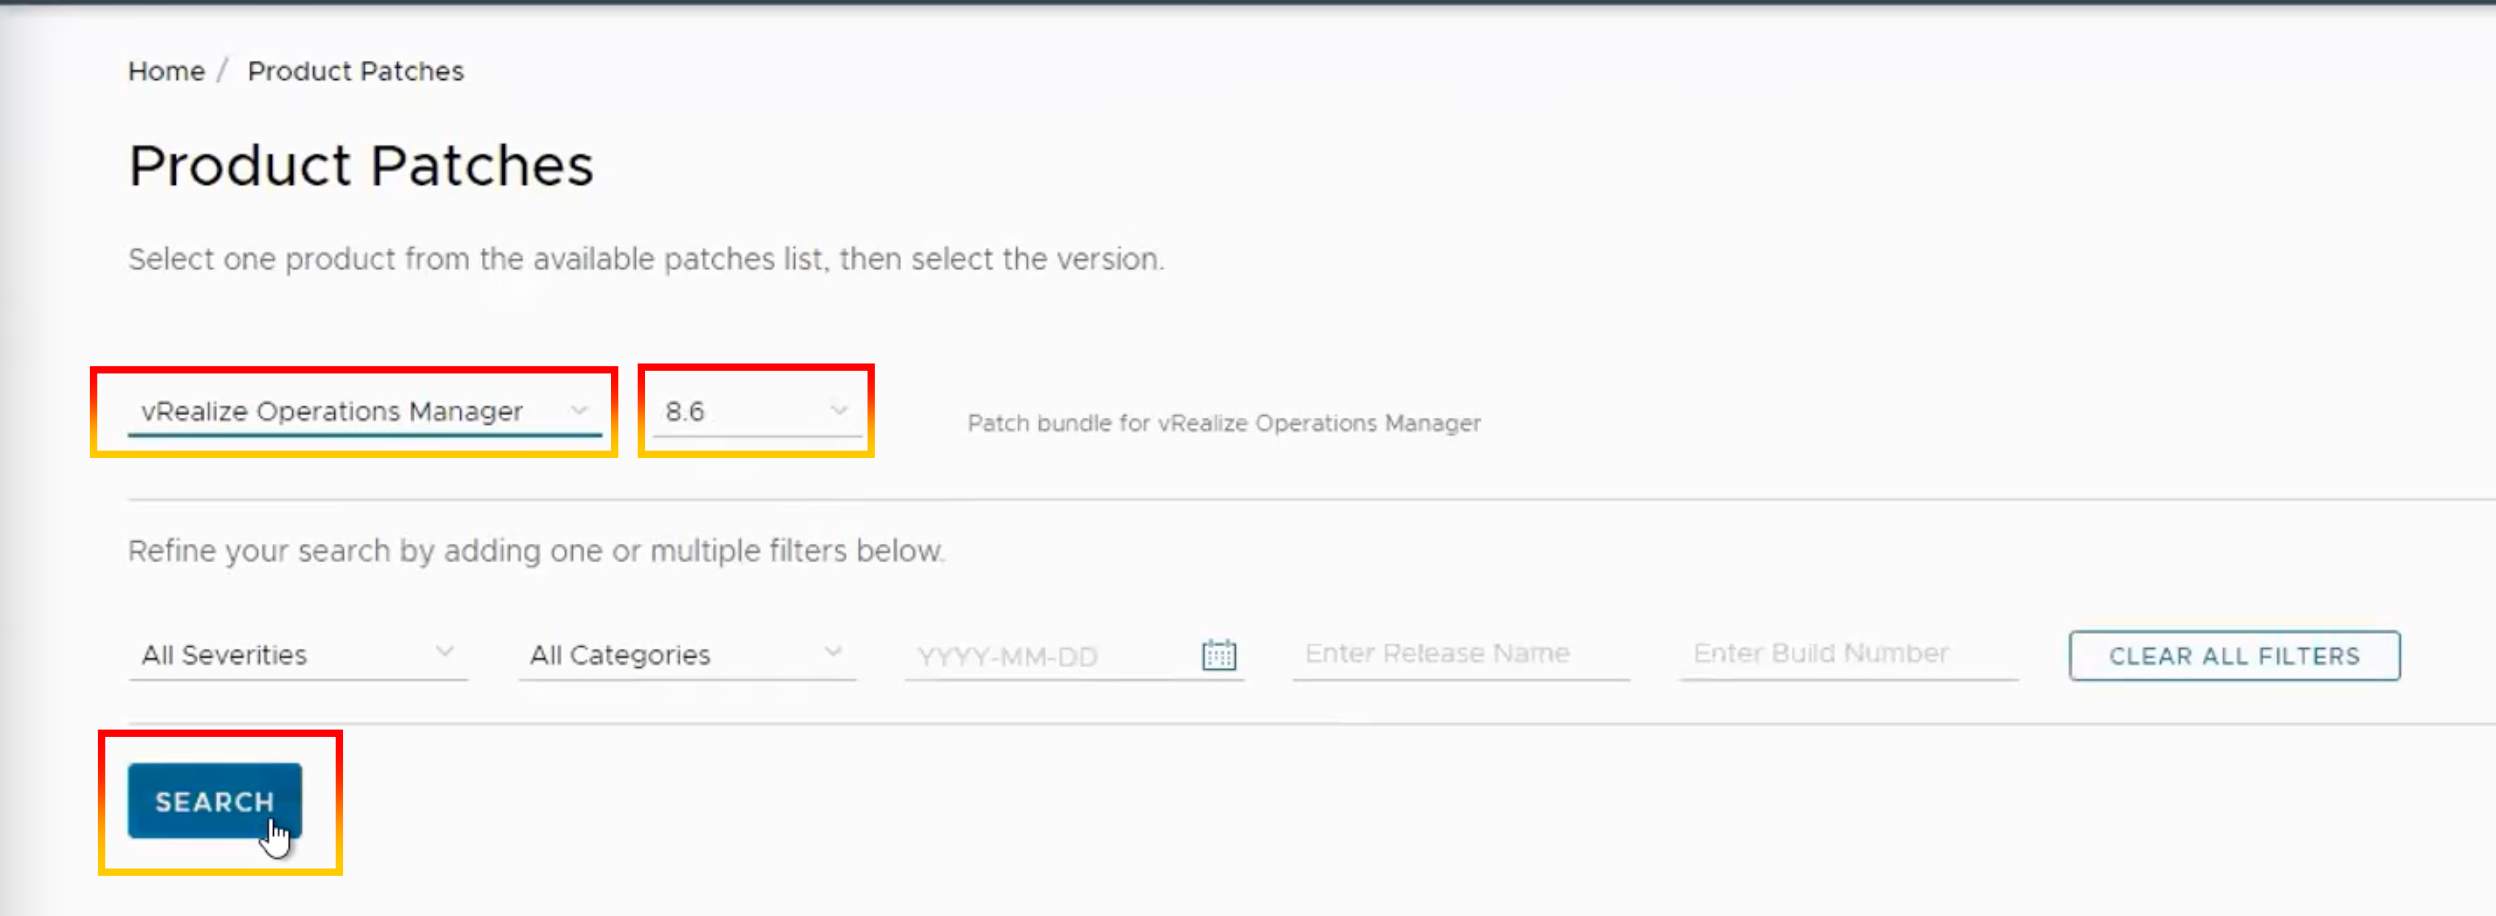
4.Choose the product and version, then press the “Search” button.
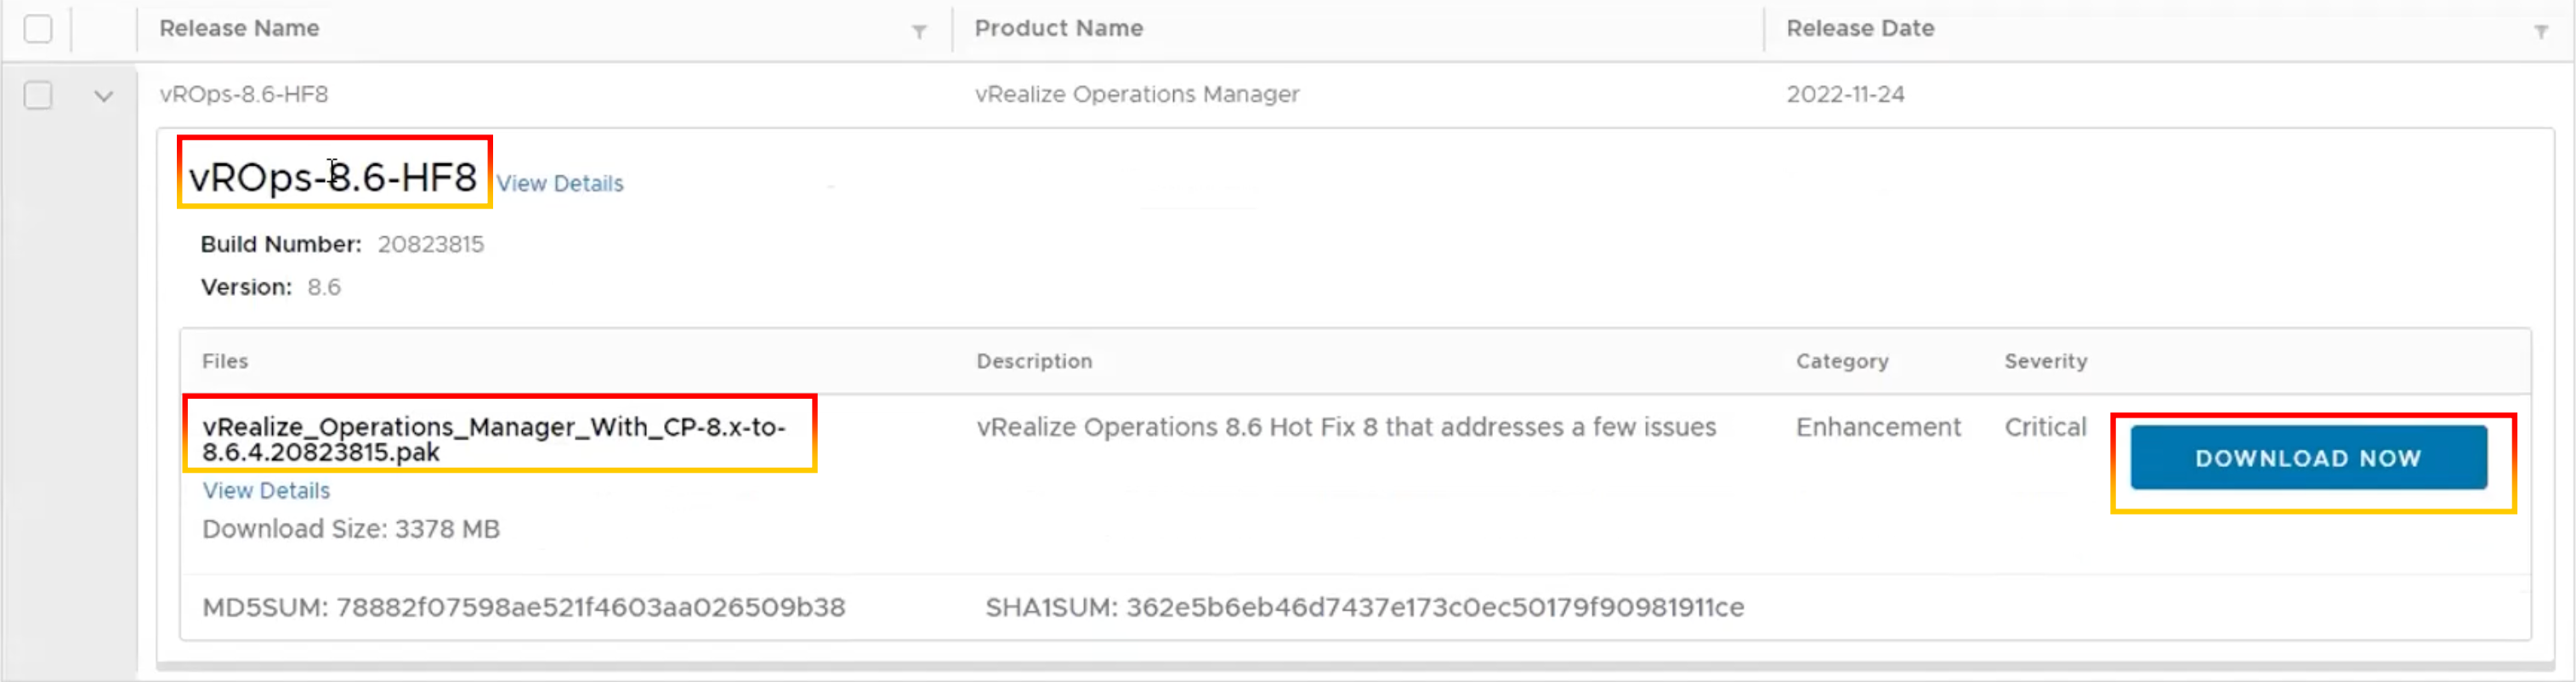
Product: vRealize Operations Manager Version: 8.6
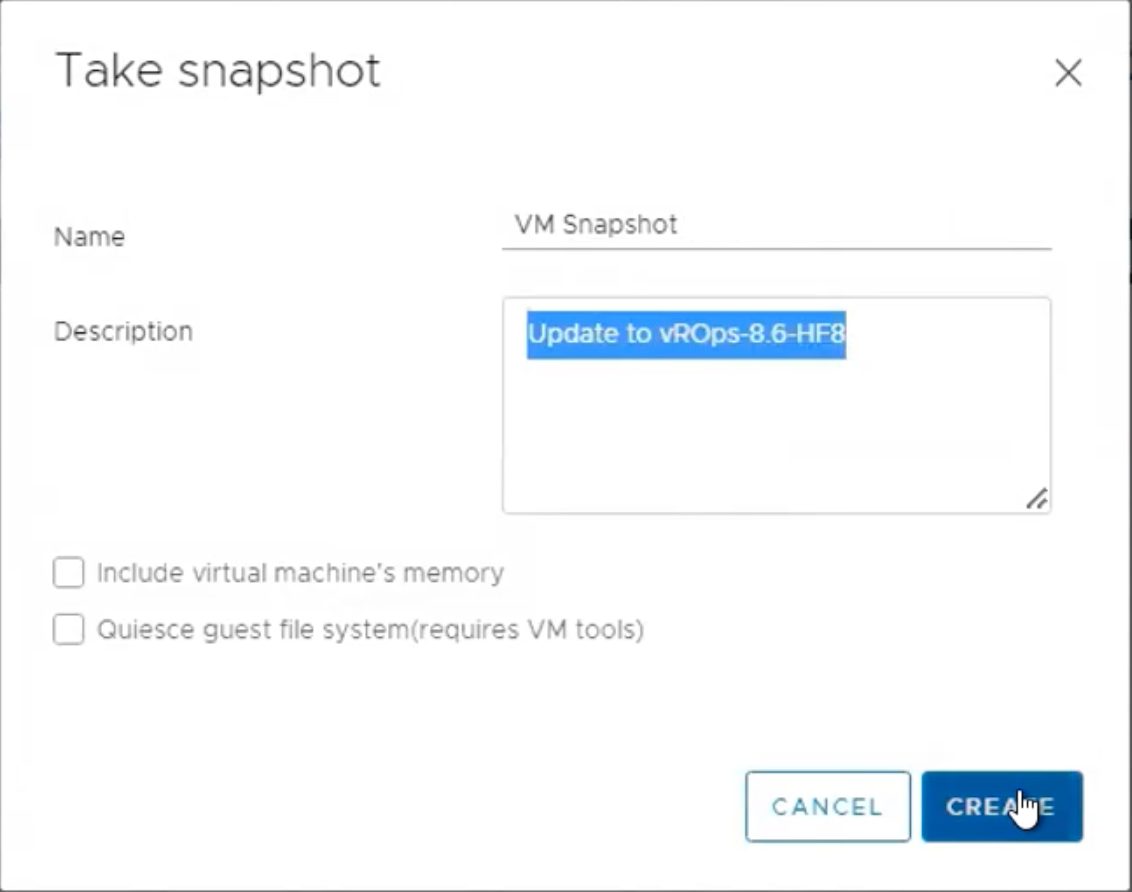
5.The “vROps-8.6-HF8” will be shown. Verify and validate the KB90232 patch file, then click “DOWNLOAD NOW.”.
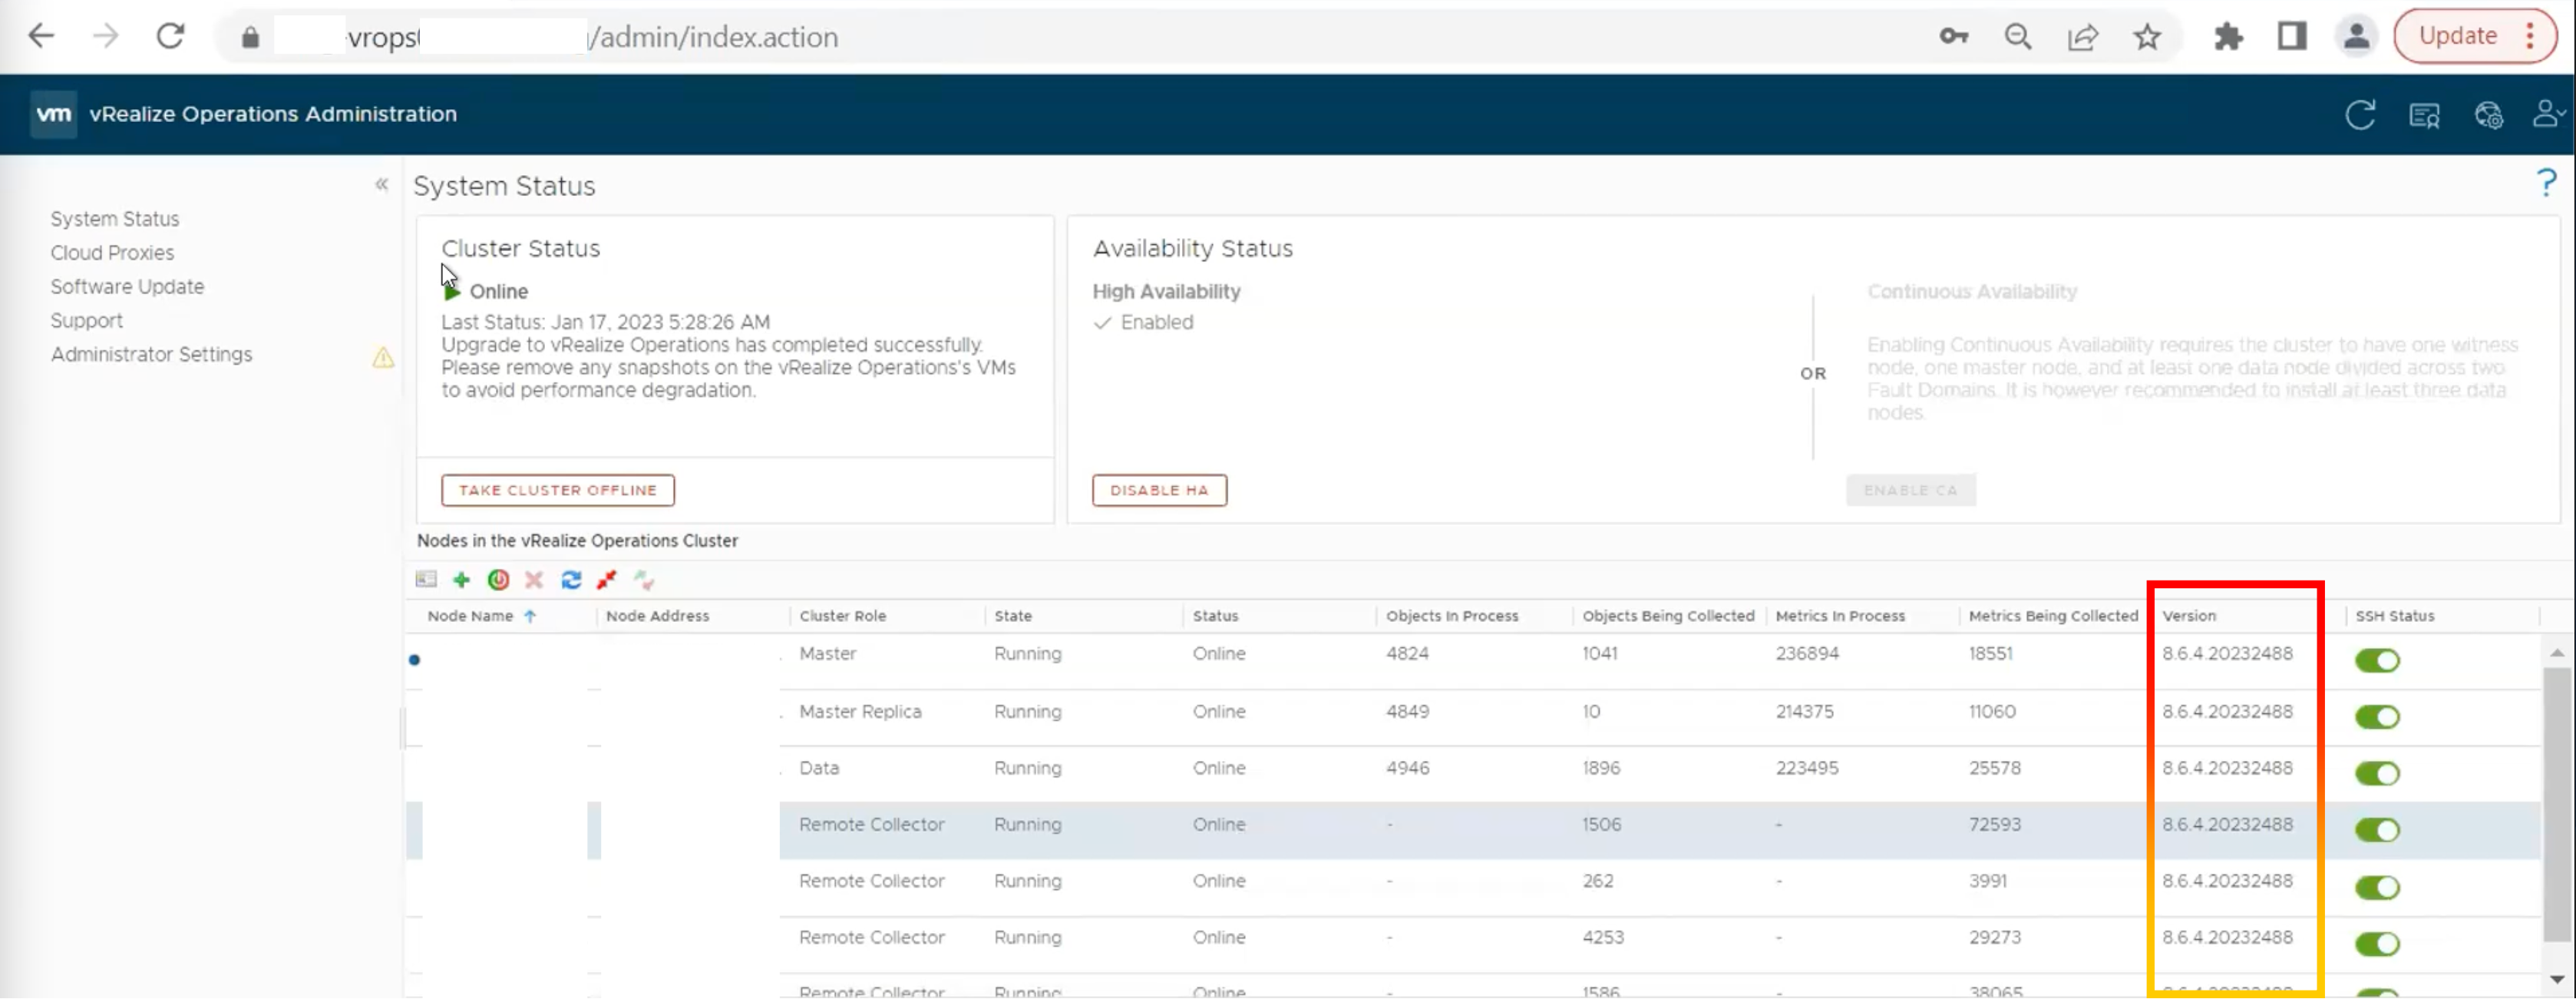
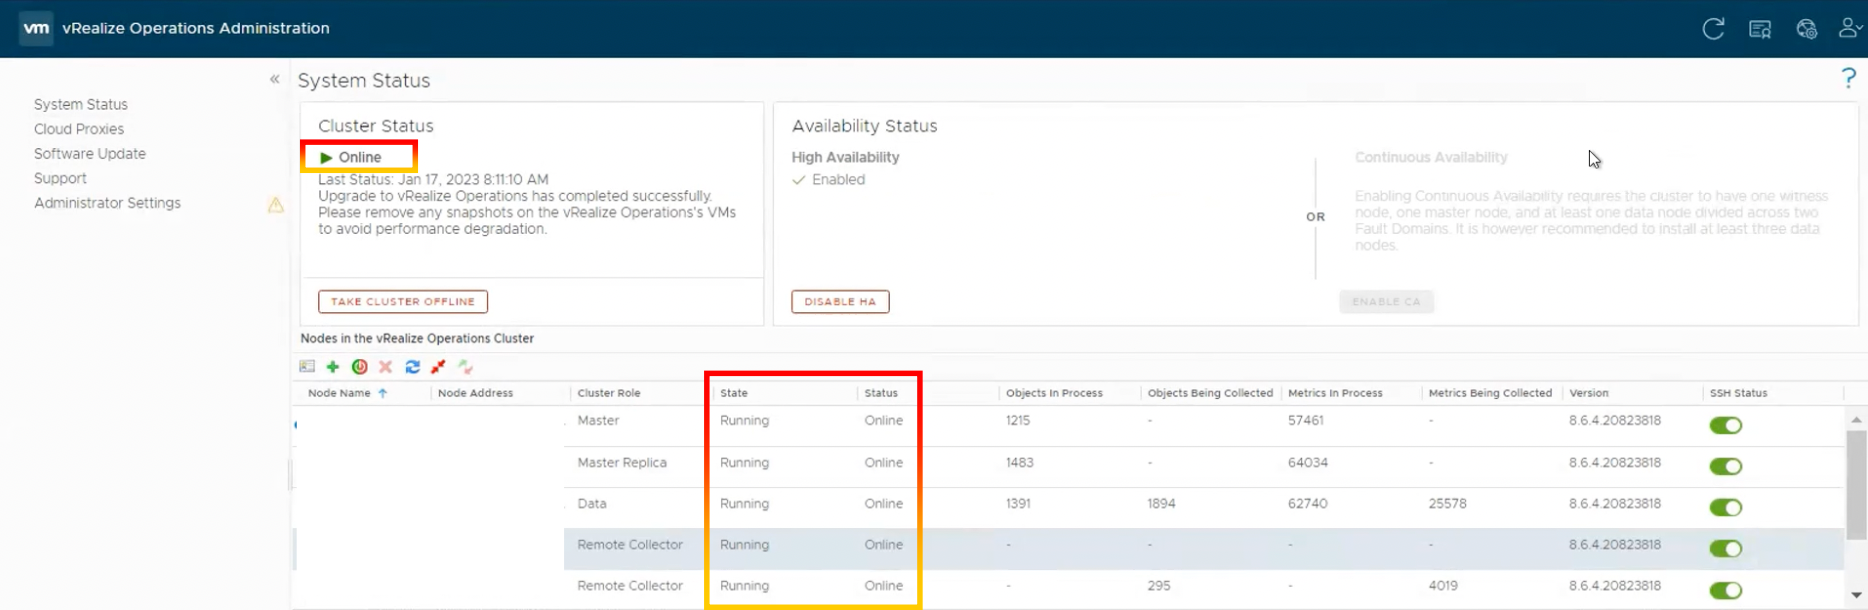
6.Once the file download and snapshot have been completed, Log in to the vRealize Operations Manager administration interface
https://master-node-name-or-ip-address/admin.
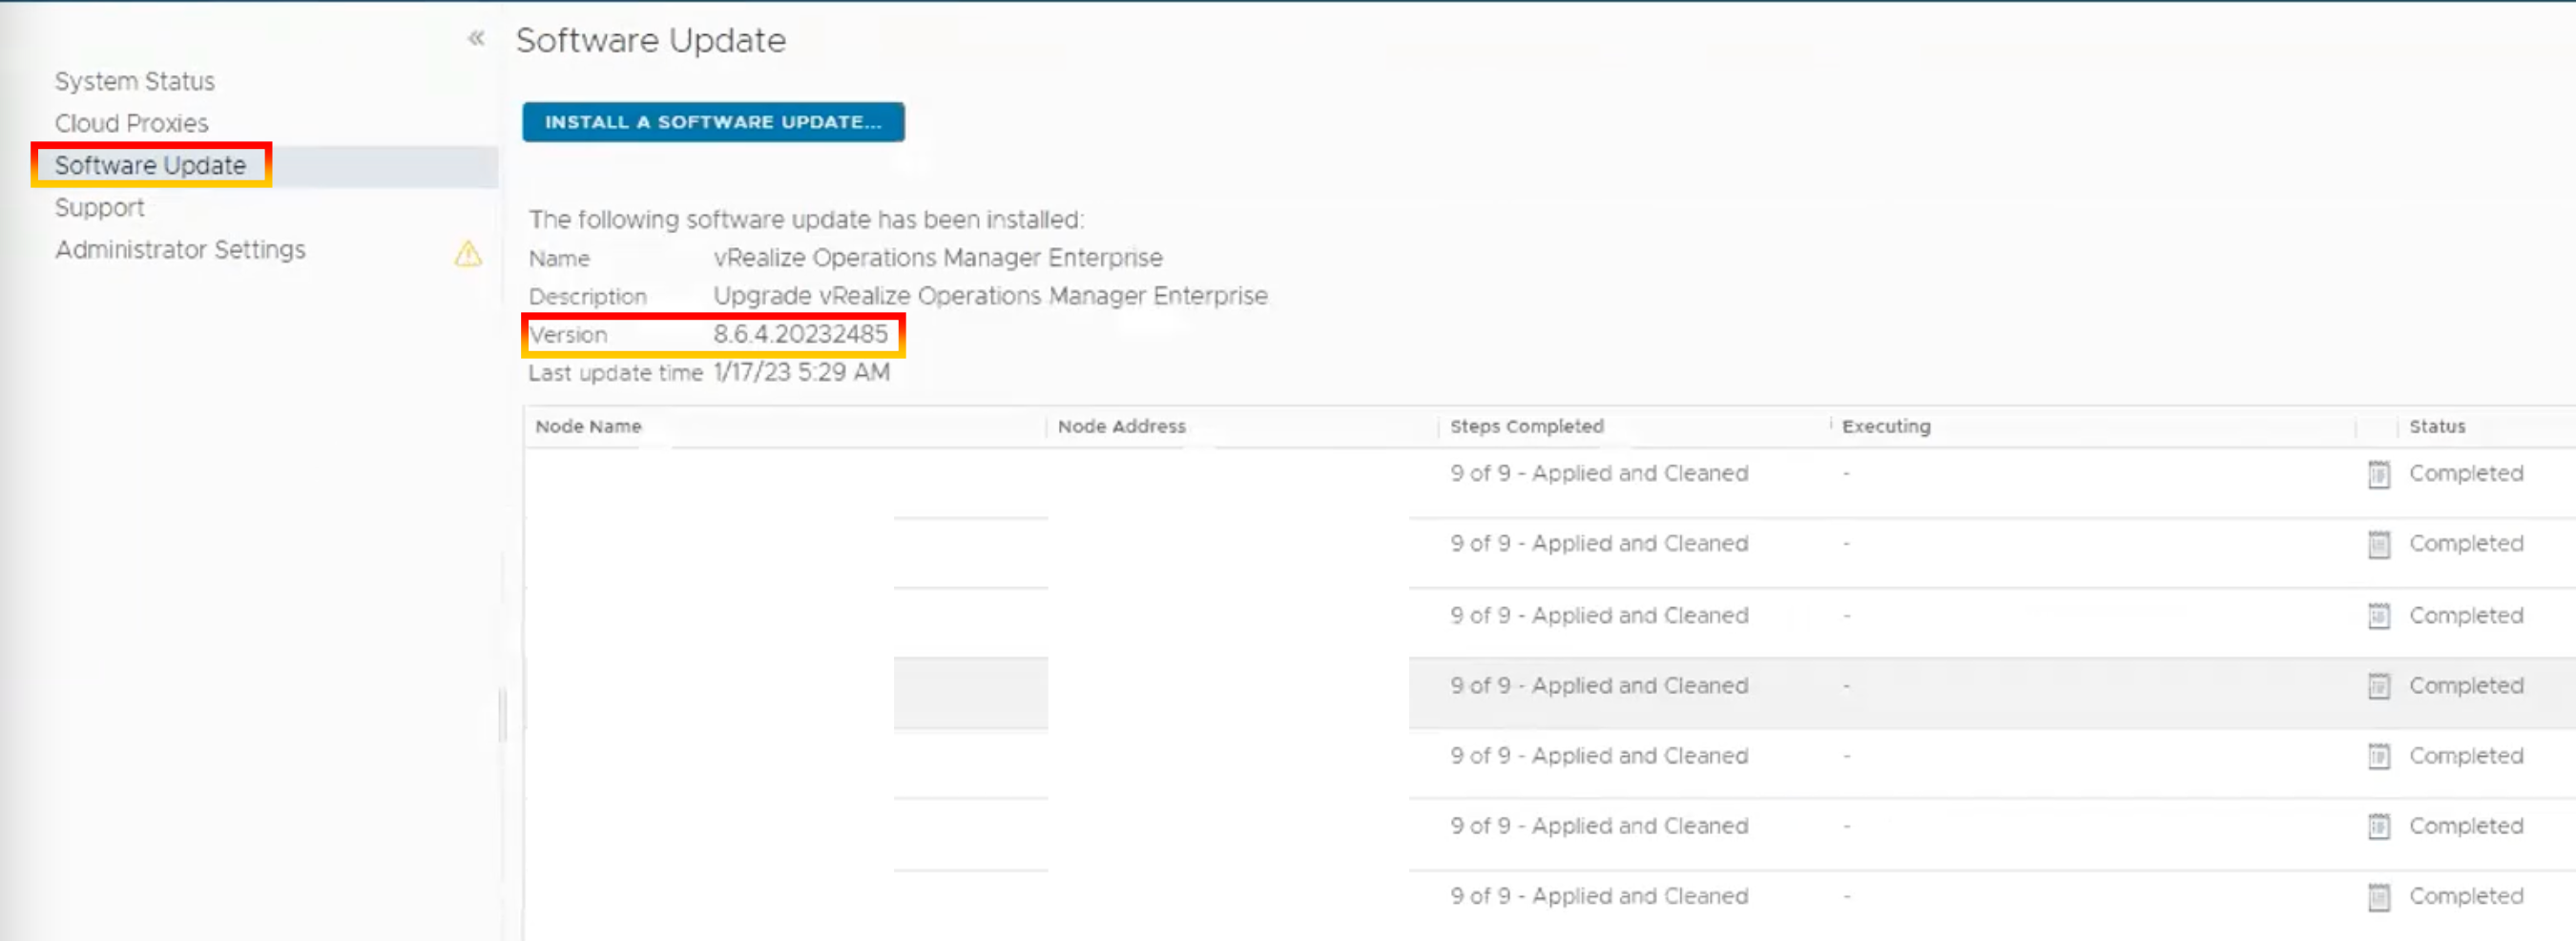
7.Click “Software Update“.
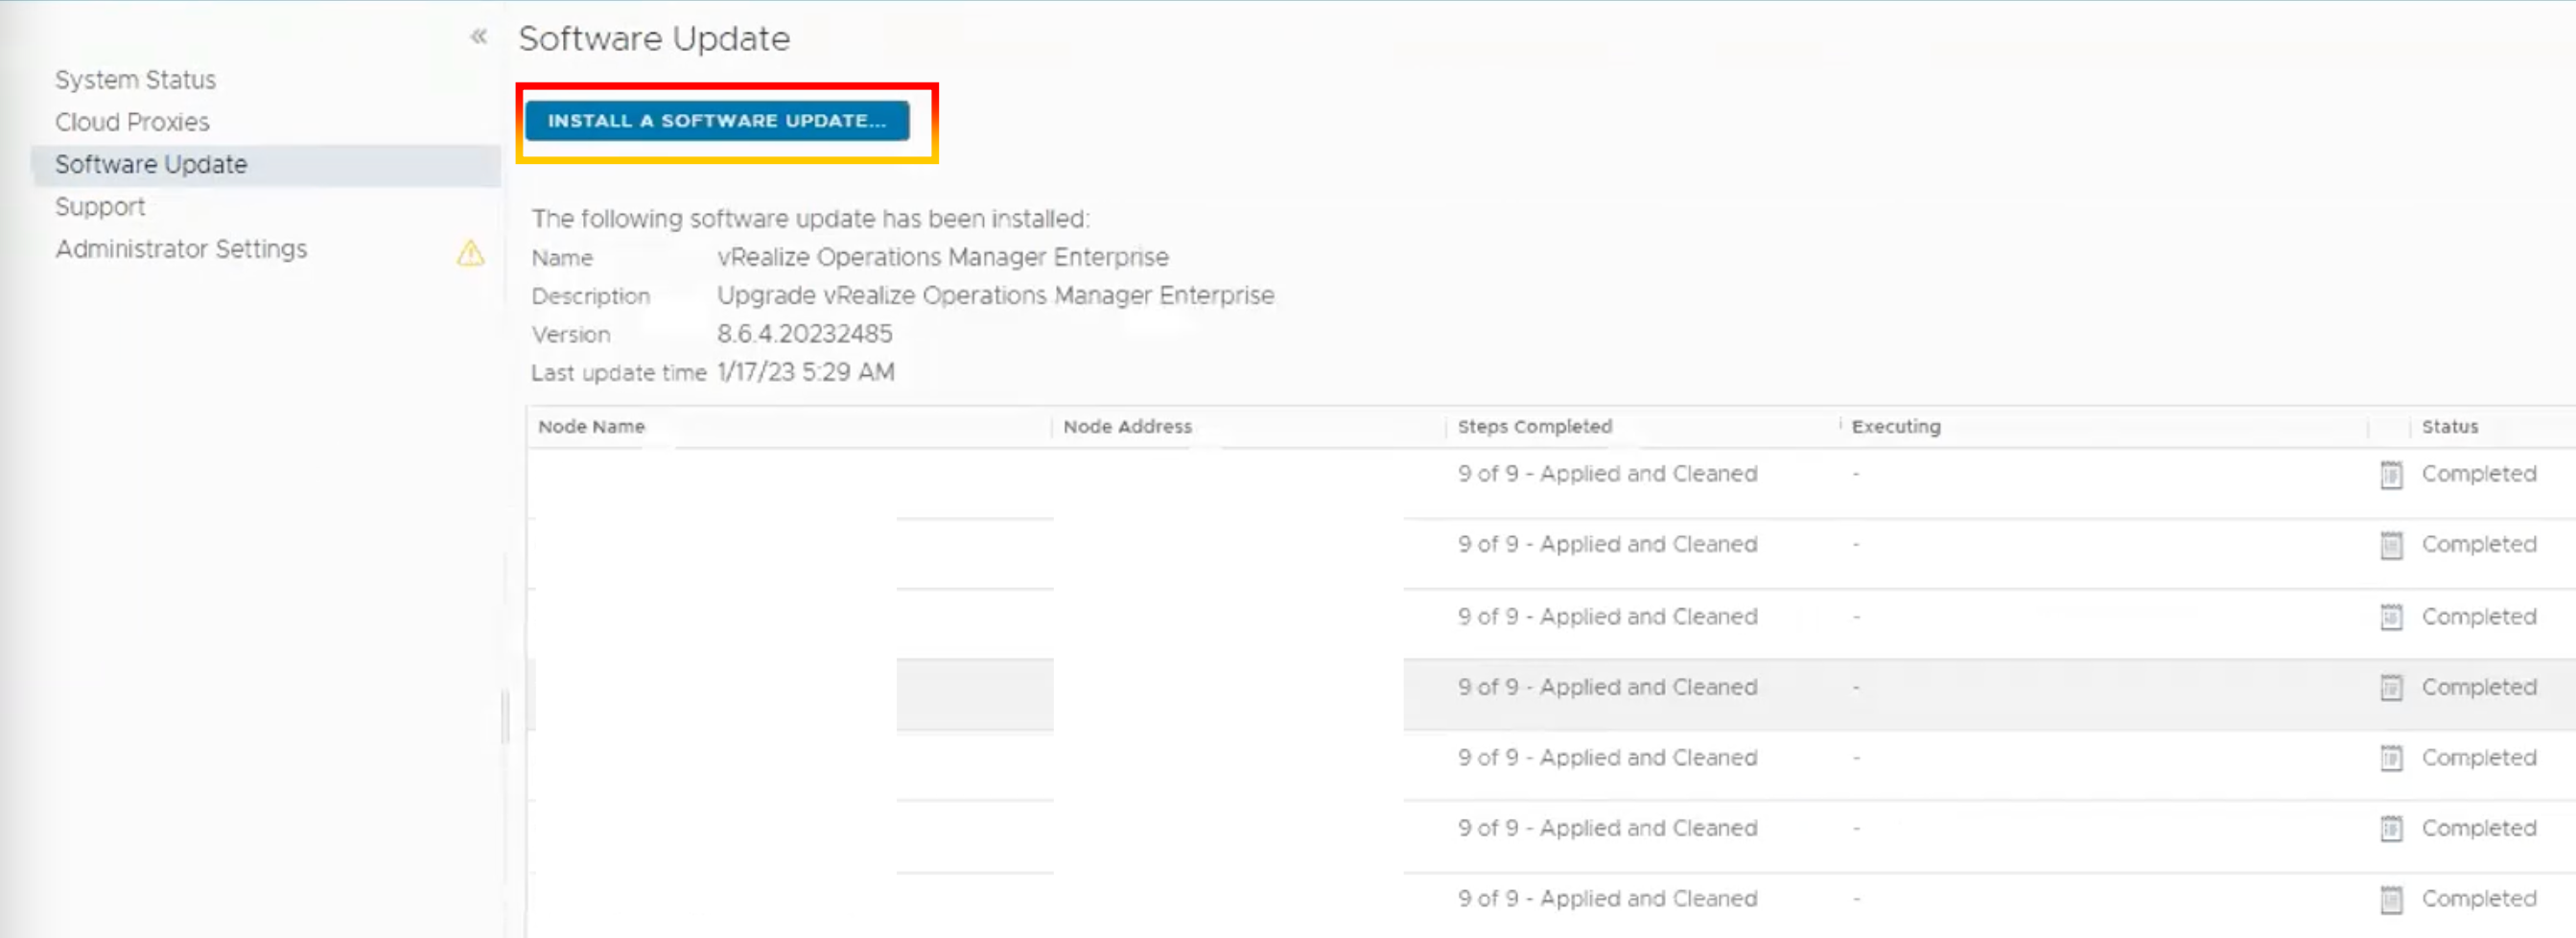
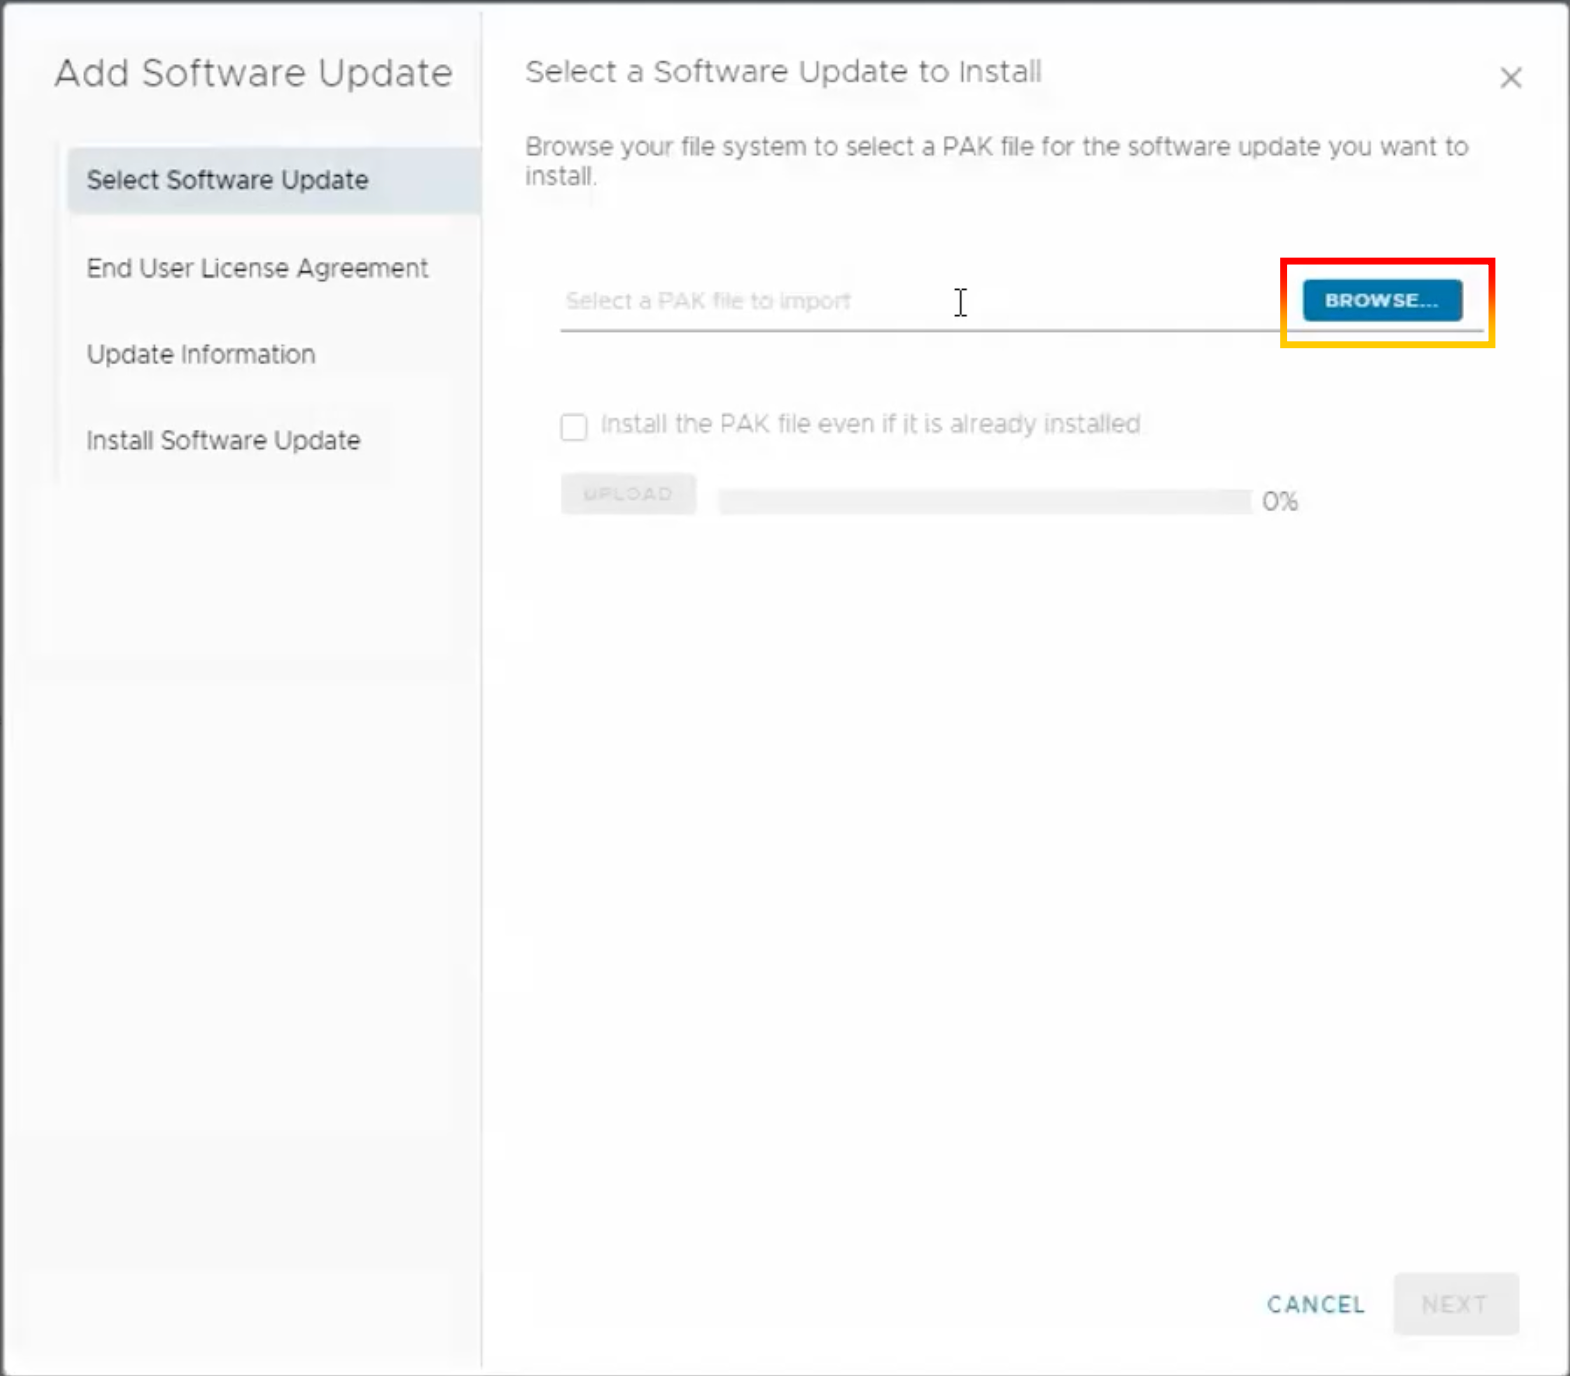
8.Click “Install a Software Update“.
9.Go through the pack file you already downloaded.
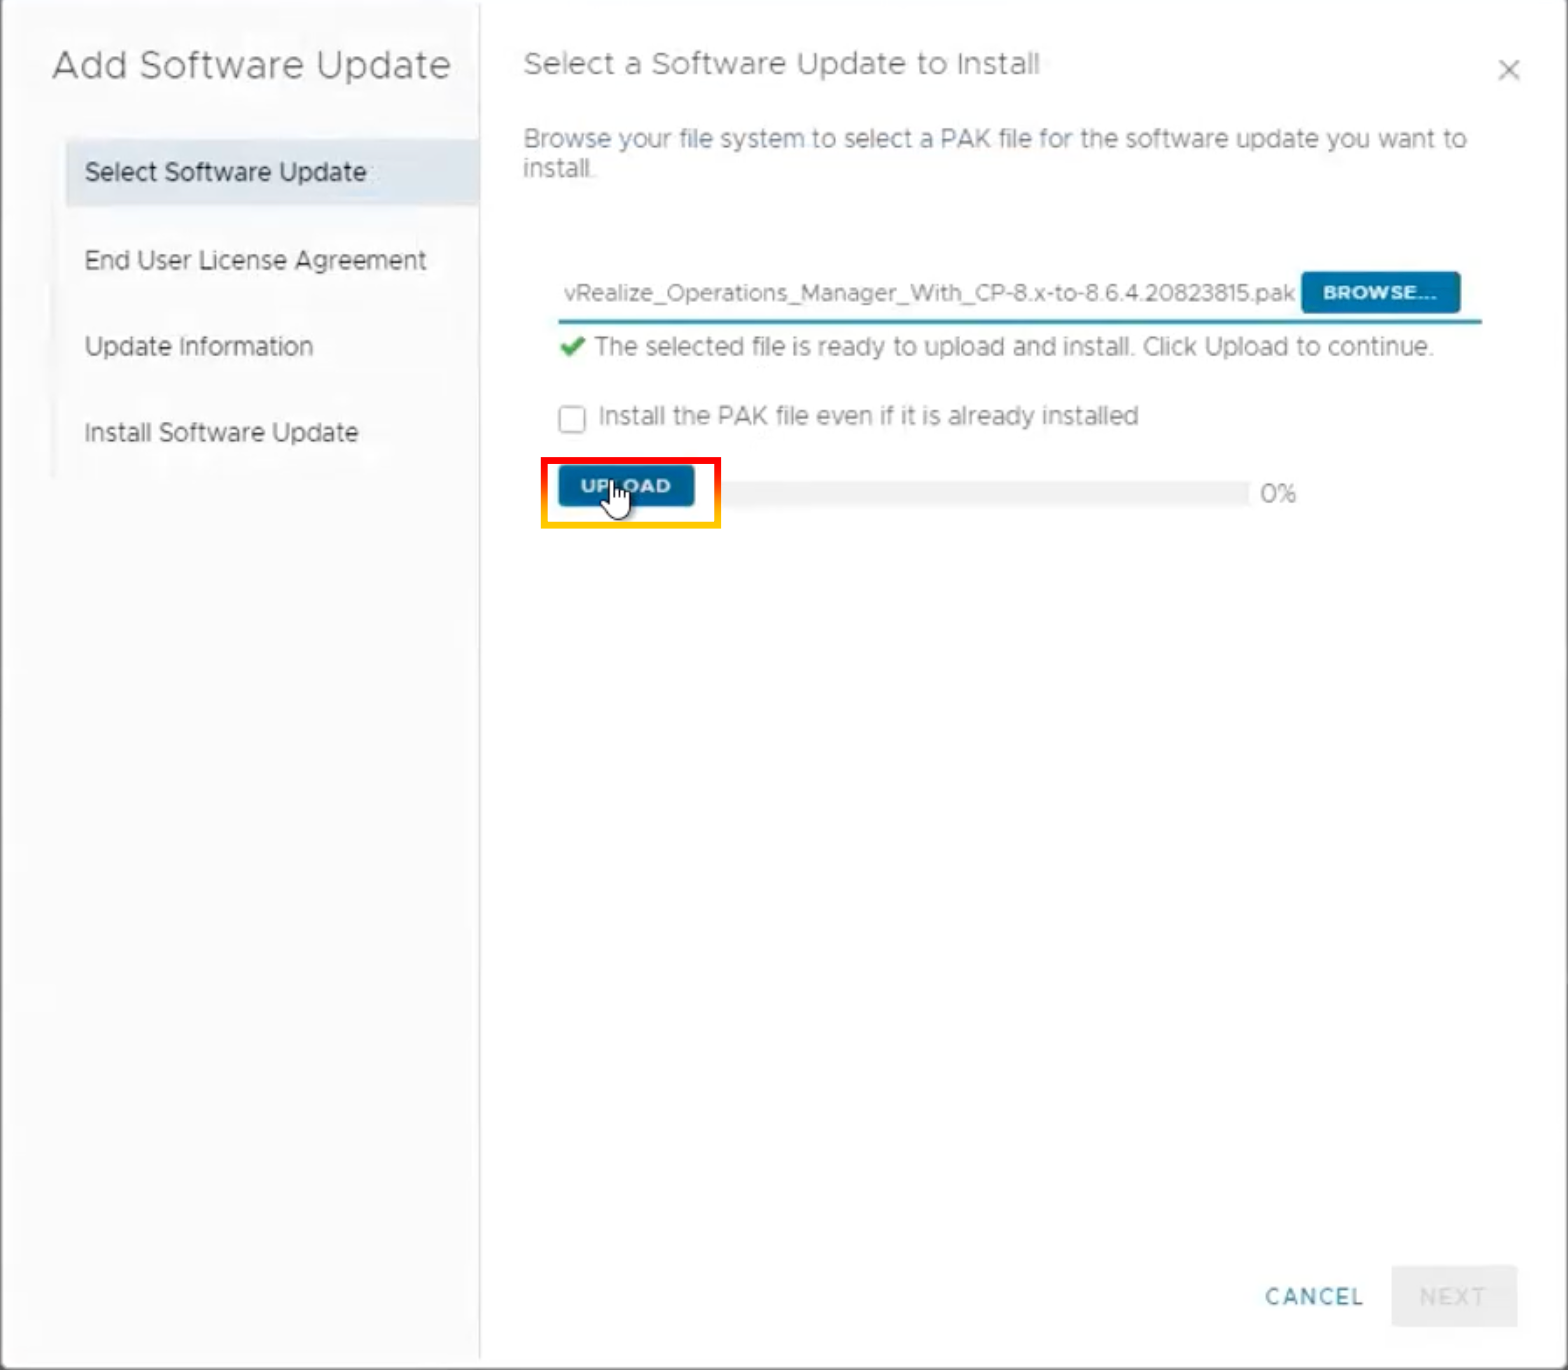
10.Click “UPLOAD” after you’ve browsed the pack file.
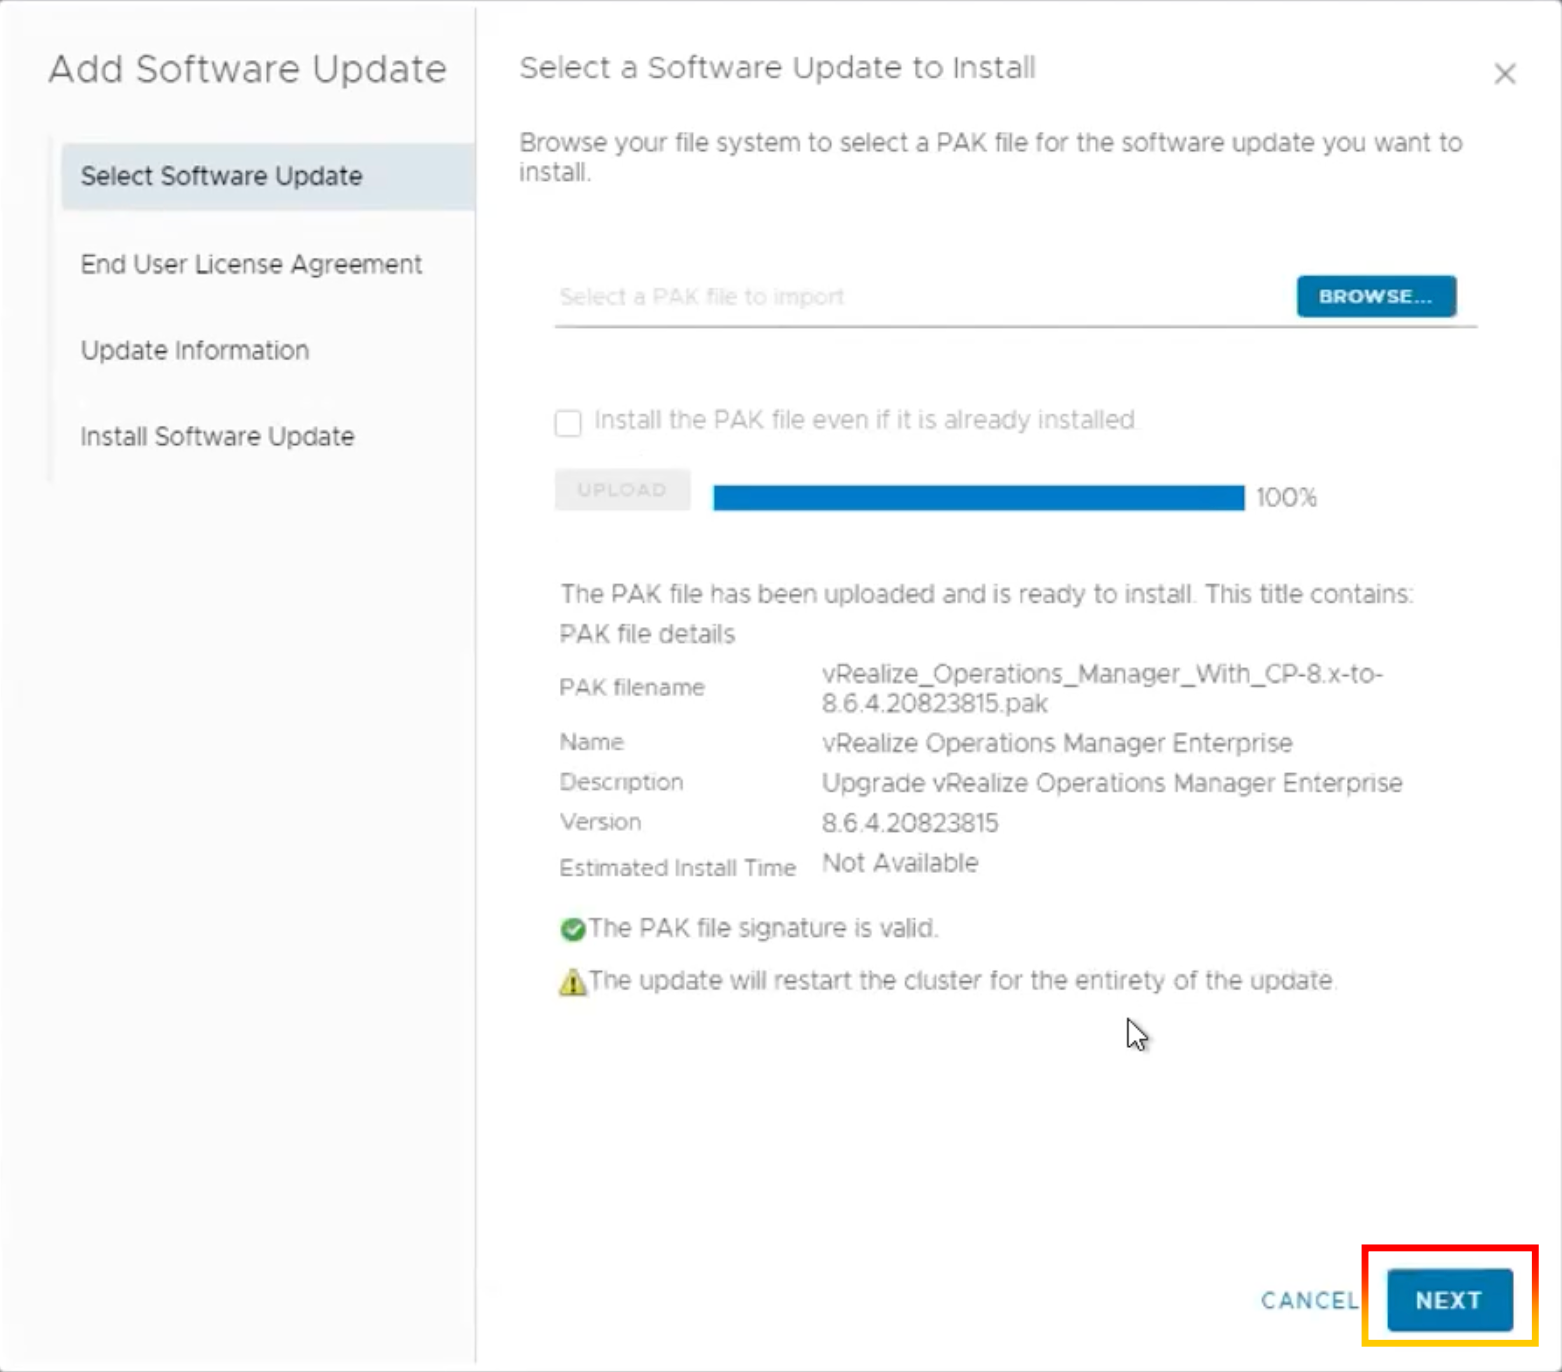
11.The pack file had been uploaded. Click “NEXT”.
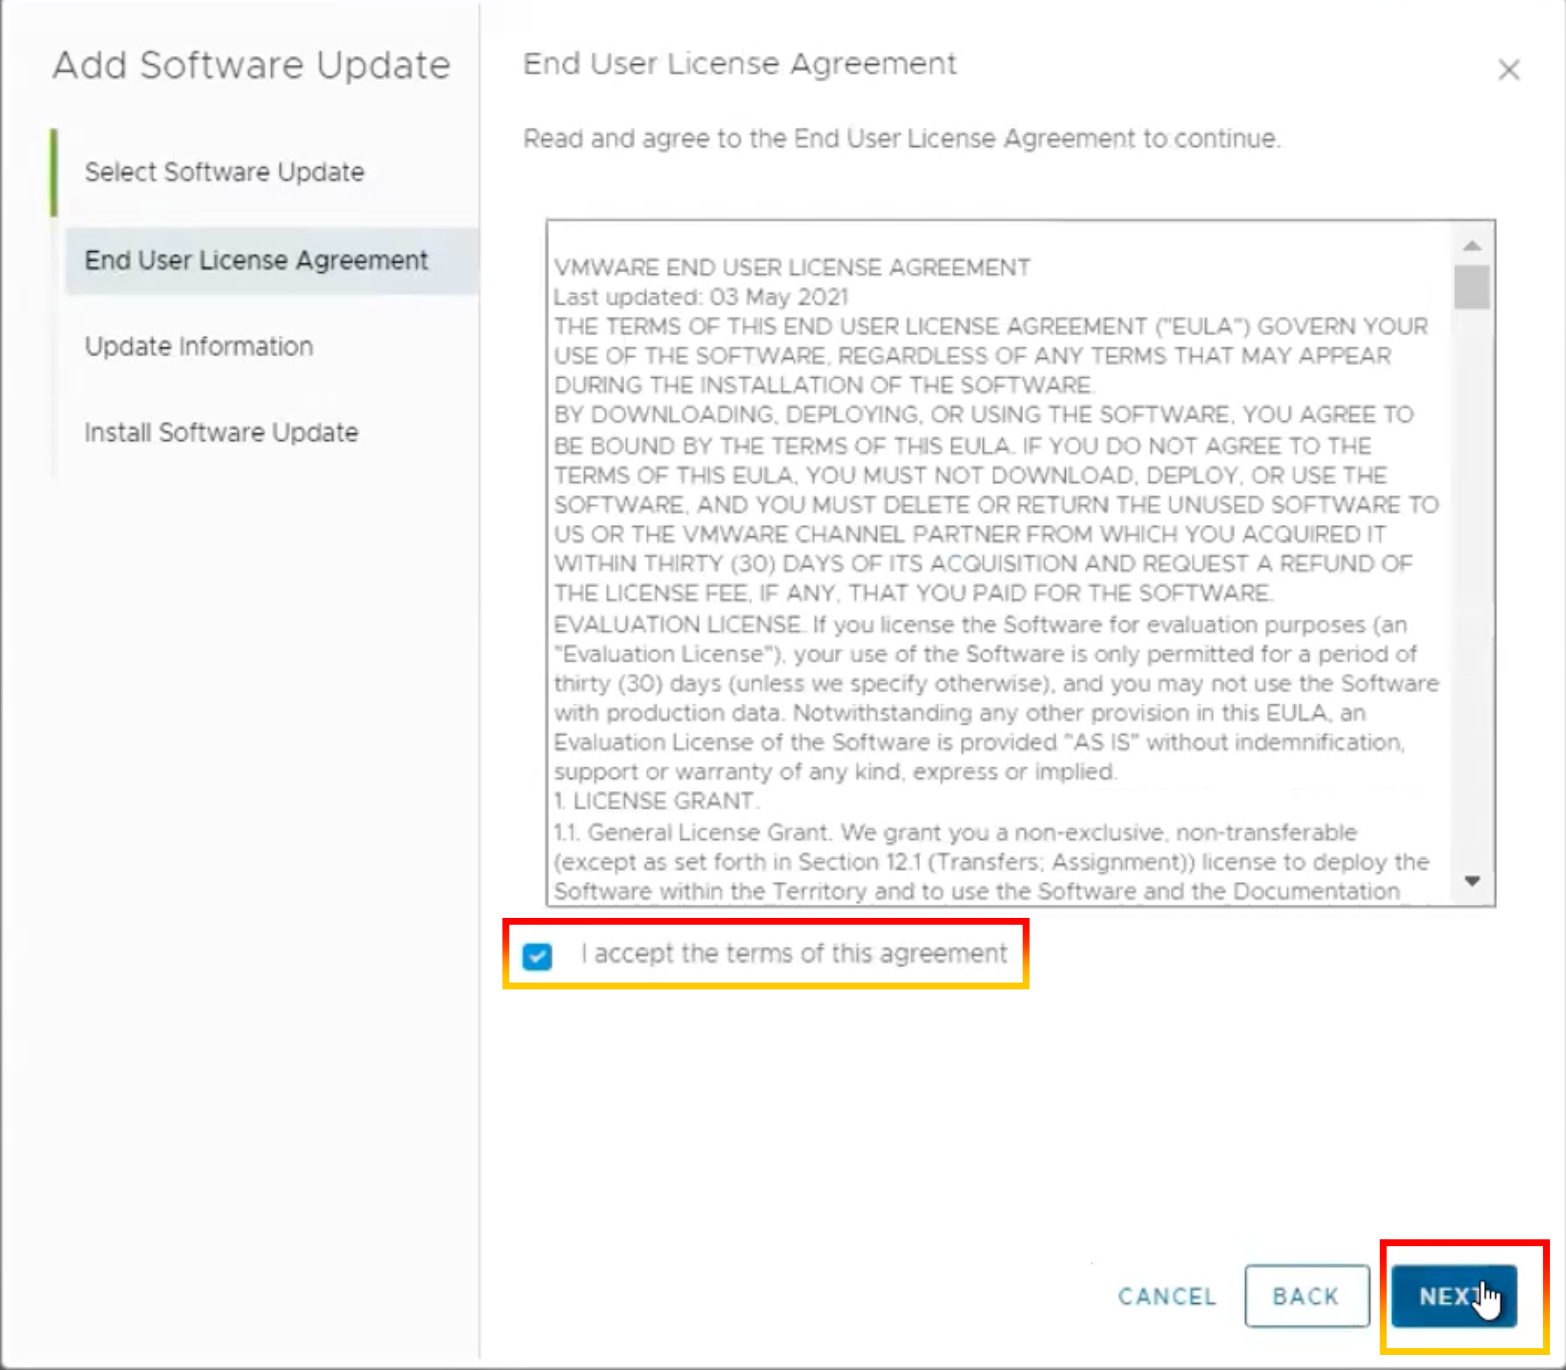
12.To accept the EULA, tick the box, then click “NEXT“.
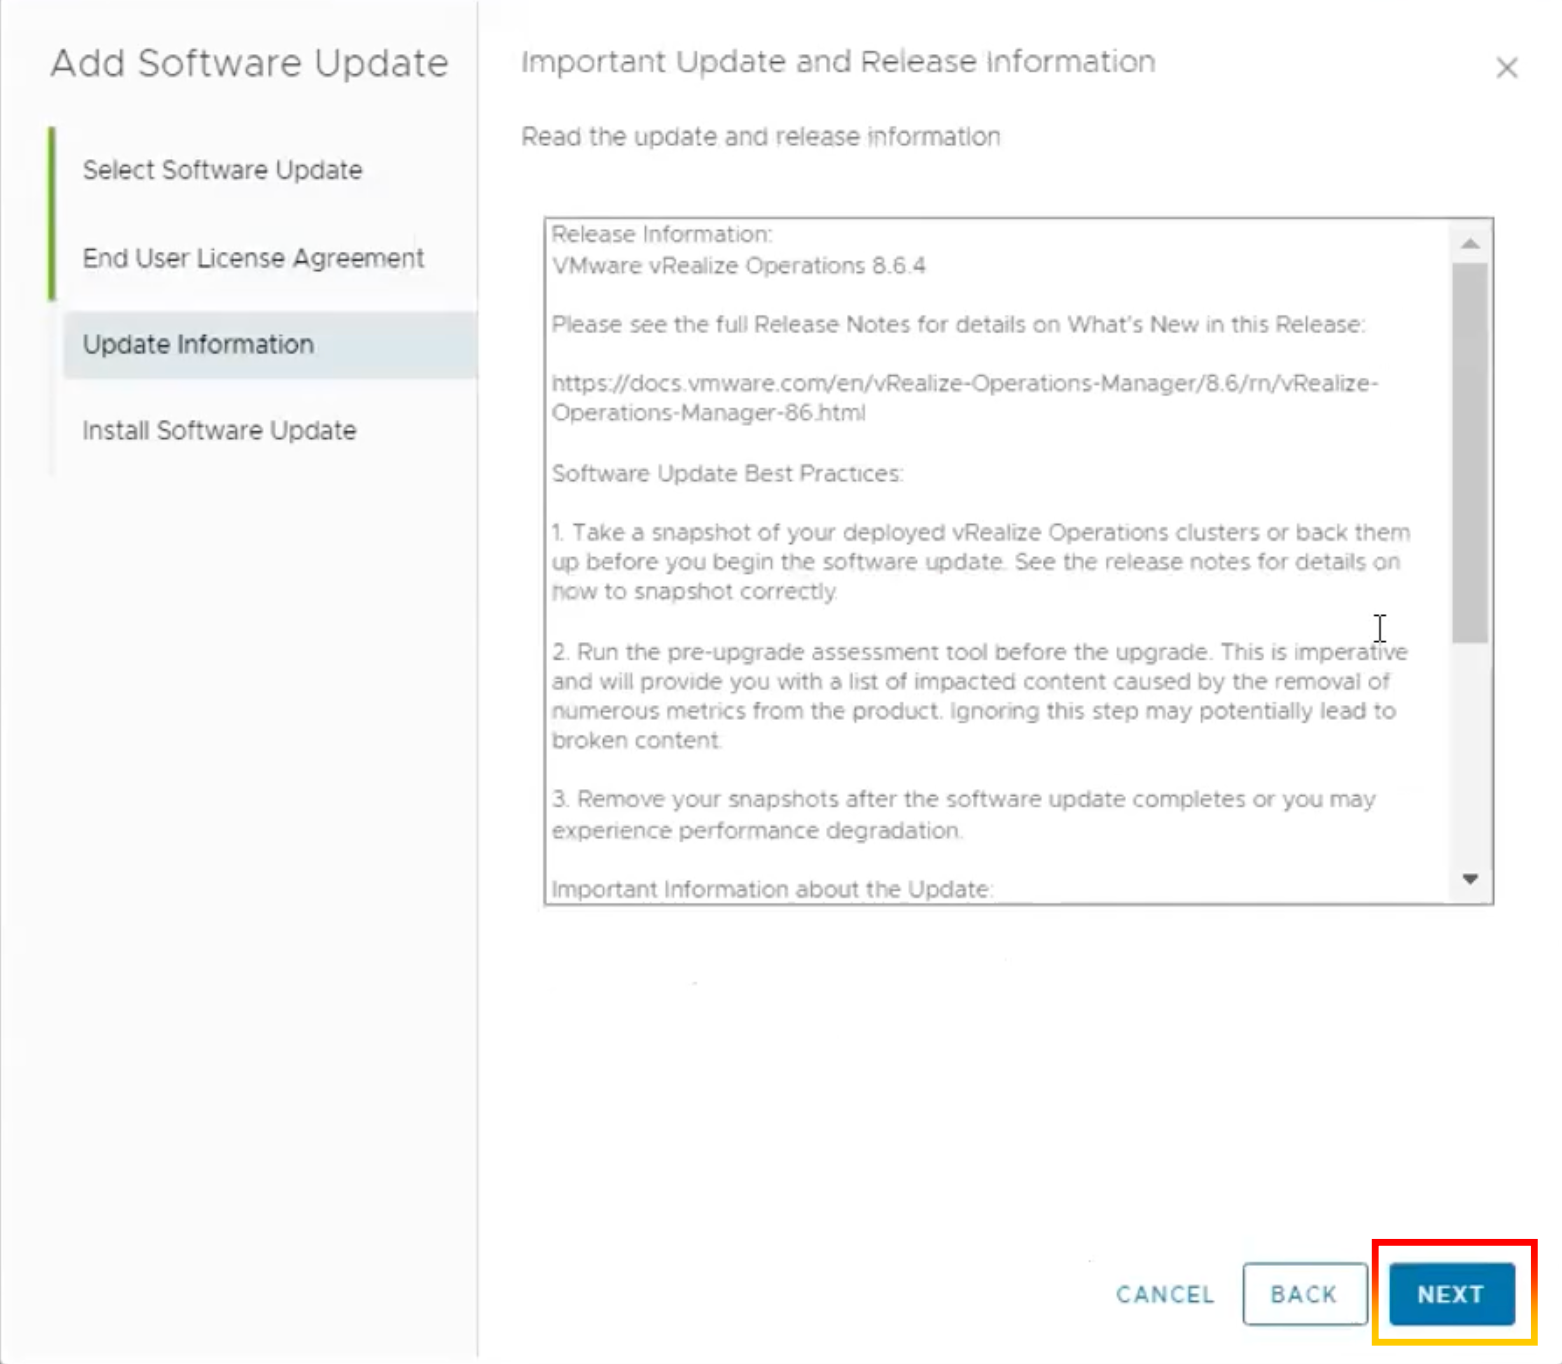
13.After reading the release notes, click “NEXT”.
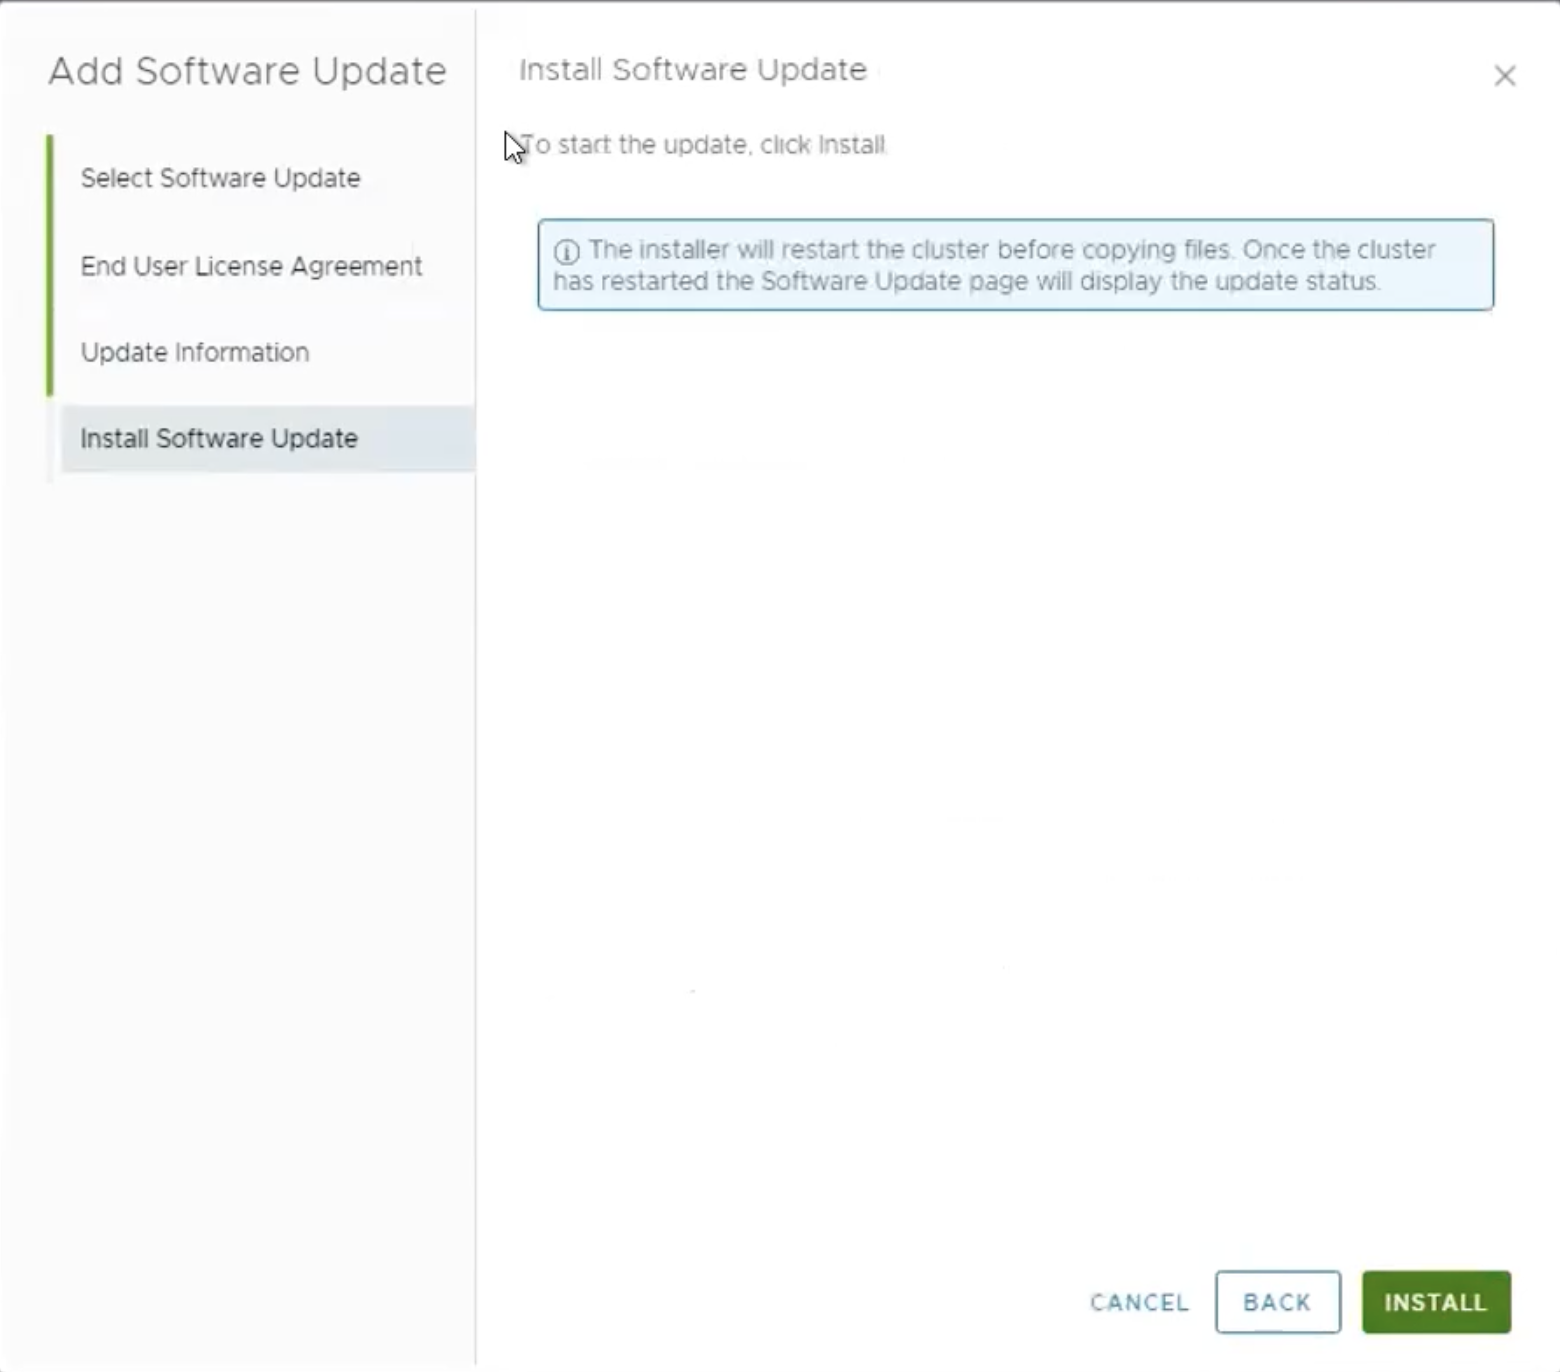
14.To install software, Click “INSTALL”.
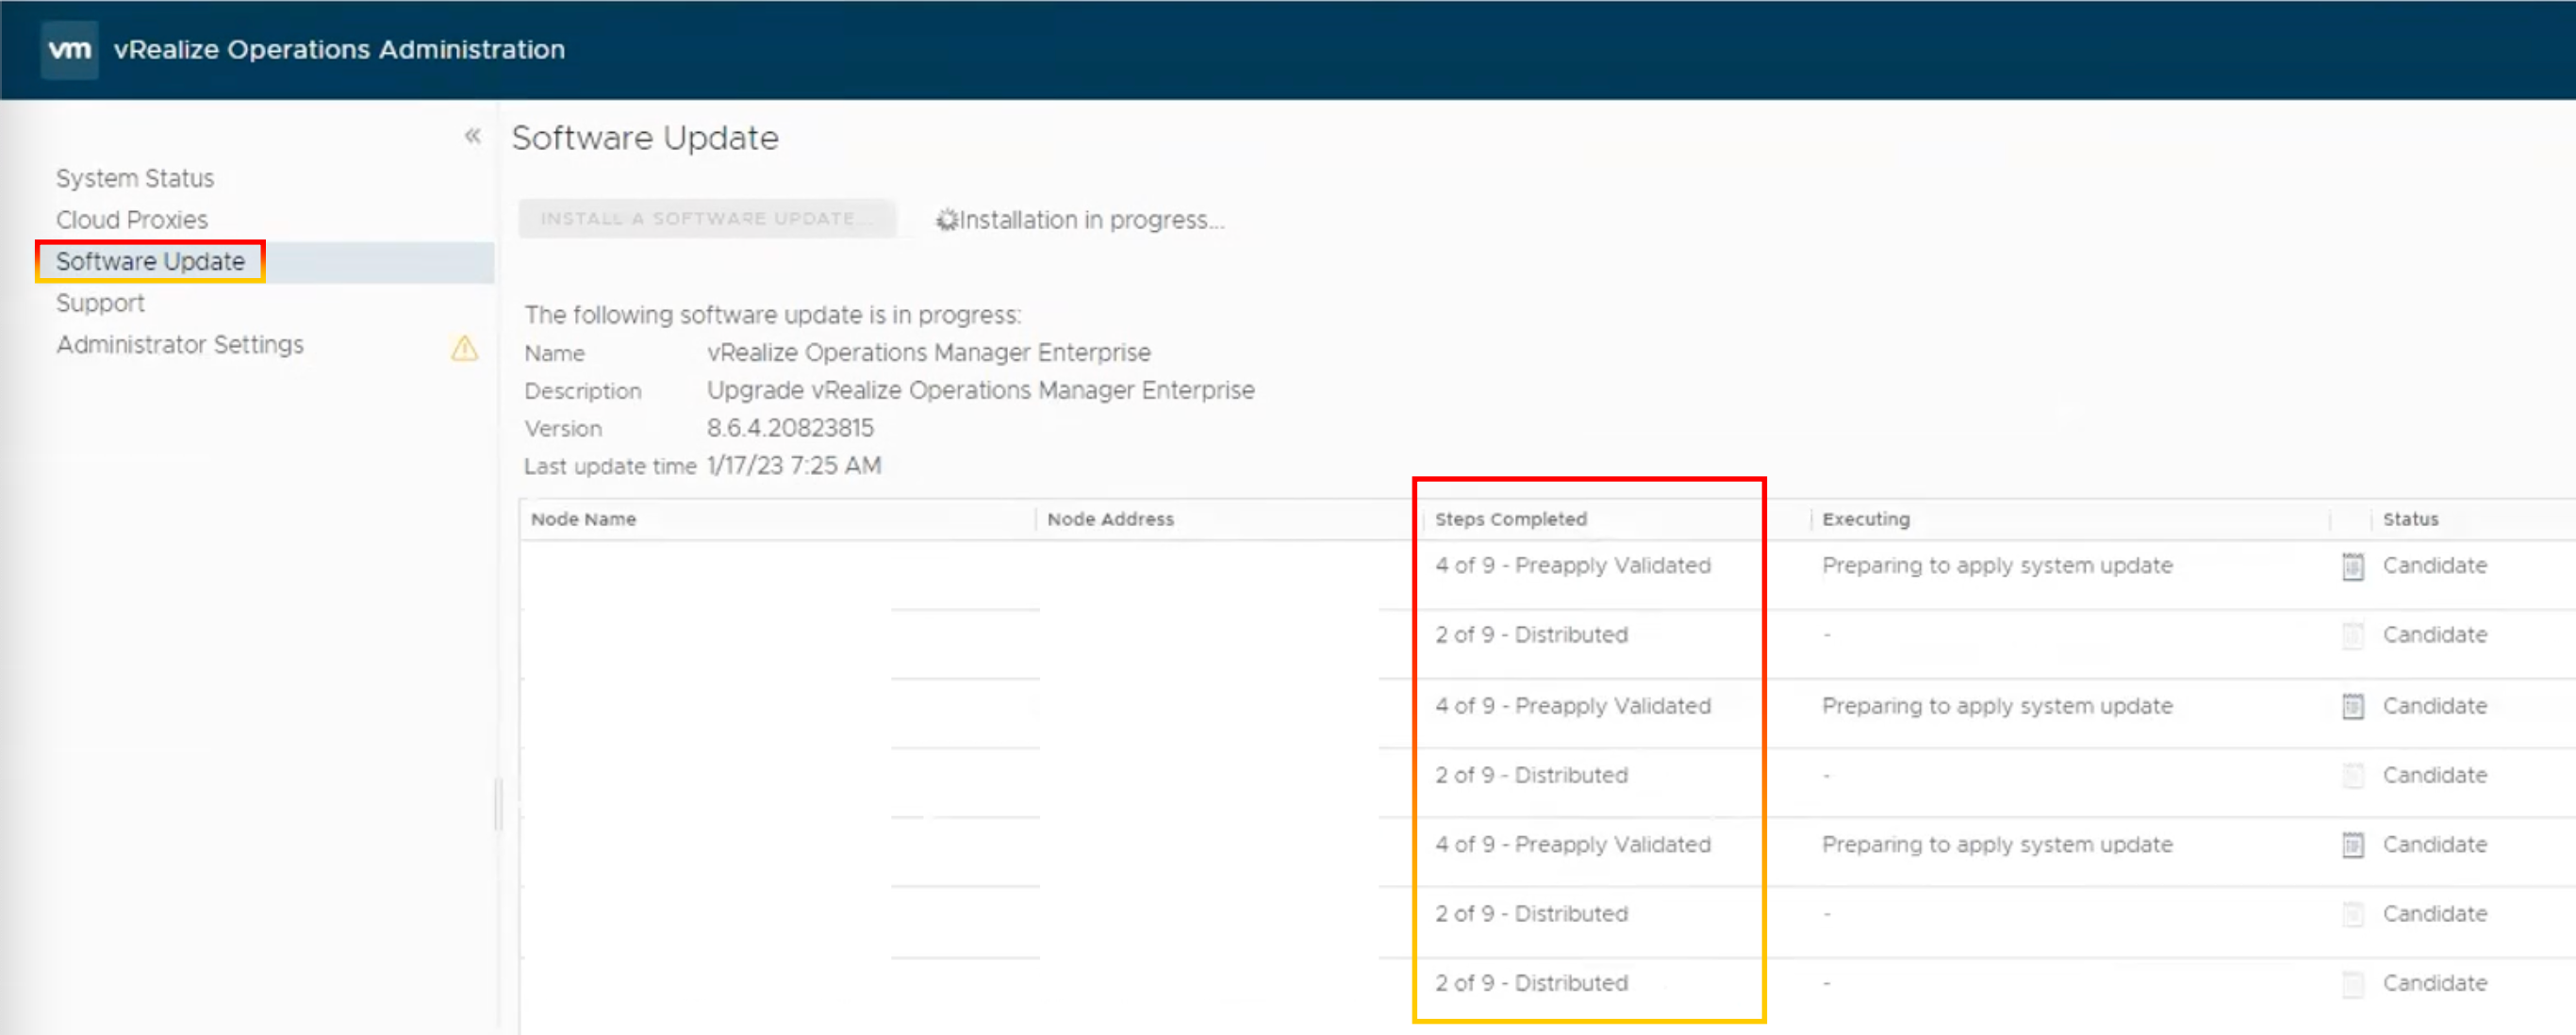
15.The Administrator interface logs you out. Return to the primary node Administrator interface. In the left side, click Software Update. The update patch status will be shown.
16.Waiting for the pack to be installed.
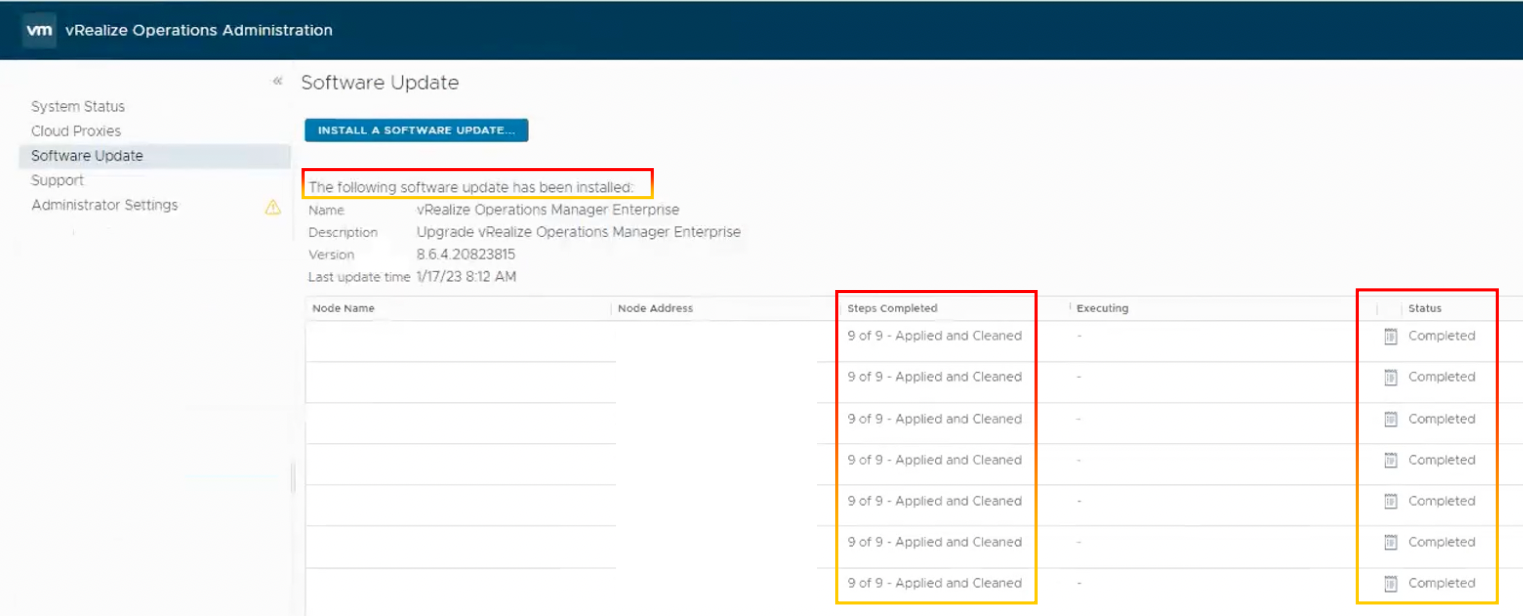
17.Refresh the page. The cluster status is changed to Online.
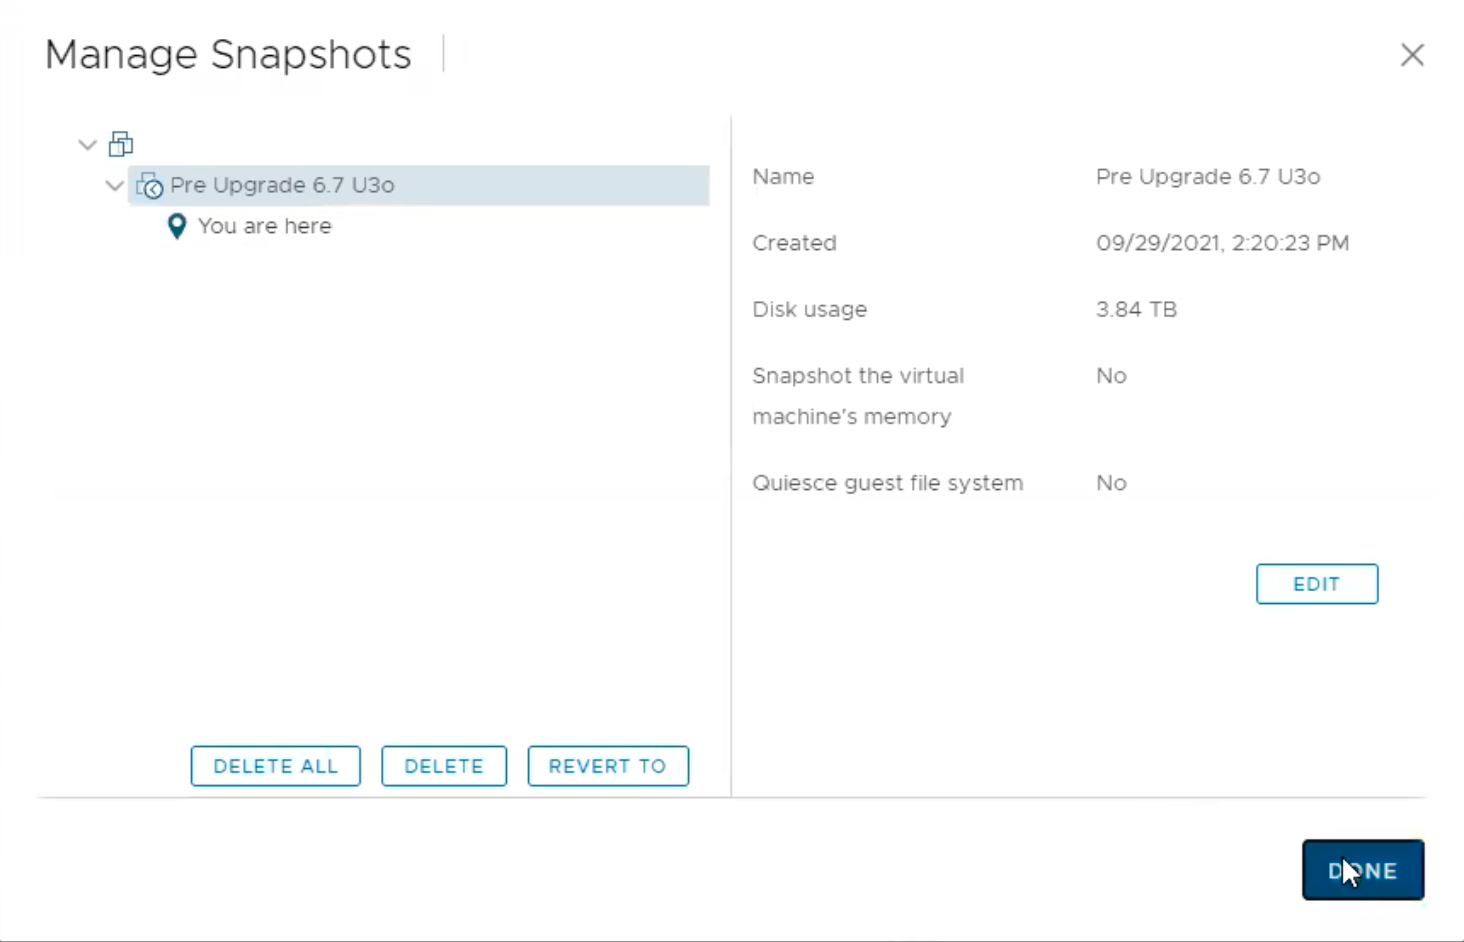
18.Once the upgrade is finished, delete the snapshots you took prior to the software update.
Guidance and Technical Recommendations.
VMware security advisory with critical security severity for VMware vRealize Operations was released. A major vulnerability was discovered in VMware vRealize Operations. Using administrator rights in the vROps application, a malicious actor can get root access to the underlying operating system. We advise applying the patch or upgrading to the patched version to preventing a malicious attacker from accessing critical information in the vROps.
Information regarding CVE-2021-44228 & CVE-2021-45046 in NSX-T Data Center (2.5.0-3.1.3) (87086)
ในบทความนี้ เราจะมาทำ workaround ในการแก้ปัญหา instructions to address CVE-2021-44228 and CVE-2021-45046 in NSX-T Data Center (2.5.0-3.1.3)โดยจะ followup วิธีการ จาก KB87086.
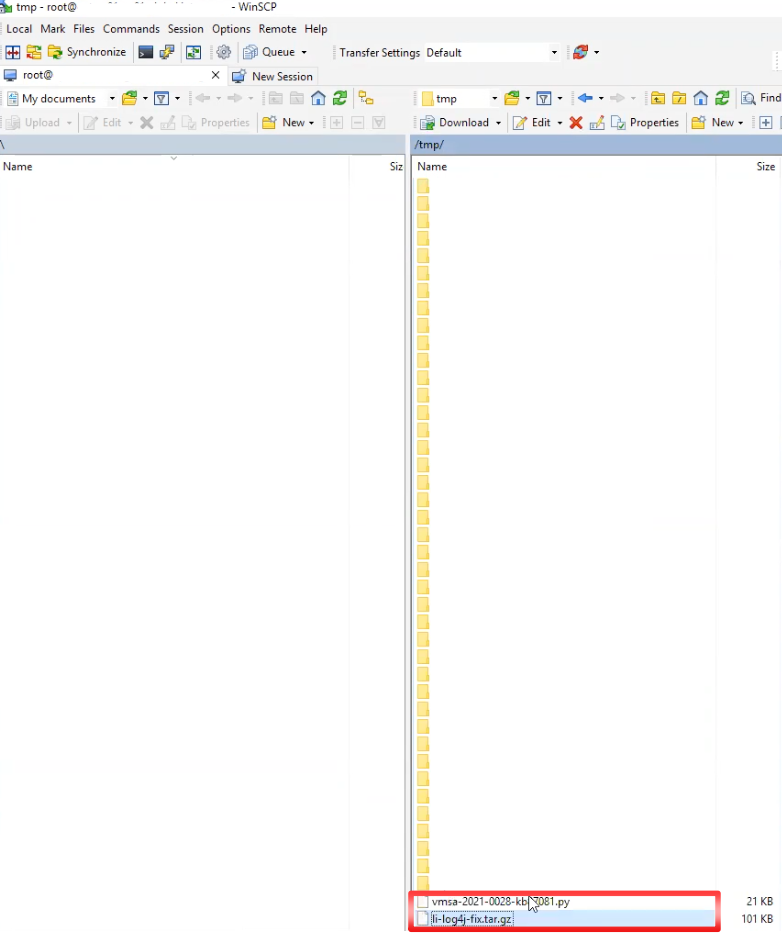
3.ทำการ copy Debian package ไปไว้ NSX-T Manager appliances ทั้ง 3 NSX-T Manager appliances โดยใช้ WinSCP หรือ Linux based SCP หรือ tool ที่สามารถ transfer files ได้.
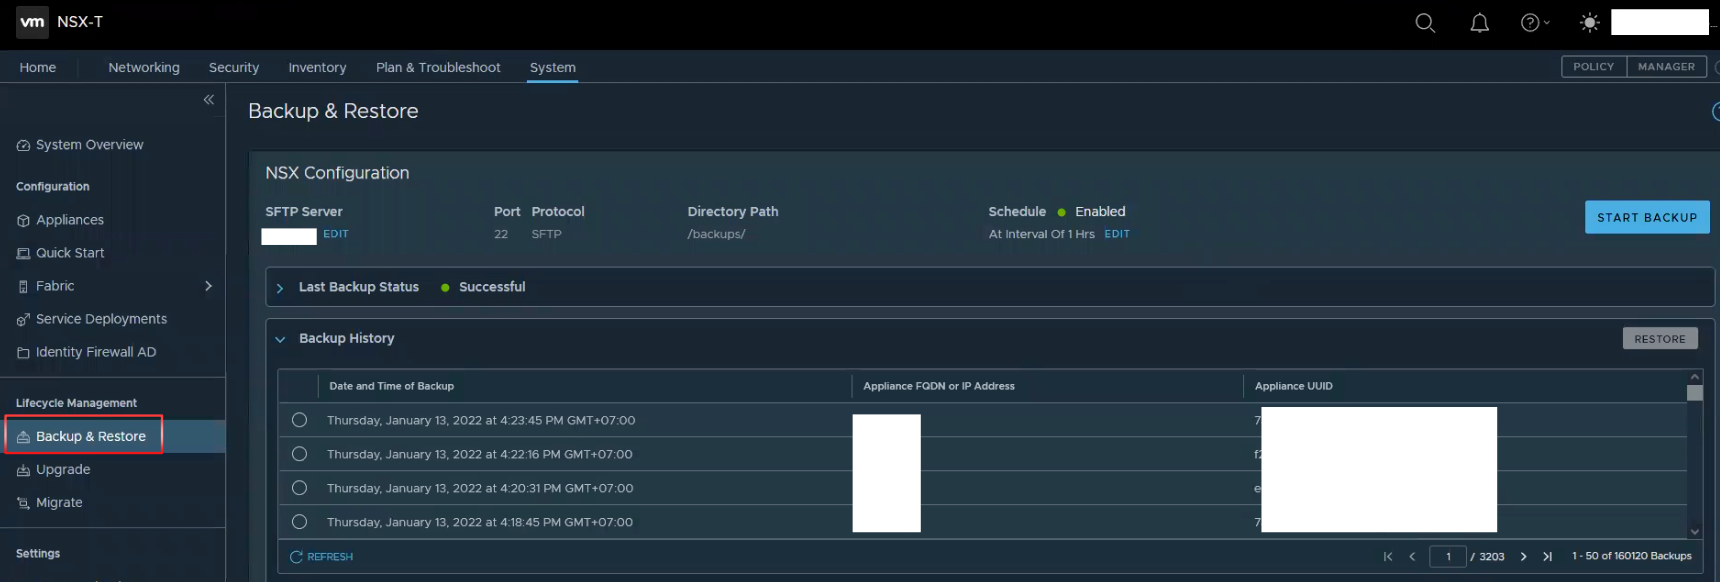
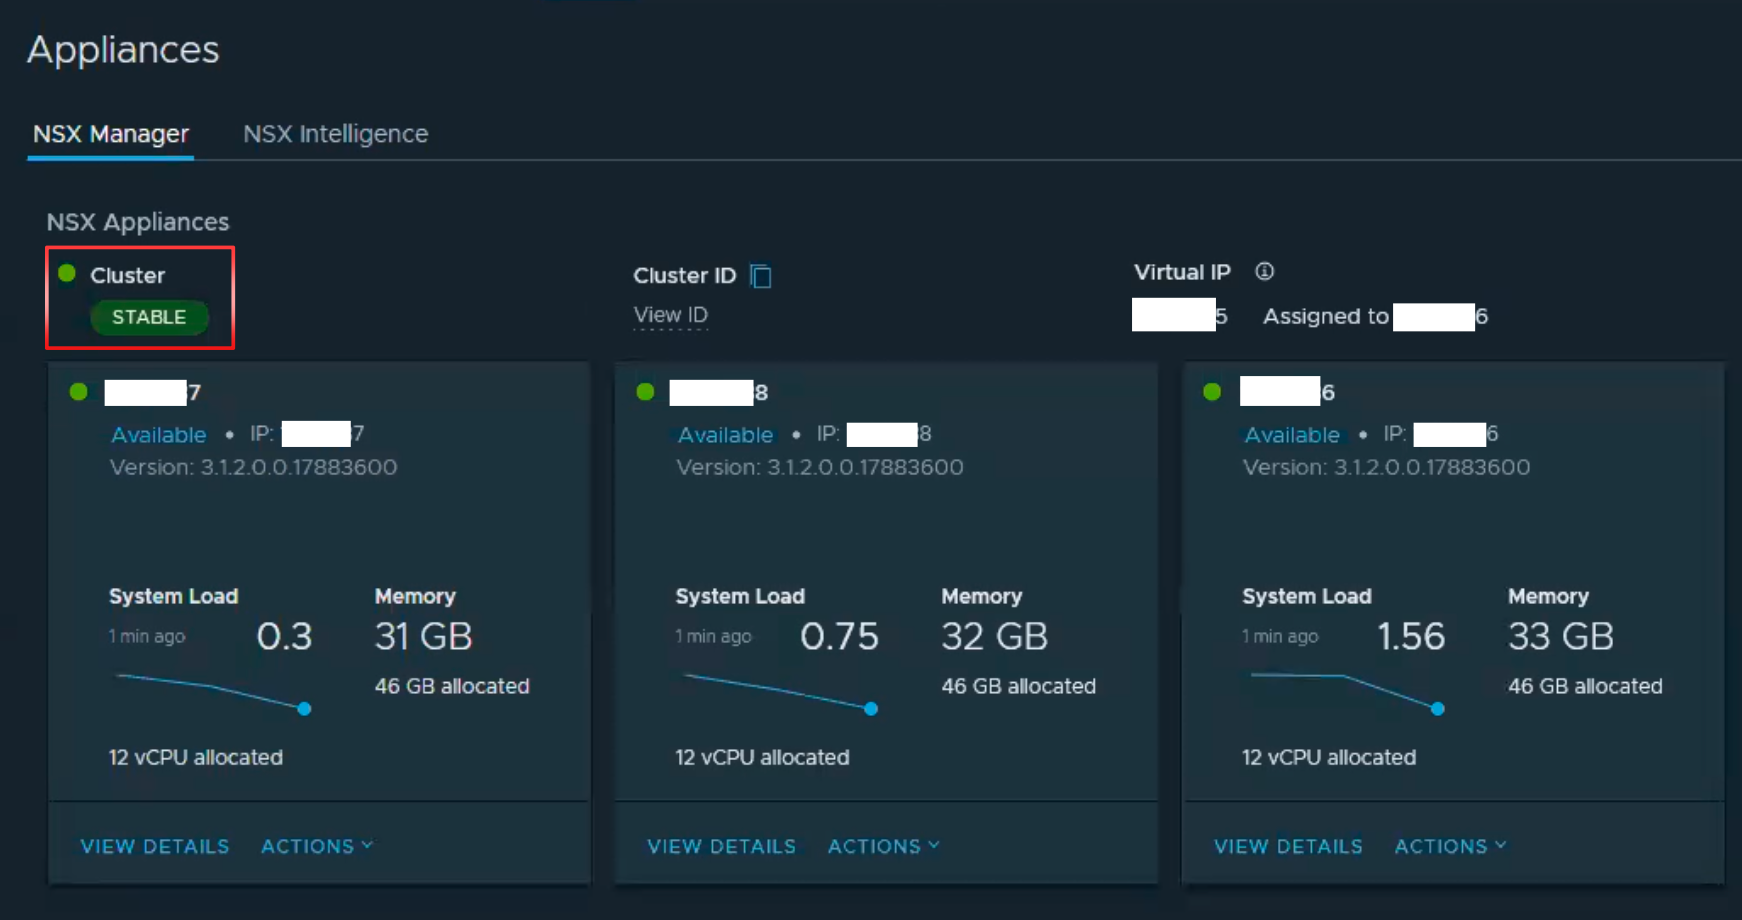
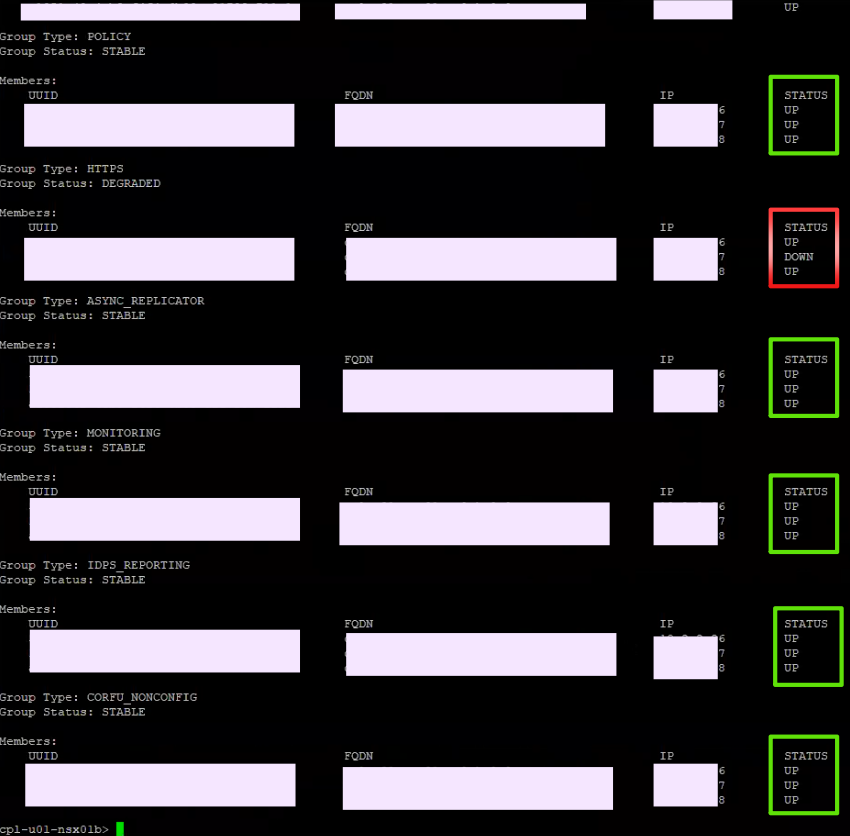
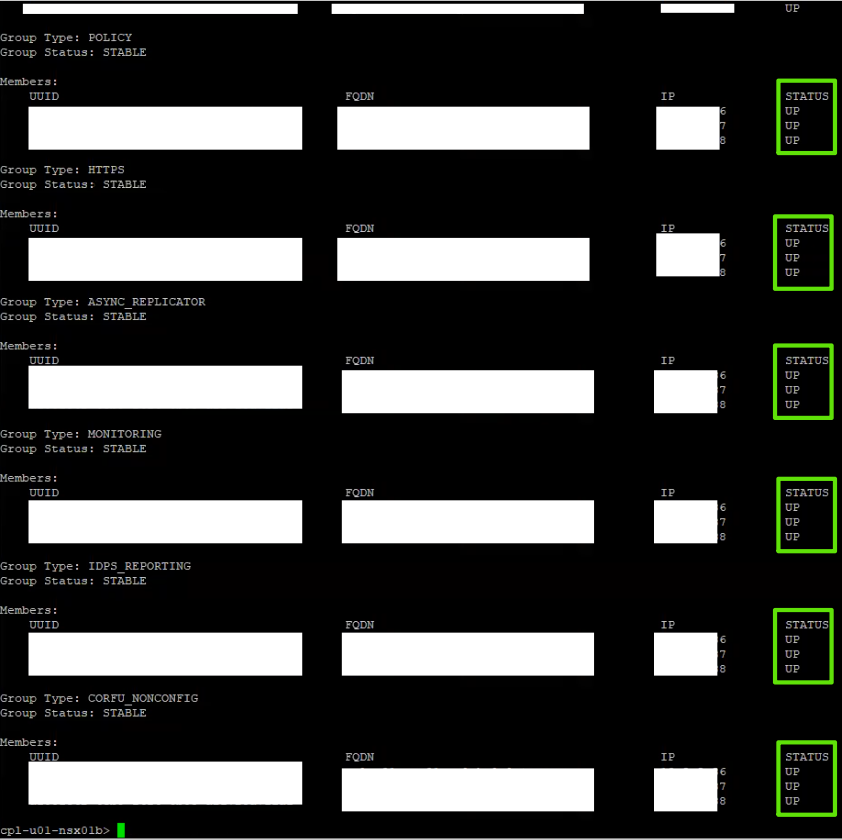
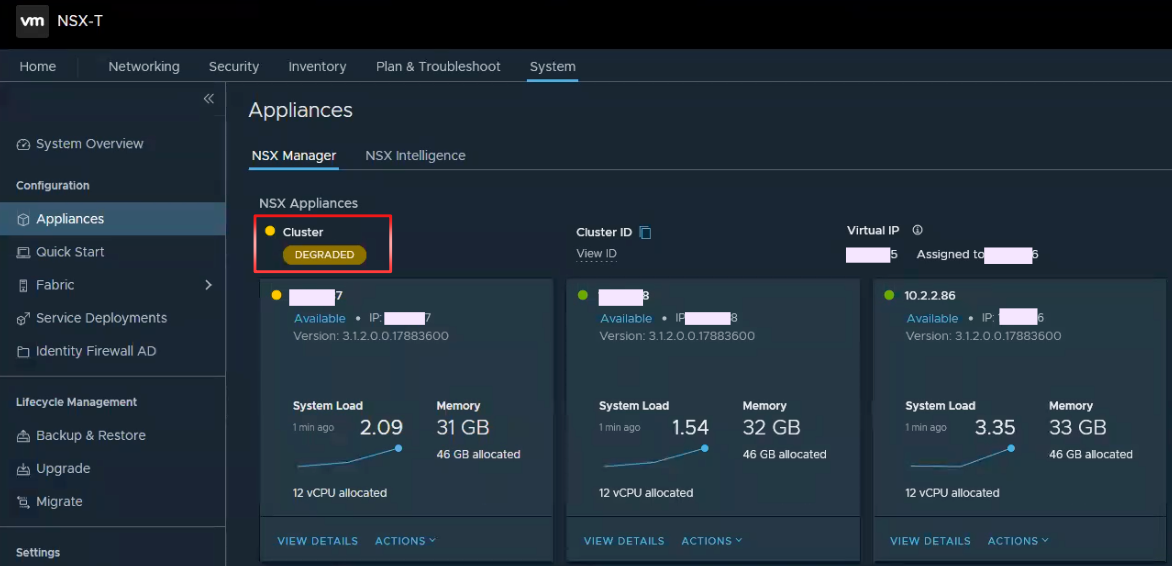
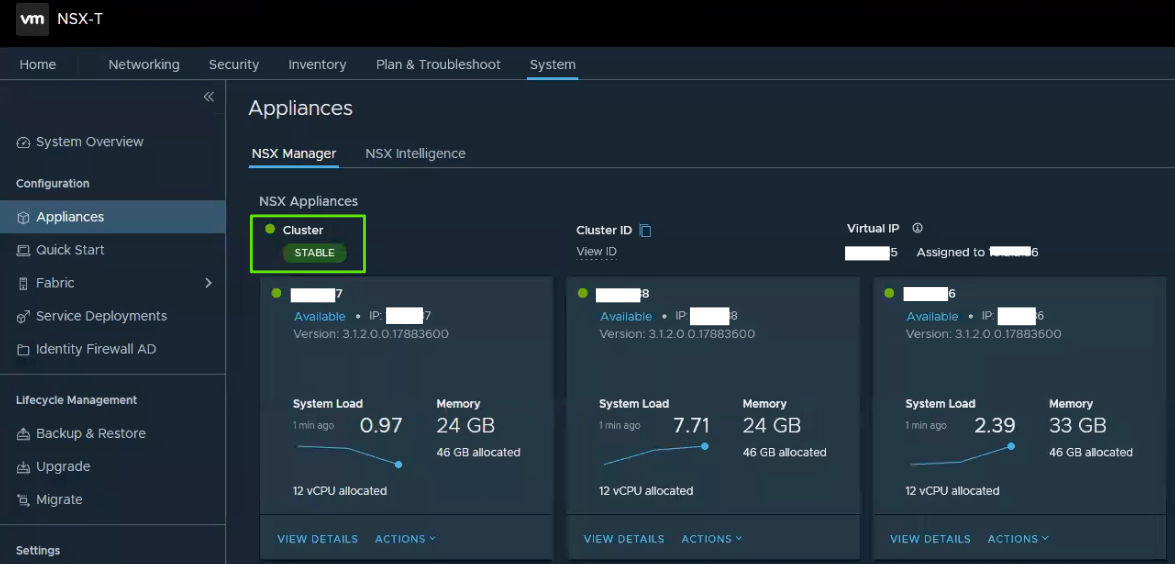
4.ให้ทำการ check status NSX-T Manager appliances. โดย Cluster status จะต้อง เป็น “STABLE” และ NSX-T Manager จะต้องเป็น “Available“.
5.Login NSX-T Manager appliance โดย SSH ใช้ user account “admin“.
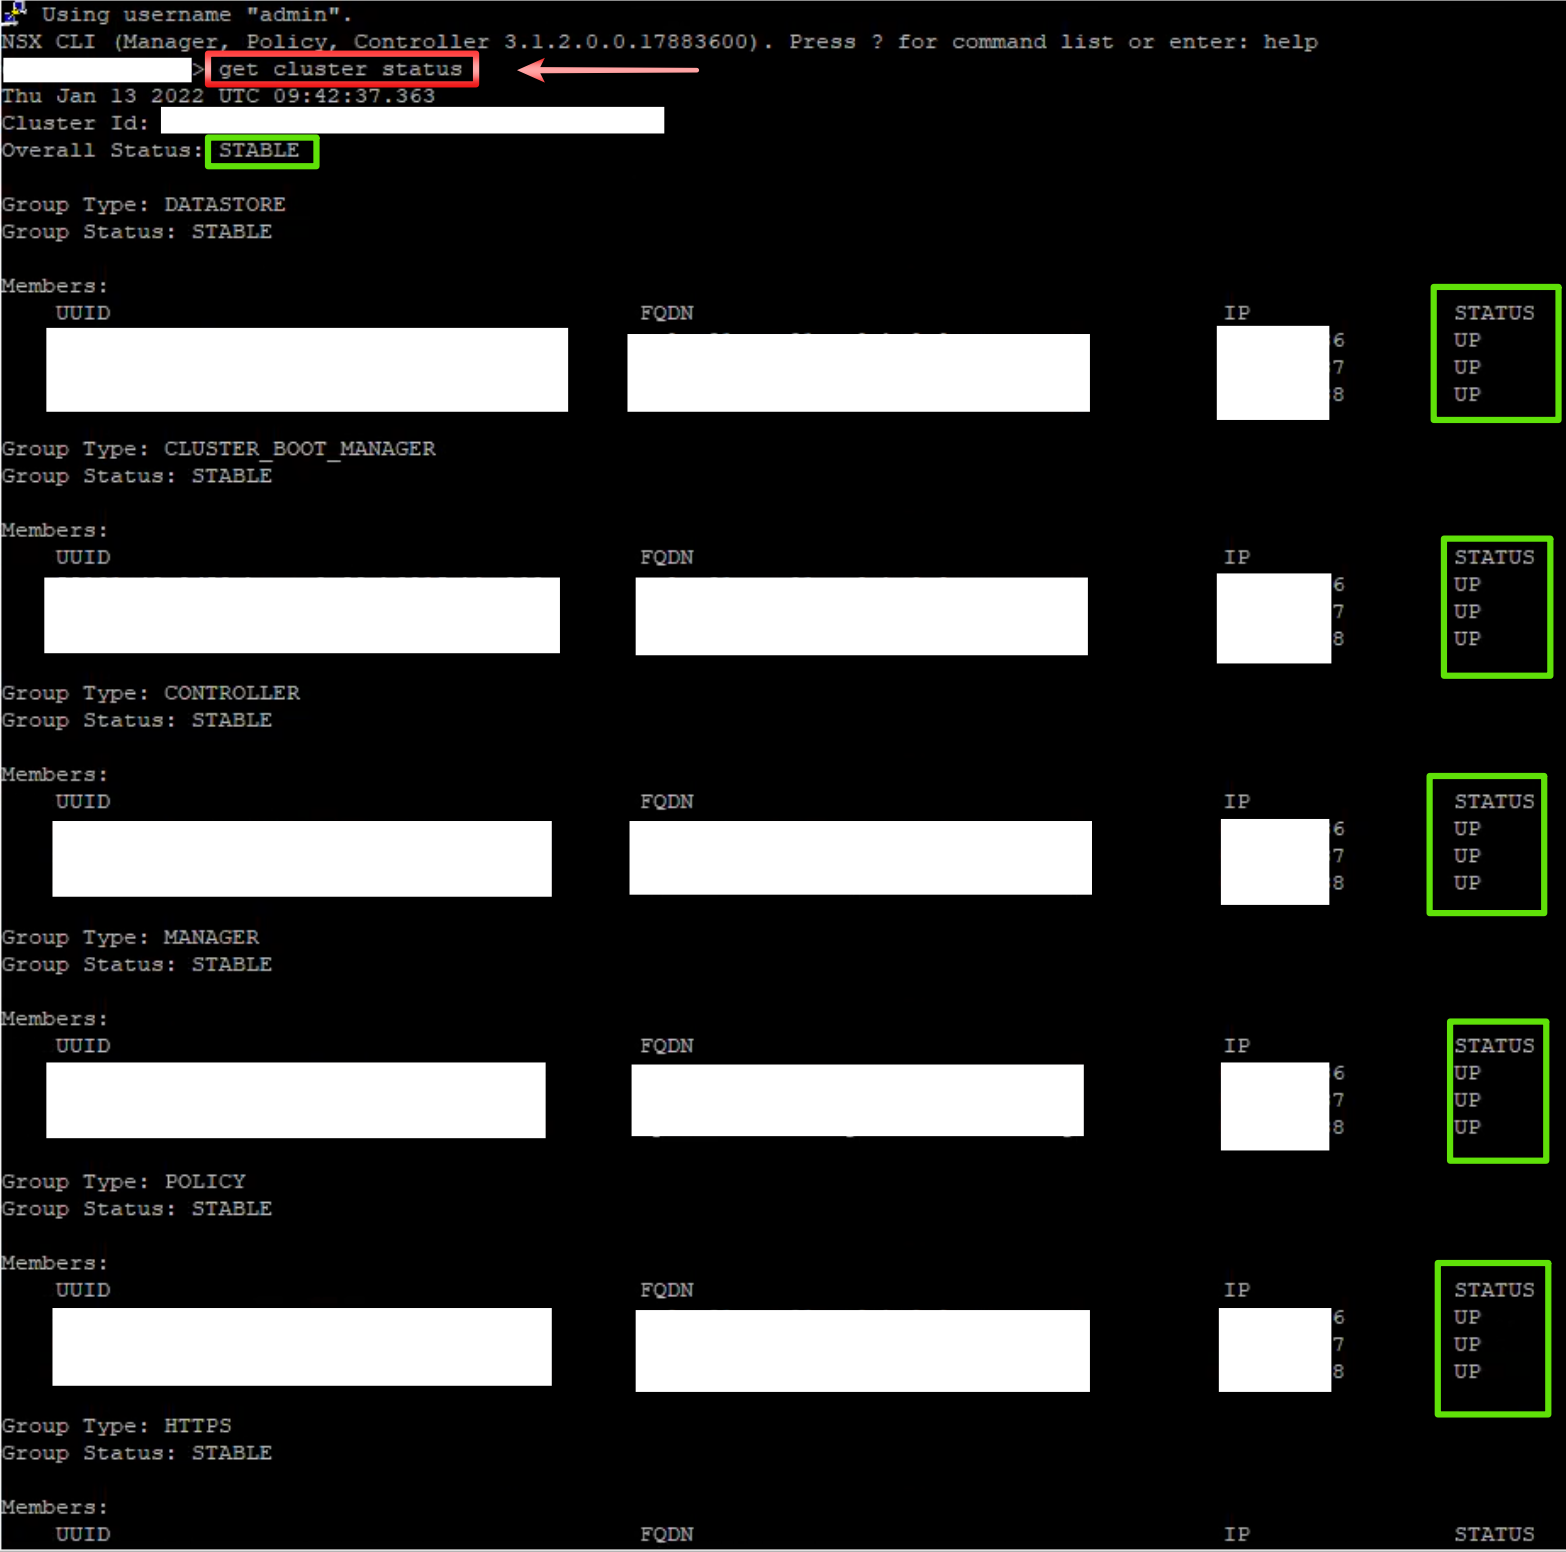
6.ให้ใช้ command check cluster status เพื่อตรวจสอบ cluster status อีกครั้ง โดย Overall Status จะต้องเป็น “STABLE” และ Status ต้อง “UP” ทั้ง 3 nodes ทุก services. get cluster status
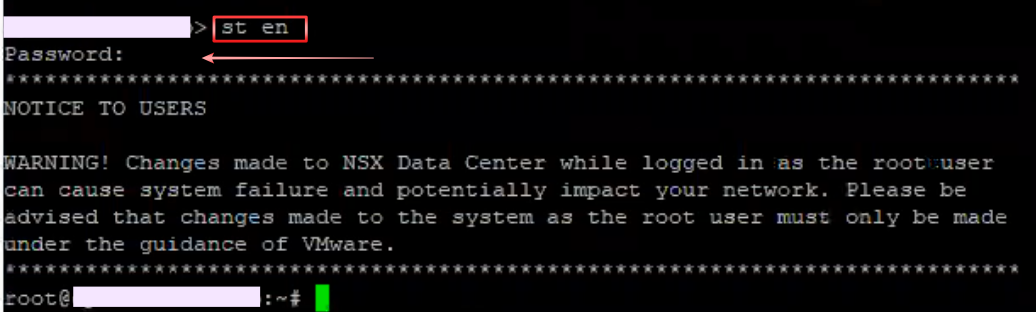
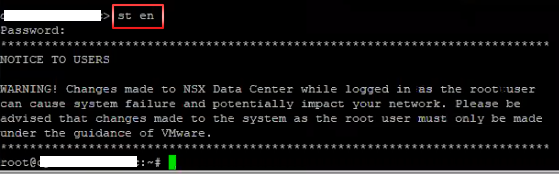
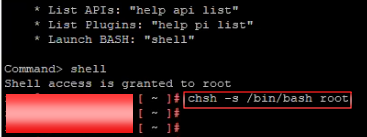
6.ให้ switch to account “root“. st en Enter the root password.
Used vmsa-2021-0028-kb87081.py script from KB 87088 and remove_log4j_class.py from this KB87081.
Used the manual workaround steps in KB87081 and remove_log4j_class.py.
Note: ในบทความนี้ จะใช้ วิธีที่ 2 – Used vmsa-2021-0028-kb87081.py script from KB 87088 and remove_log4j_class.py from this KB87081. โดยจะเป็น vCenter server virtual appliance version 7.0.1.00301
Workaround
Automated Workaround (Recommended)
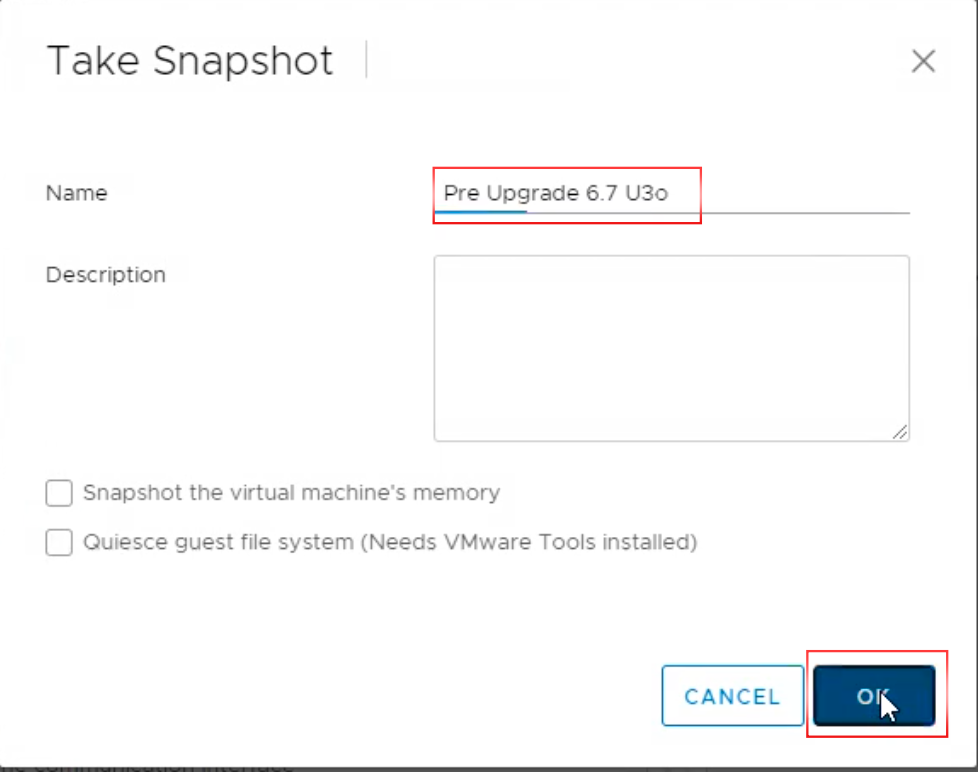
ทำการ take snapshot “vCenter server virtual appliance”.
ทำการ check disk space available by command “df-h” (capture screen ไว้ด้วย).
ทำการ check vCenter server service by command “service-control –status –all” (capture screen ไว้ด้วย).
13. ทำการ Login to the vCSA using an SSH Client (using Putty.exe or any similar SSH Client) แล้วเข้าไปที่ path /tmp ใช้ “ls” command ทำการตรวจสอบไฟล์ ที่เราทำการ upload เข้าไป
14. ทำการ run script vmsa-2021-0028-kb87081.py root@xxxx[/tmp]#python vmsa-2021-0028-kb87081.py
15. พิมพ์ Y แล้วกด Enter
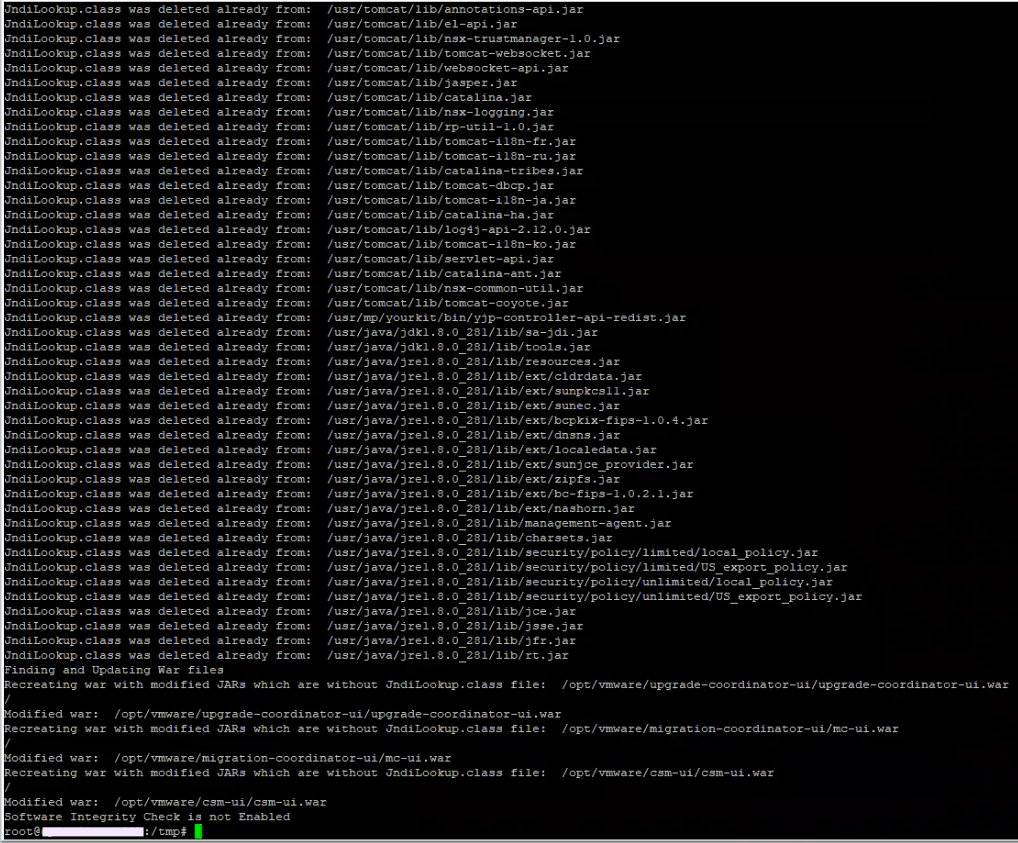
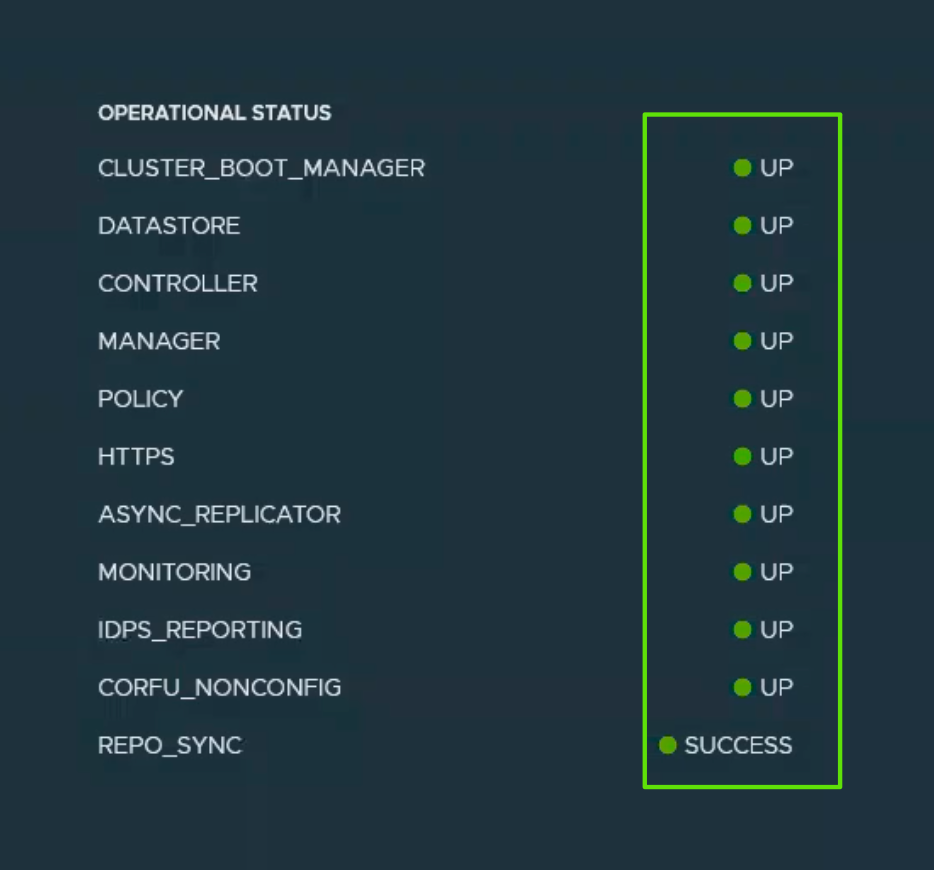
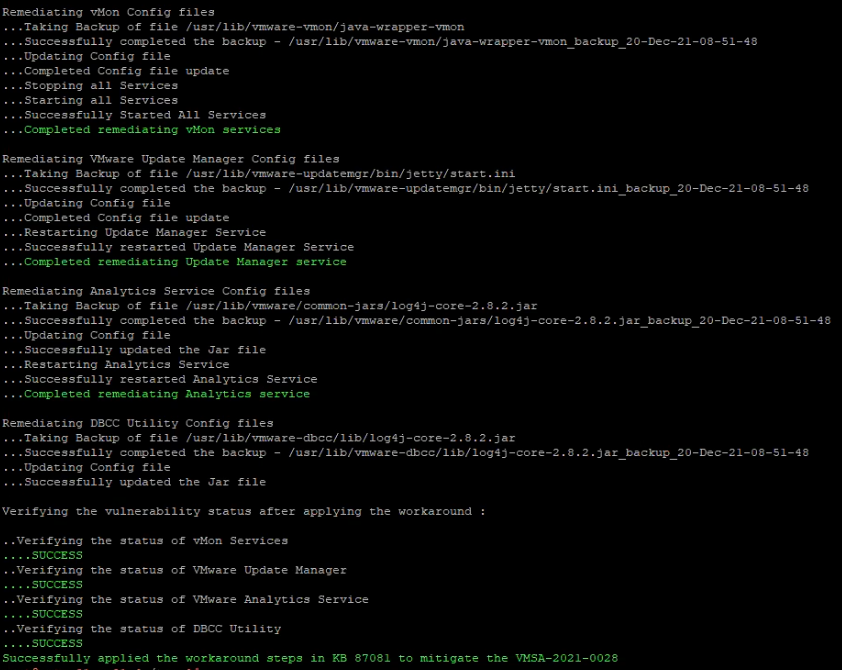
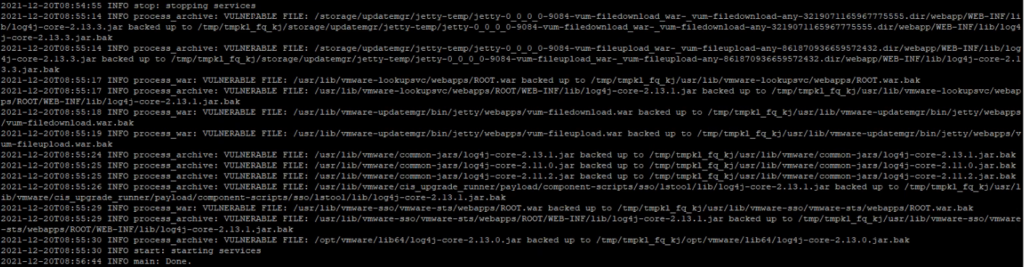
16. Script ก็จะทำการ run process เพื่อจะทำ workaround เกี่ยวกับ CVE-2021-44228 and CVE-2021-45046 (ใช้เวลา10 นาที โดยประมาณ). โดย script ก็จะแสดง status ของแต่ละ process และที่สำคัญจะต้องแสดงผล “SUCCESS” -vMON Config files -VMware Update Manager Config files -Analytics service Config files -DBCC Utility Config files
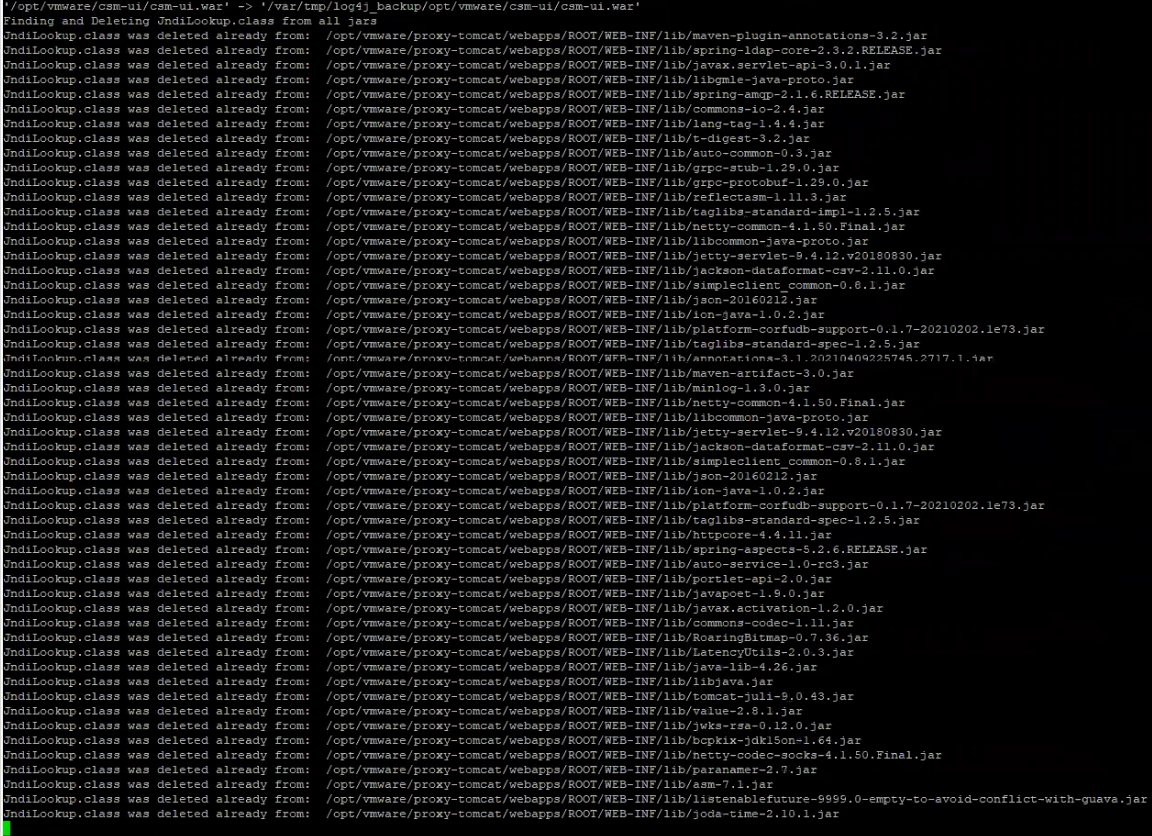
17. เมื่อทำการ run script แรก เสร็จเรียบร้อยแล้วให้ เรา run script ตัวที่ 2 คือ remove_log4j_class.py from this KB87081. root@xxxx[/tmp]#python remove_log4j_class.py
18. พิมพ์ Y แล้วกด Enter
19. Script ก็จะทำการ run process เพื่อจะทำ workaround เกี่ยวกับ CVE-2021-44228 and CVE-2021-45046 (ใช้เวลา10 นาที โดยประมาณ).โดย script ก็จะแสดง status ของแต่ละ process
Verify the changes
เมื่อเราทำการ run script ทั้ง 2 scripts completed แล้วให้เราทำ การ ตรวจสอบให้แน่ใจว่า script ที่เรา run นั้นถูกต้อง
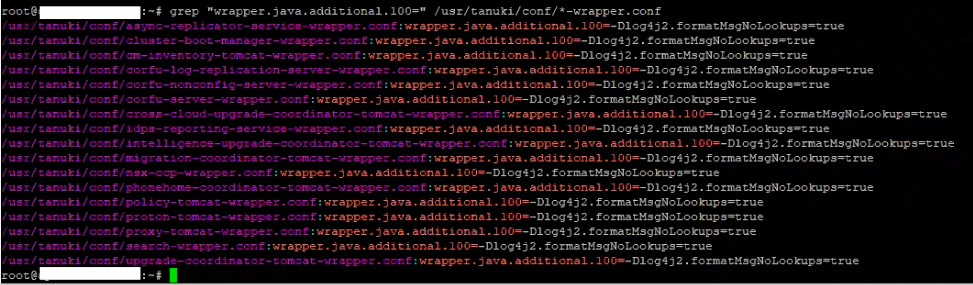
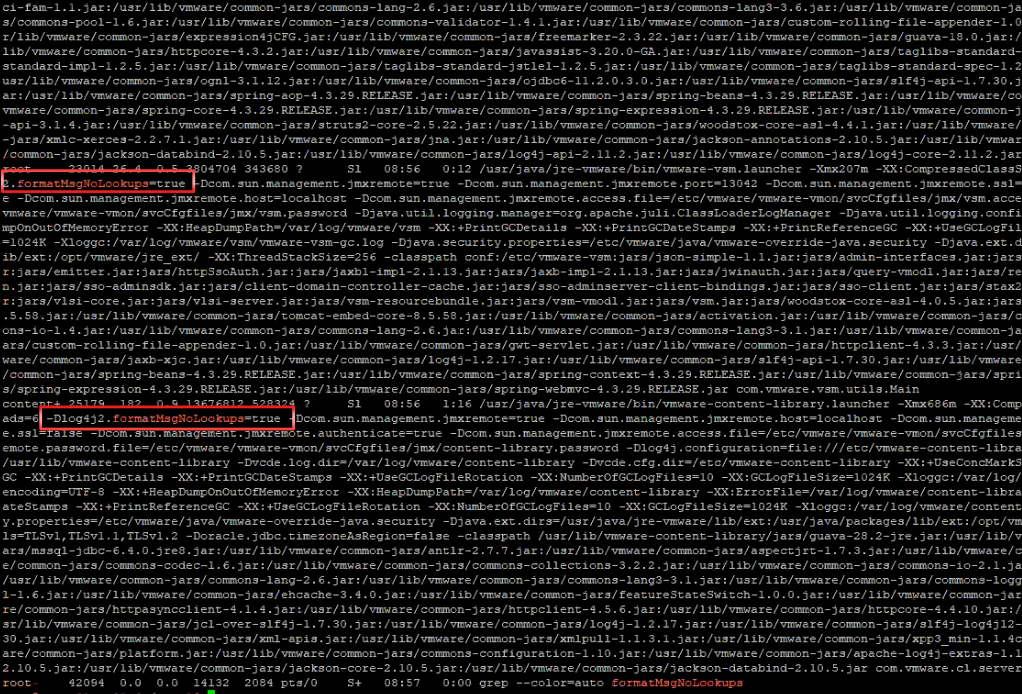
Verify if the stsd, idmd, and vMon controlled services were started with the new -Dlog4j2.formatMsgNoLookups=true parameter: ps auxww | grep formatMsgNoLookups
โดย จะแสดง ผล -Dlog4j2.formatMsgNoLookups=true
2. Verify the Update Manager changes are shown under “System Properties” in the output of the following two commands: cd /usr/lib/vmware-updatemgr/bin/jetty/ java -jar start.jar --list-config system properties: log4j2.formatMsgNoLookups = true (/usr/lib/vmware-updatemgr/bin/jetty/start.ini)
3. Verify the Analytics Service changes: grep -i jndilookup /usr/lib/vmware/common-jars/log4j-core-2.8.2.jar | wc -l โดย จะแสดงค่า “0“
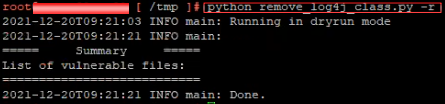
4. Verify the script successfully removed JndiLookup.class from all java files with the following command: python remove_log4j_class.py -r
จะได้ผลลัพธ์ ดังนี้ 2021-12-18T00:04:38 INFO main: Running in dryrun mode 2021-12-18T00:05:04 INFO main: ===== Summary ===== List of vulnerable files: 2021-12-18T00:05:04 INFO main: Done.
Remark
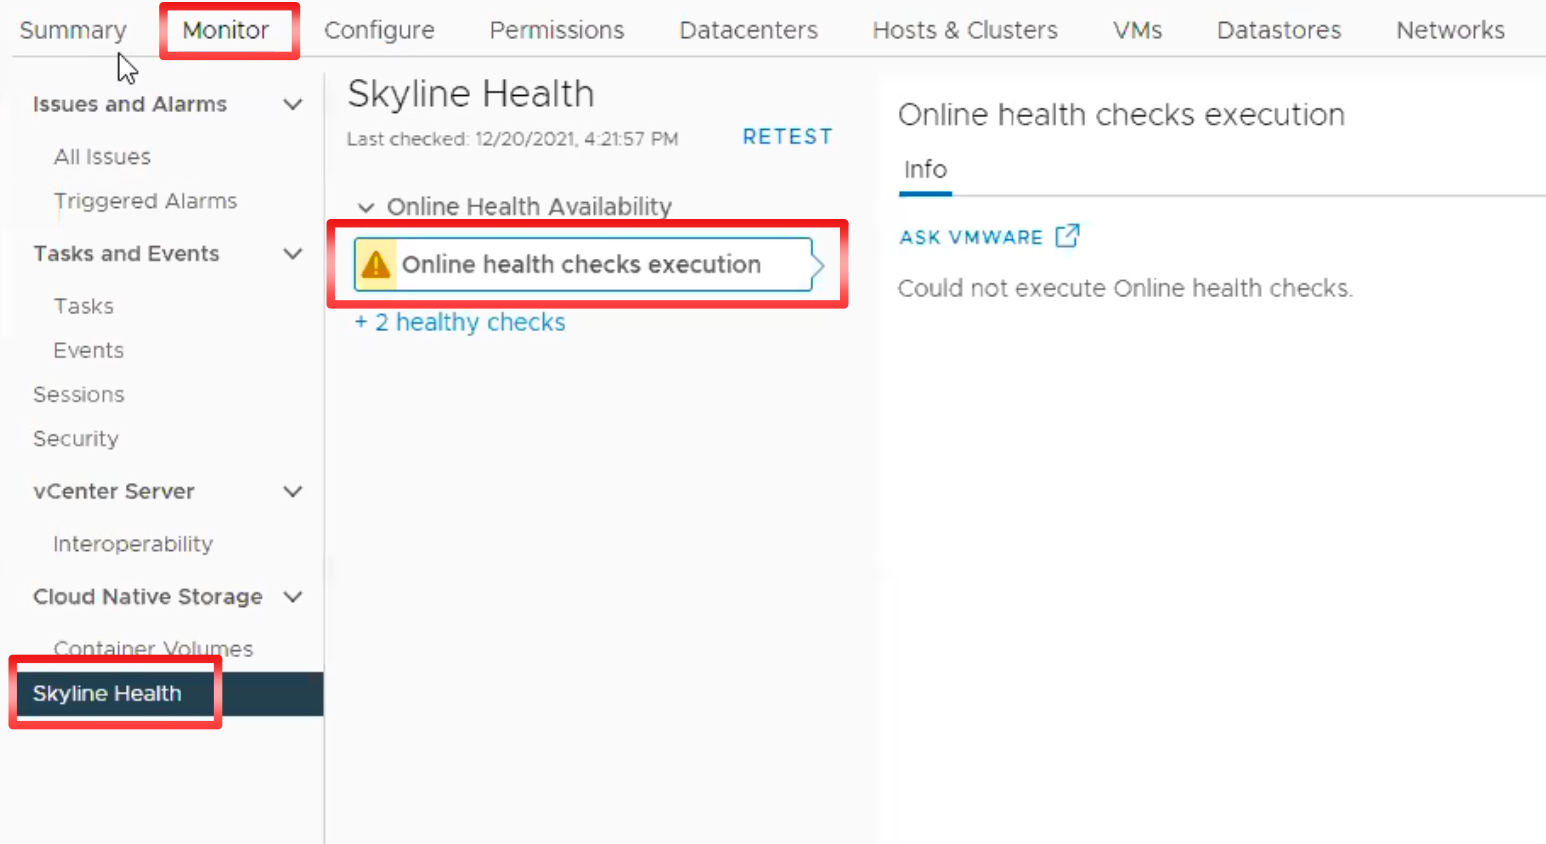
หลังจาก เราทำการ run script เสร็จเมื่อกลับที่ vSphere client browser ของ vCenter server จะพบว่า ที่ Tab -> Monitor ในหน้า Skyline Health จะ show warning “Online health checks execution” (ถ้าไม่เจอแบบนี้ก็ไม่เป็นไร นะครับ) !!!warning ที่แสดง จะหายไป เอง นะครับ!!!
Conclusion
ในบทความนี้จะเป็น workaround สำหรับ vCenter server virtual appliance 7.x เท่านั้น โดย fix version ยังไม่มีออกมาในส่วน version อื่น ให้ทุกท่านติดตาม VMSA-2021-0028 ในการทำ workaround หรือ fix version รวมถึง Product อื่นๆ ของ VMware ที่ได้รับผลกระทบ เช่นกัน.
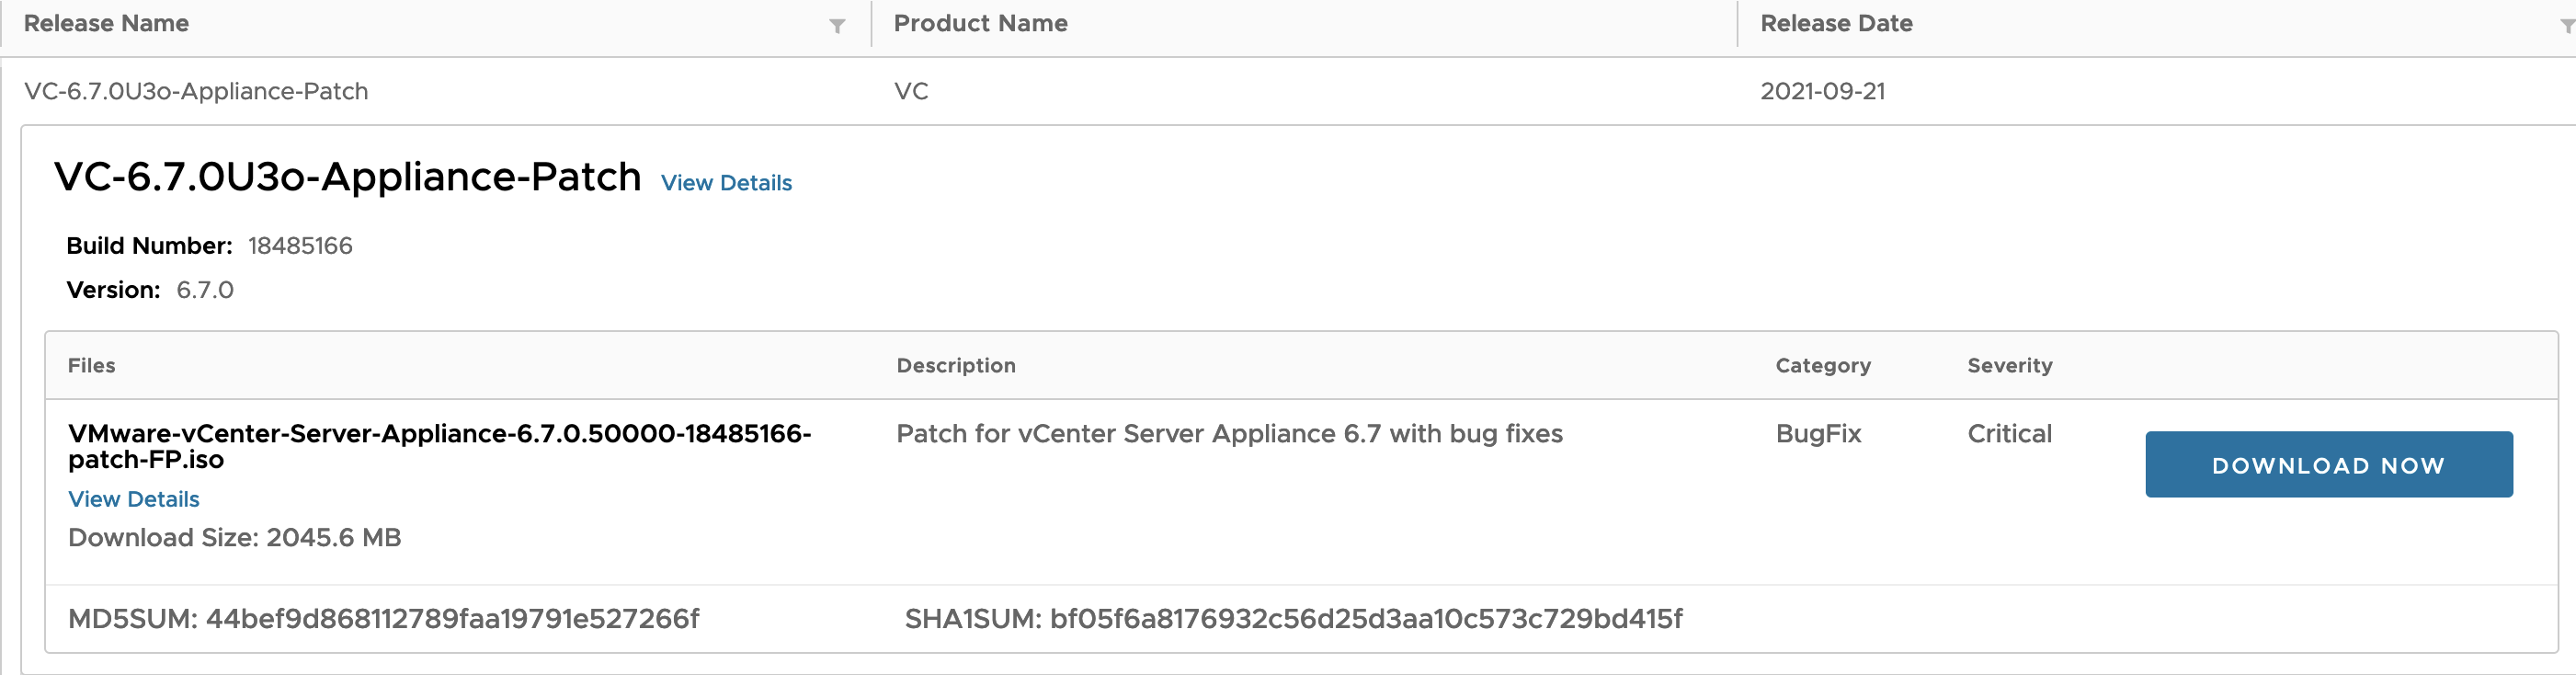
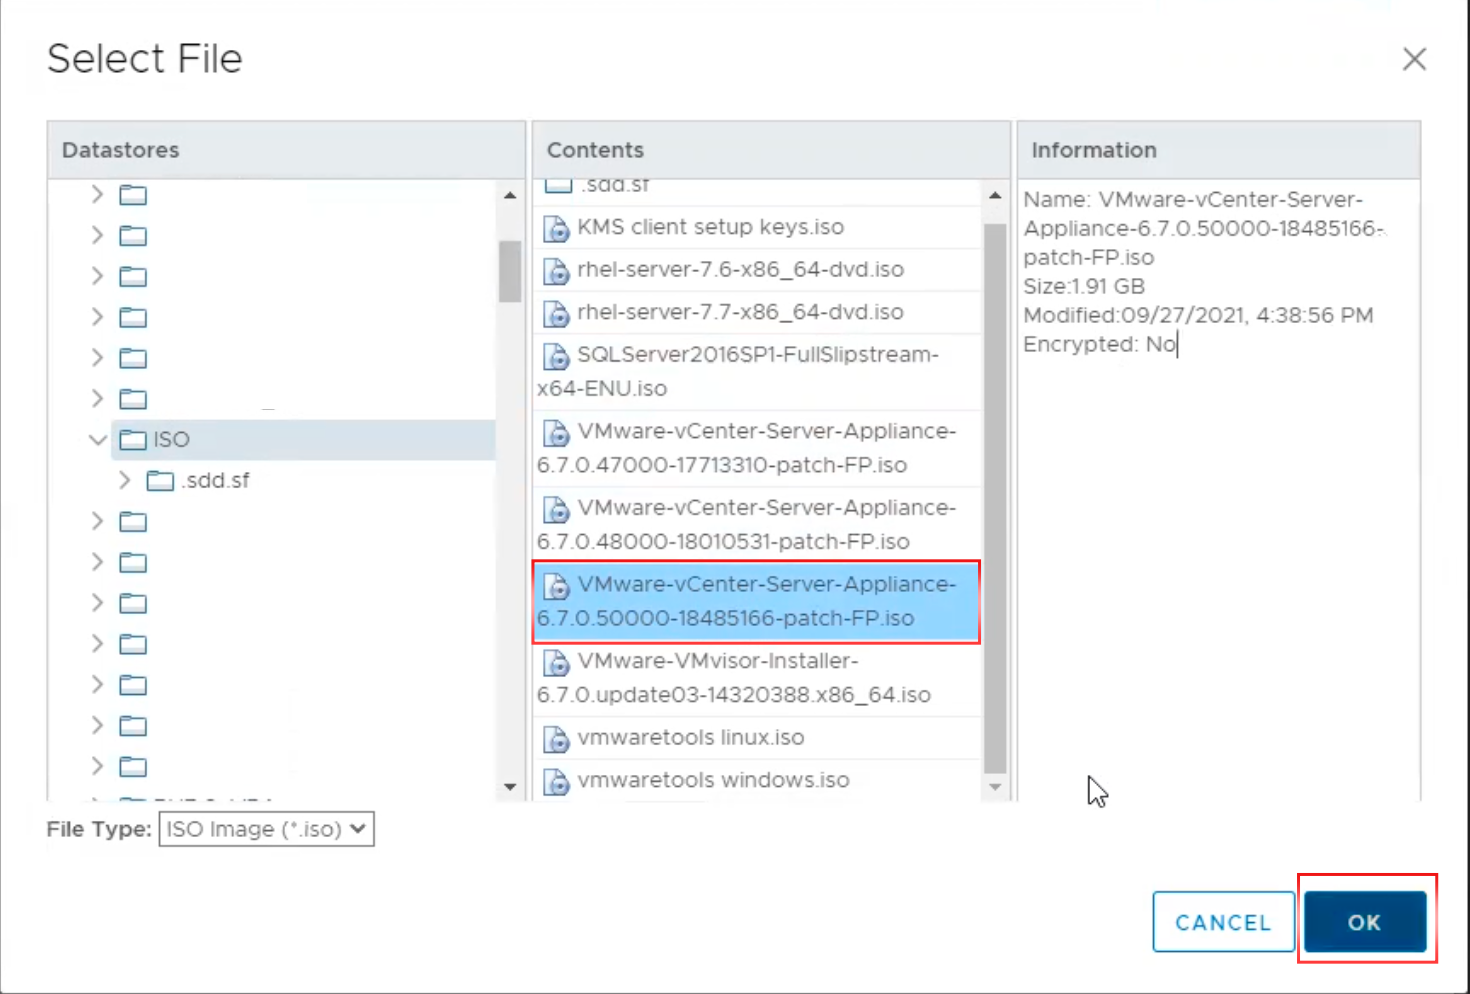
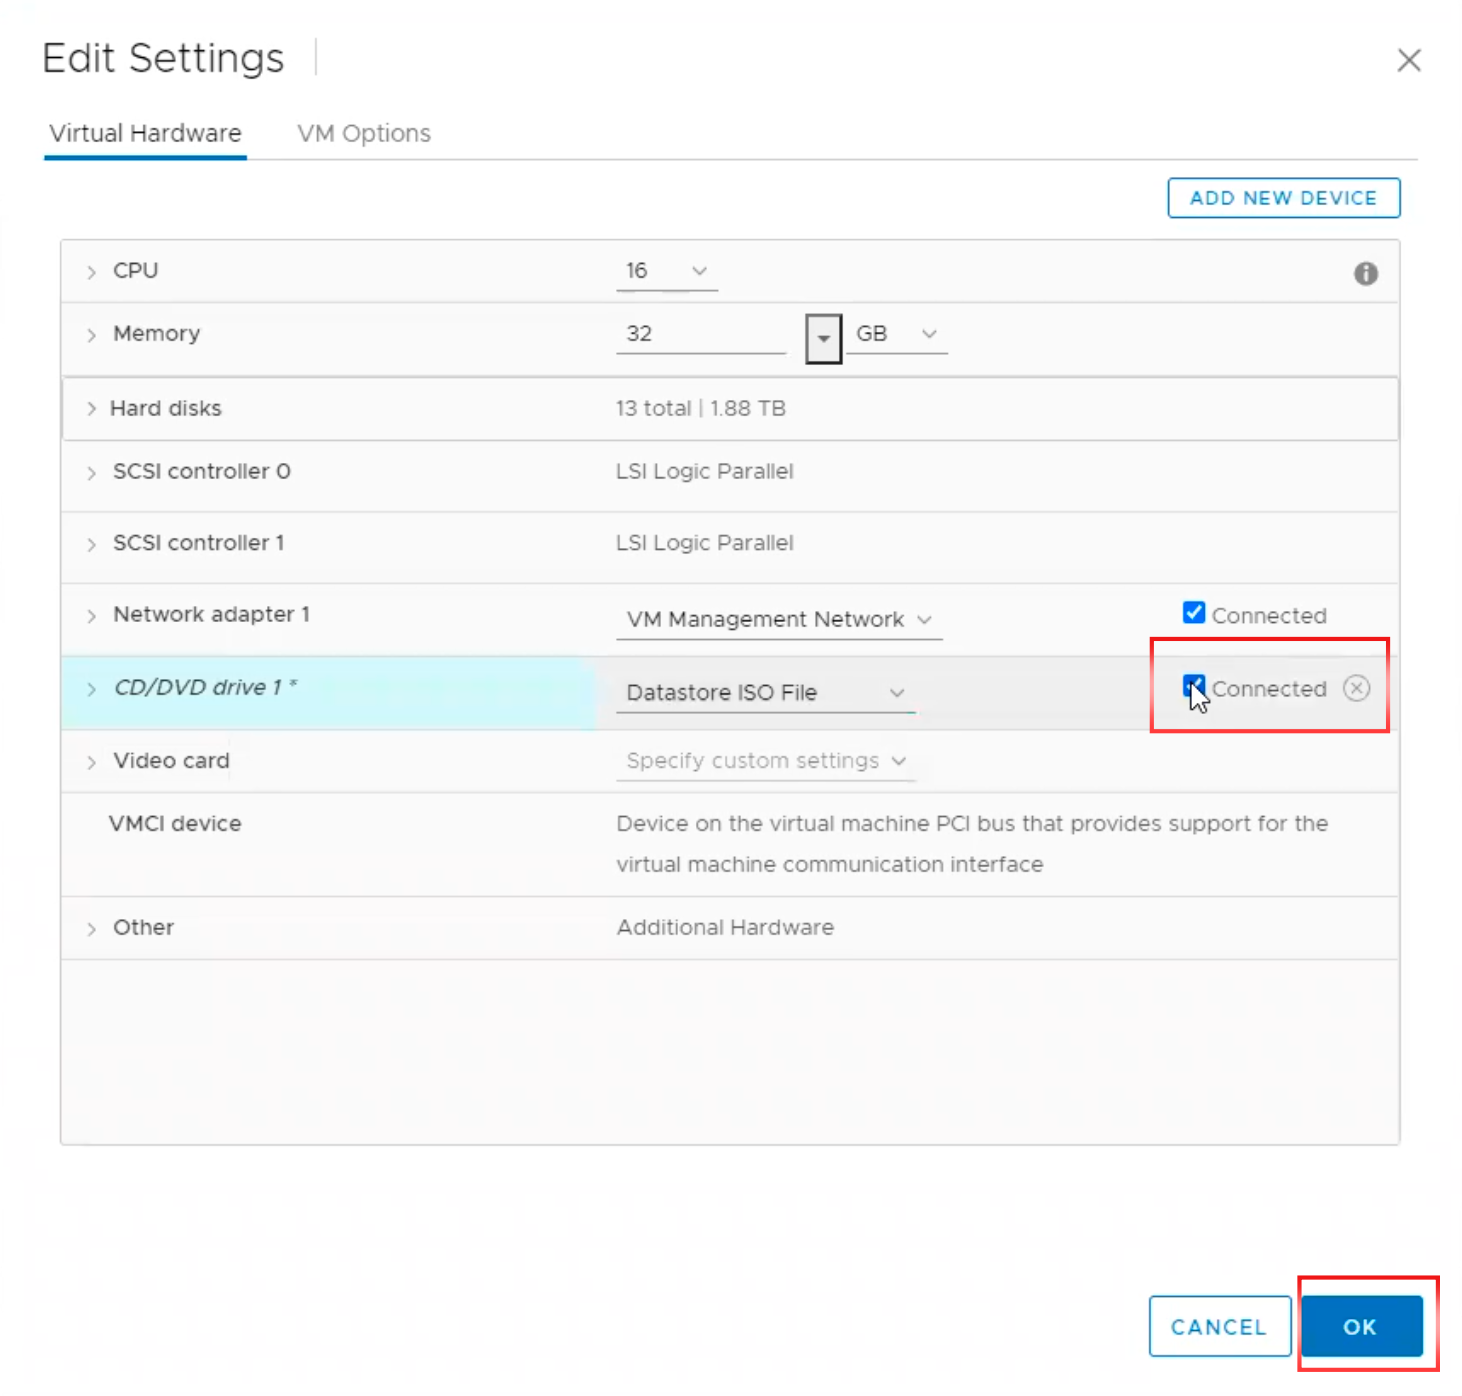
ในการ upgrade vCenter Server จะมีหลายวิธี ในบทความนี้ เราจะทำการ upgrade ด้วยวิธีแบบง่ายๆ ด้วยการ download ISO image แล้วก็ mount แผ่นให้ connect กับ vCenter Server
ขั้นตอนการ Upgrade vCenter Server
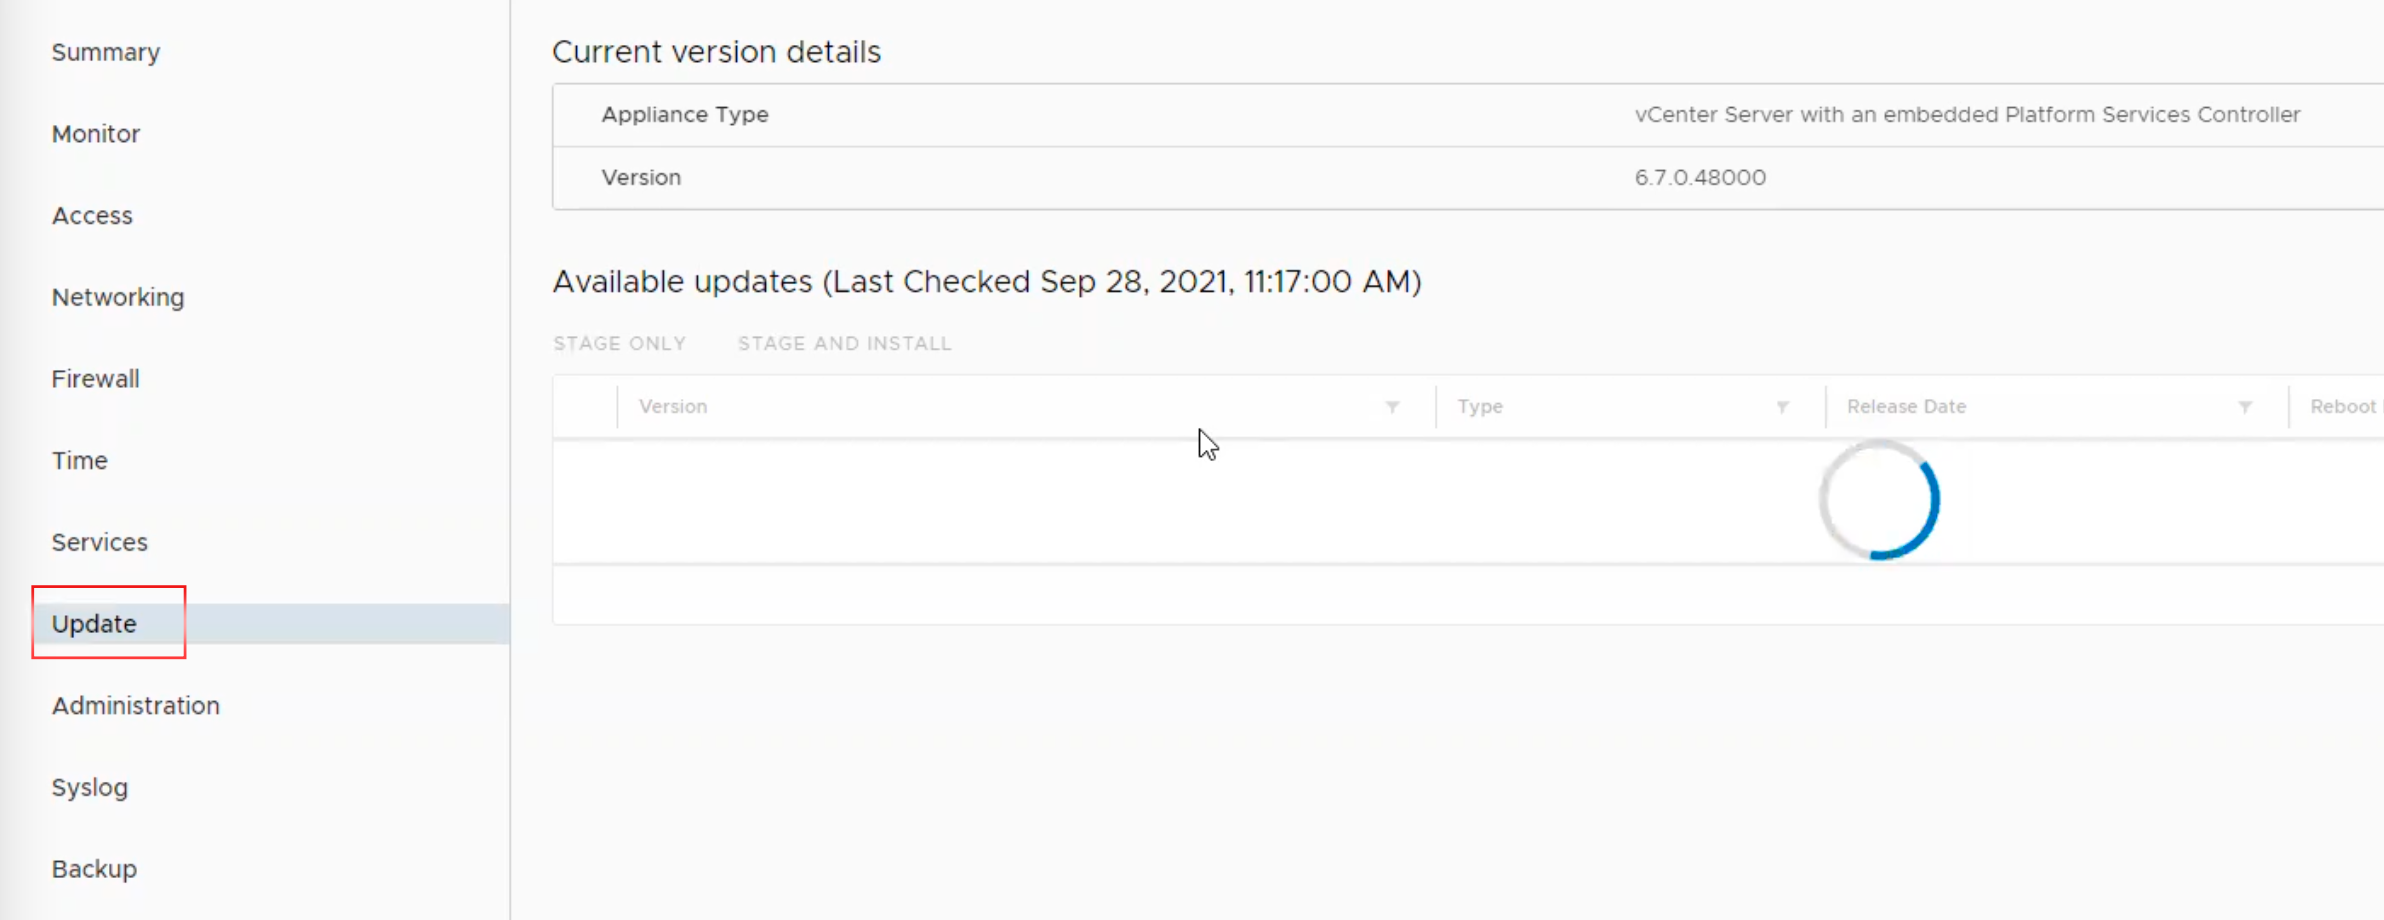
เราจะทำการ Upgrade vCenter Server version 6.7 U3n – 18010599
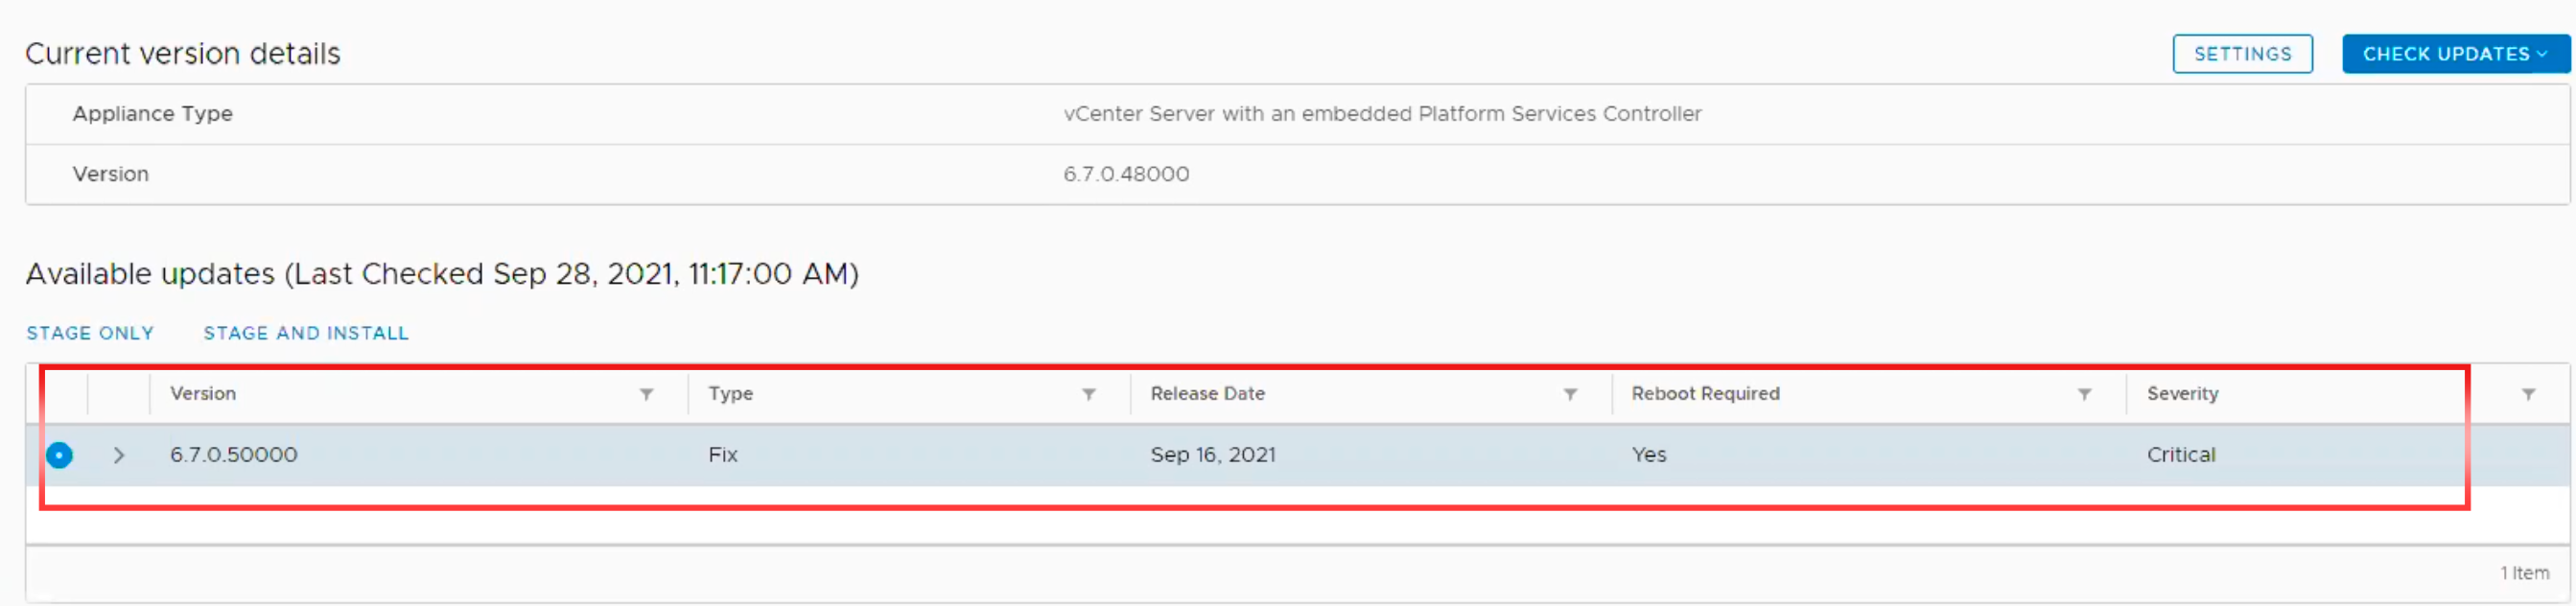
12. Version ของพี่ vCenter Server ที่เราต้องการจะ Update ก็จะปรากฏขึ้น
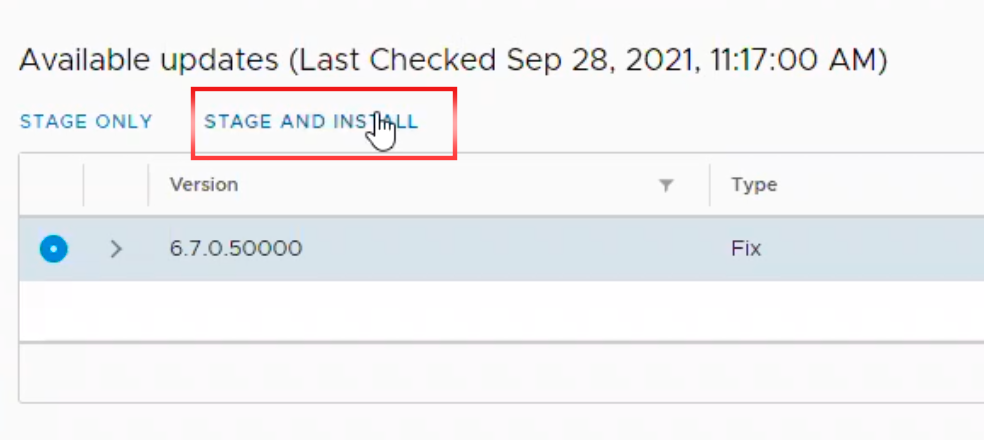
13. ทำการ เลือก “STAGE AND INSTALL“.
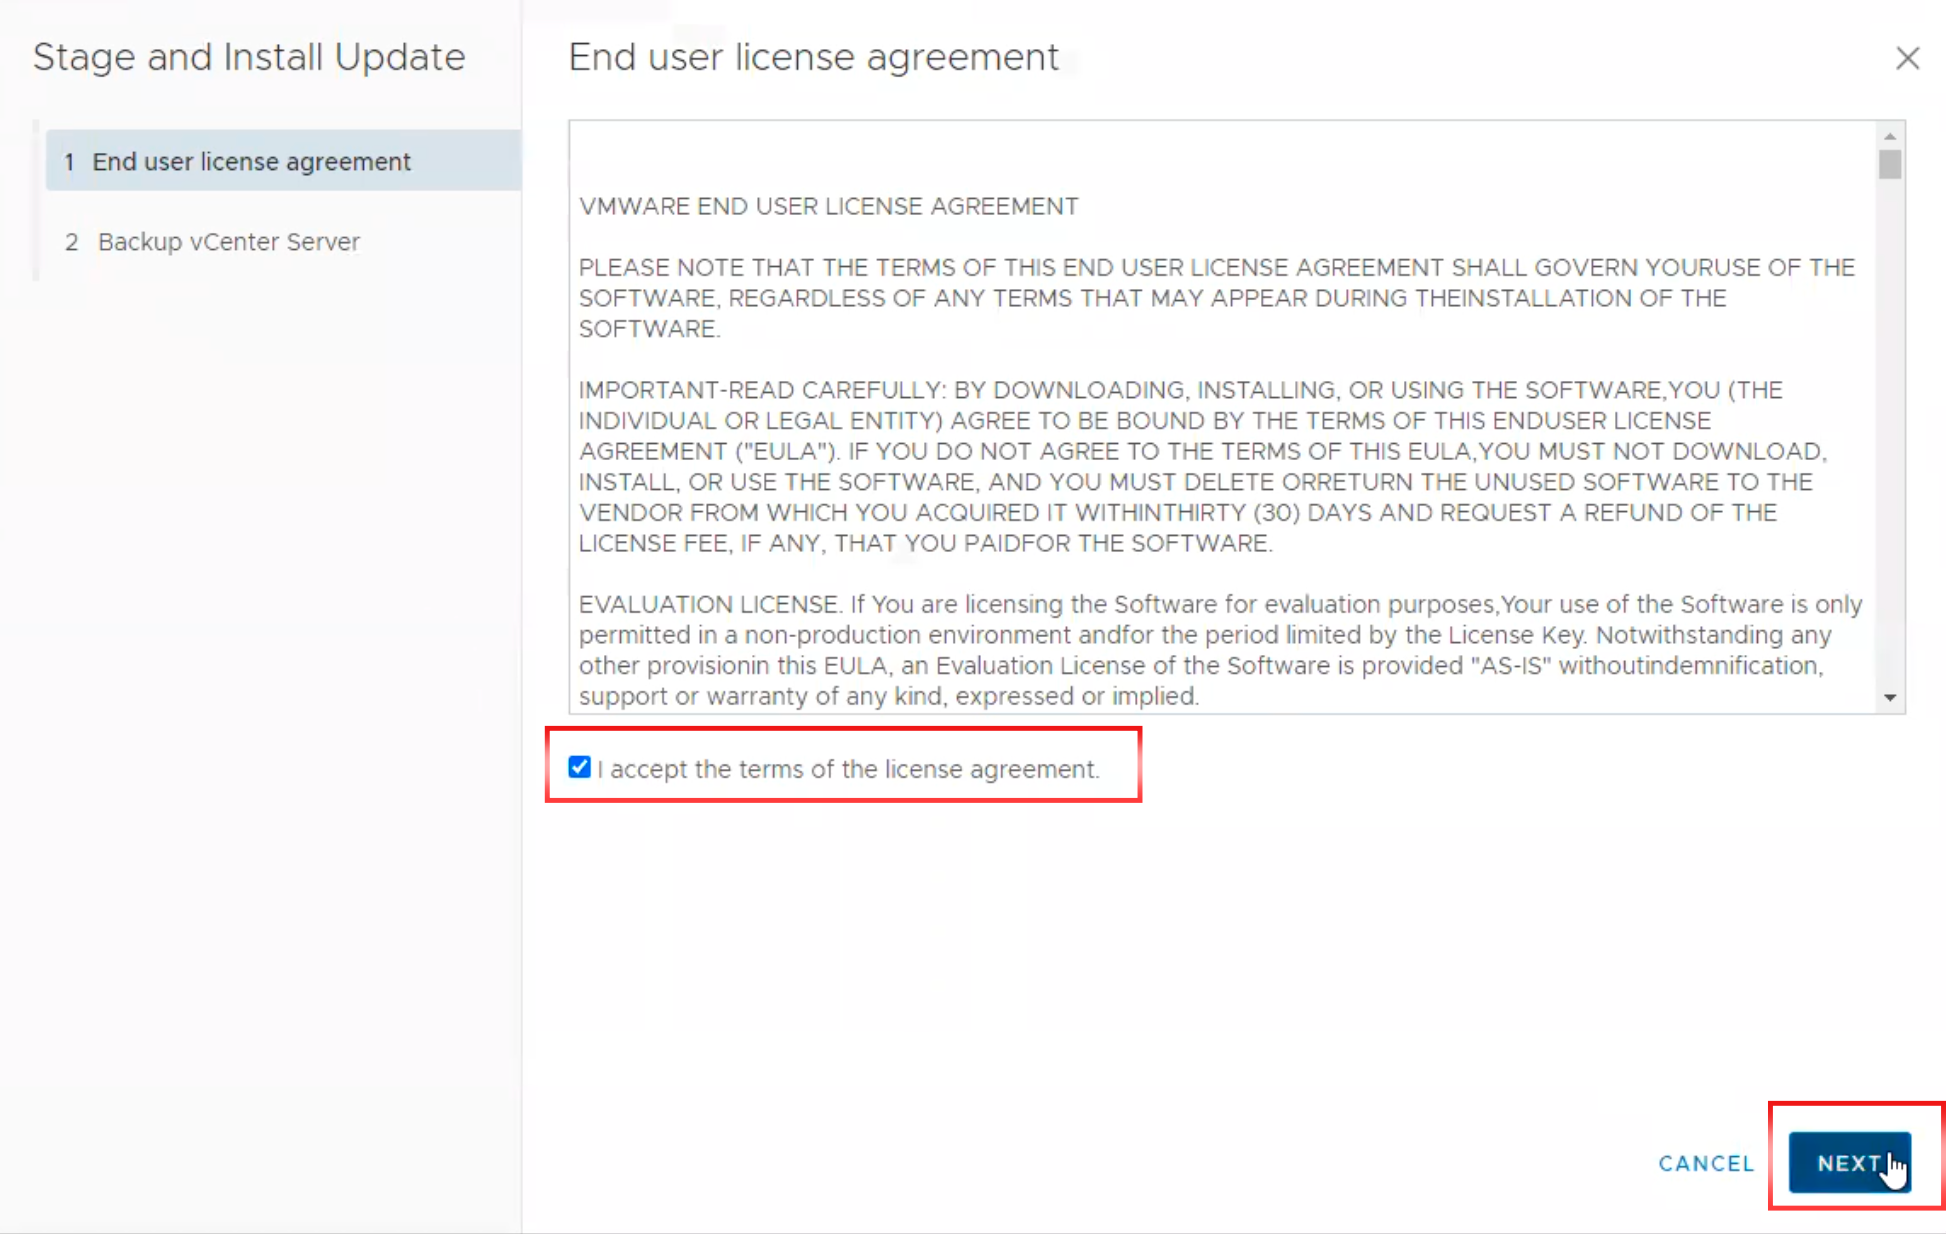
14. Click Check box แล้วก็ Click “NEXT“
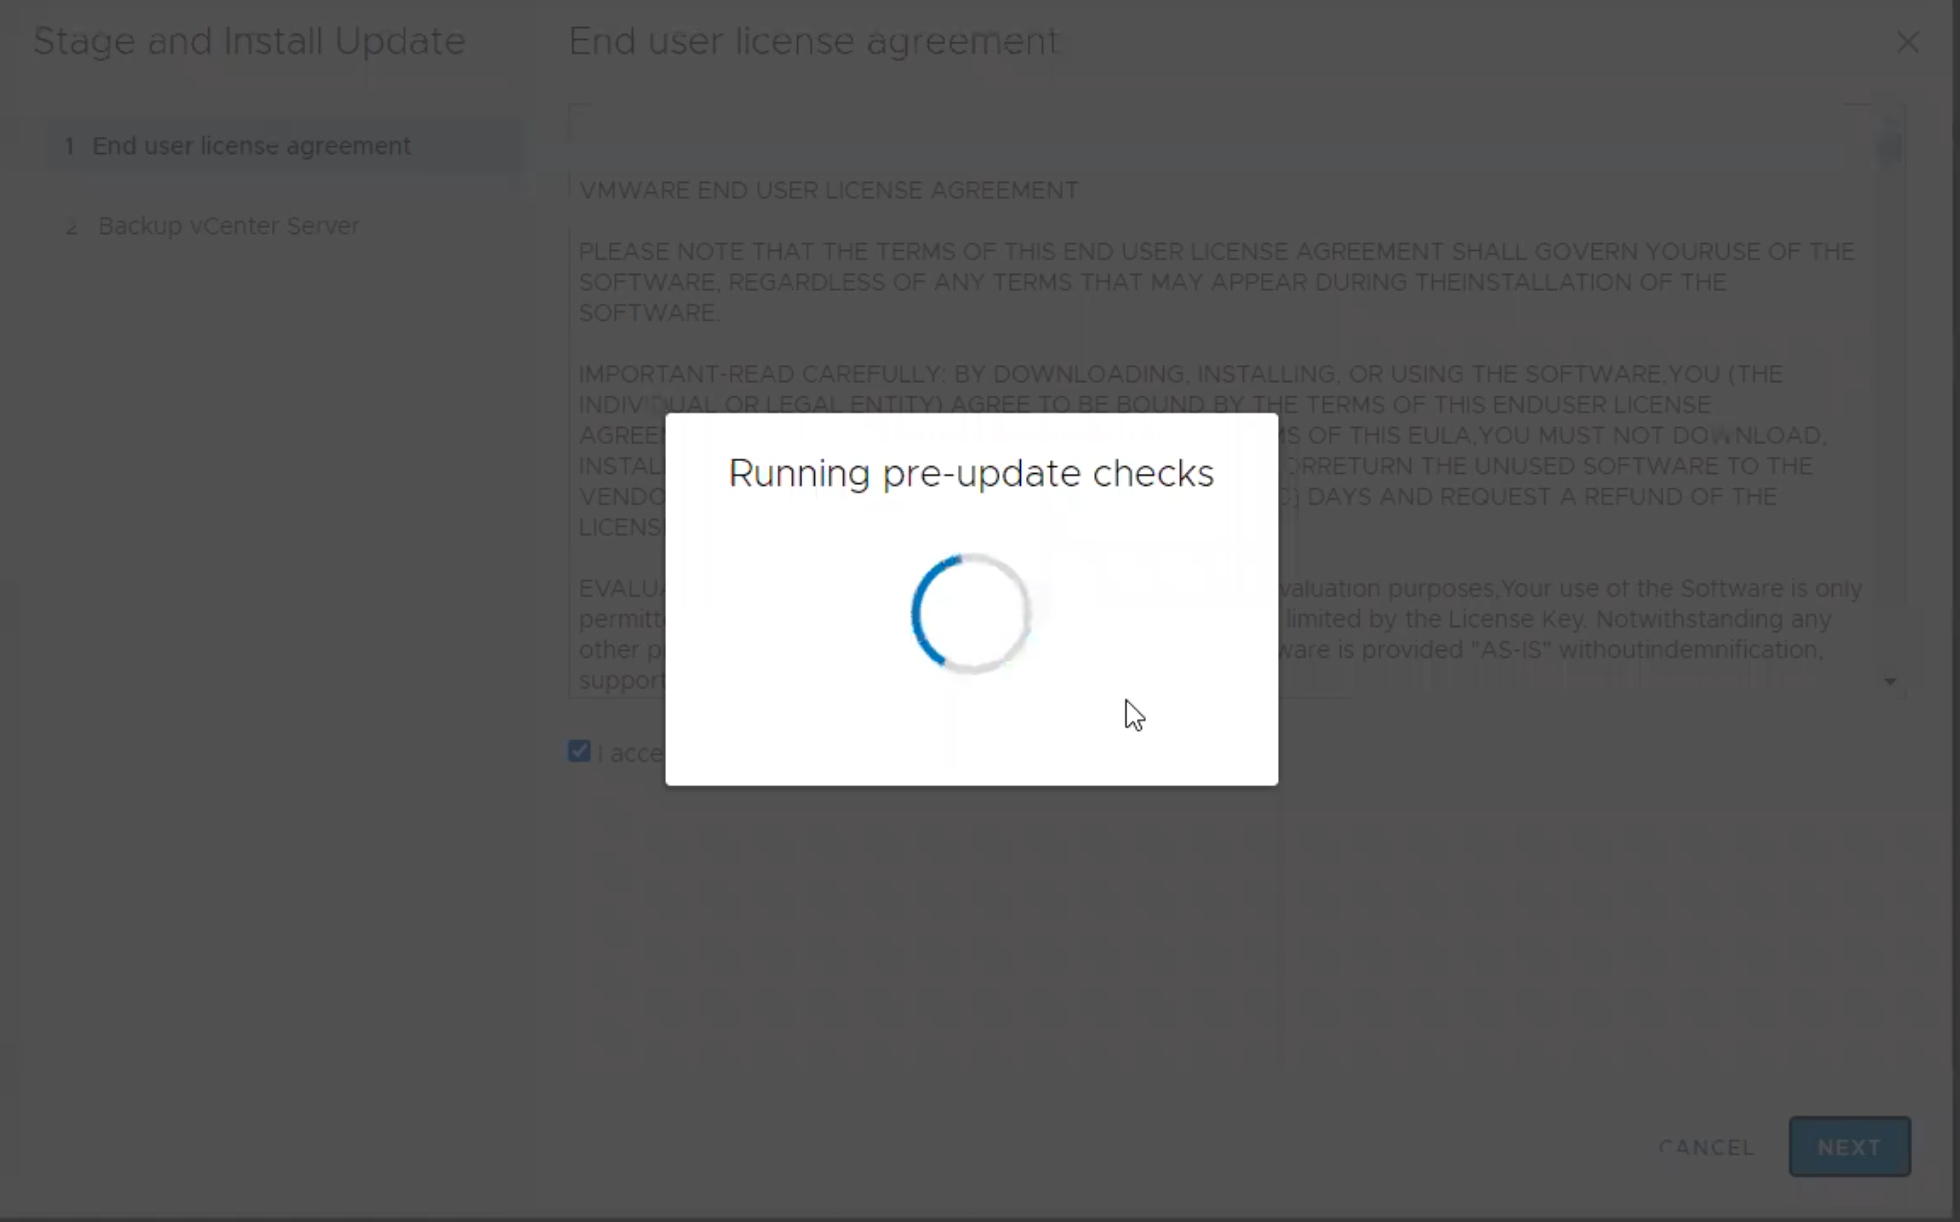
15. จะแสดงการ “Running pre-update checks“
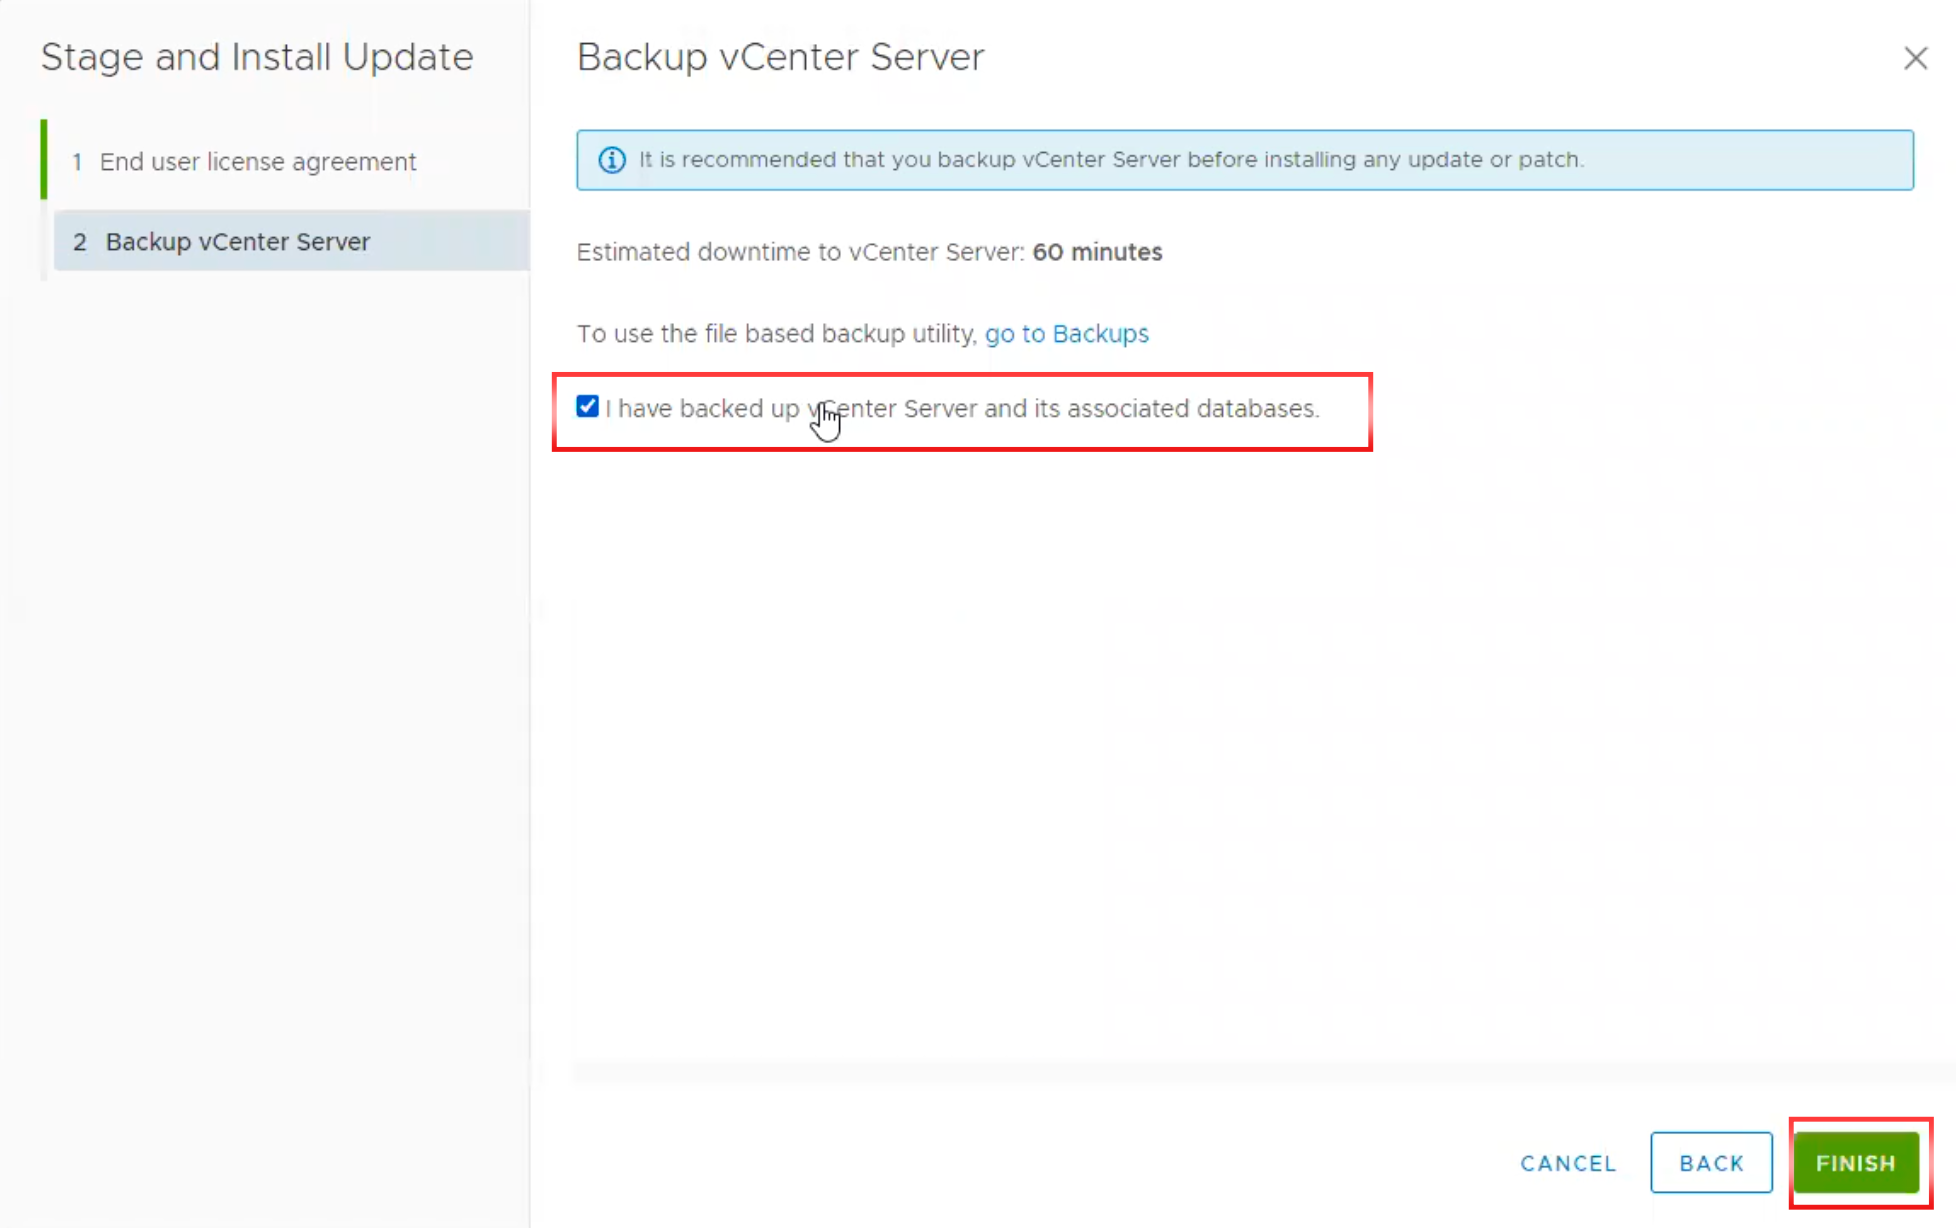
16. ทำการ ตรวจสอบว่าเรามีทำการ Back-up vCenter Server หรือไม่ (ถ้าเรามีการ Back-up vCenter Server ไว้ก่อนแล้วให้ทำ การ check-box) Click “FINISH“
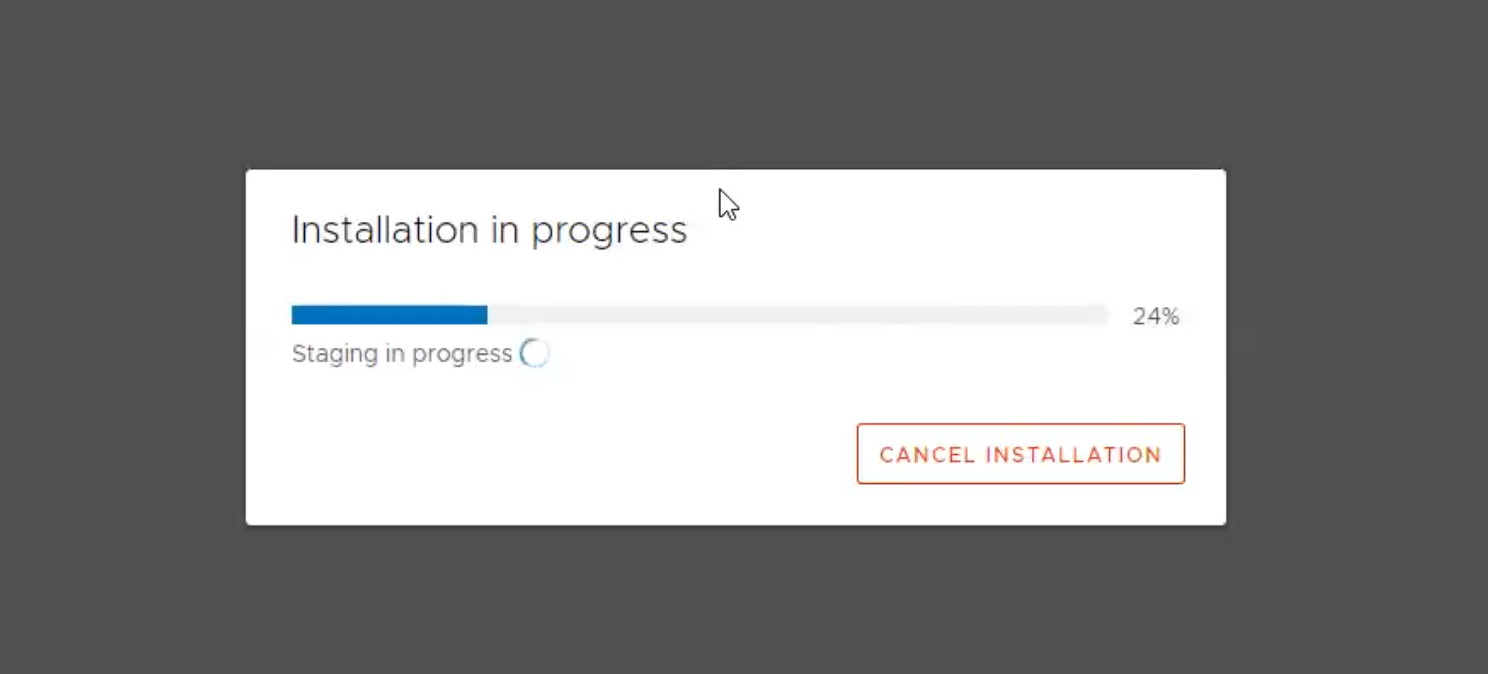
17. ขั้นตอน ต่อไปจะเป็นการ Install vCenter Server
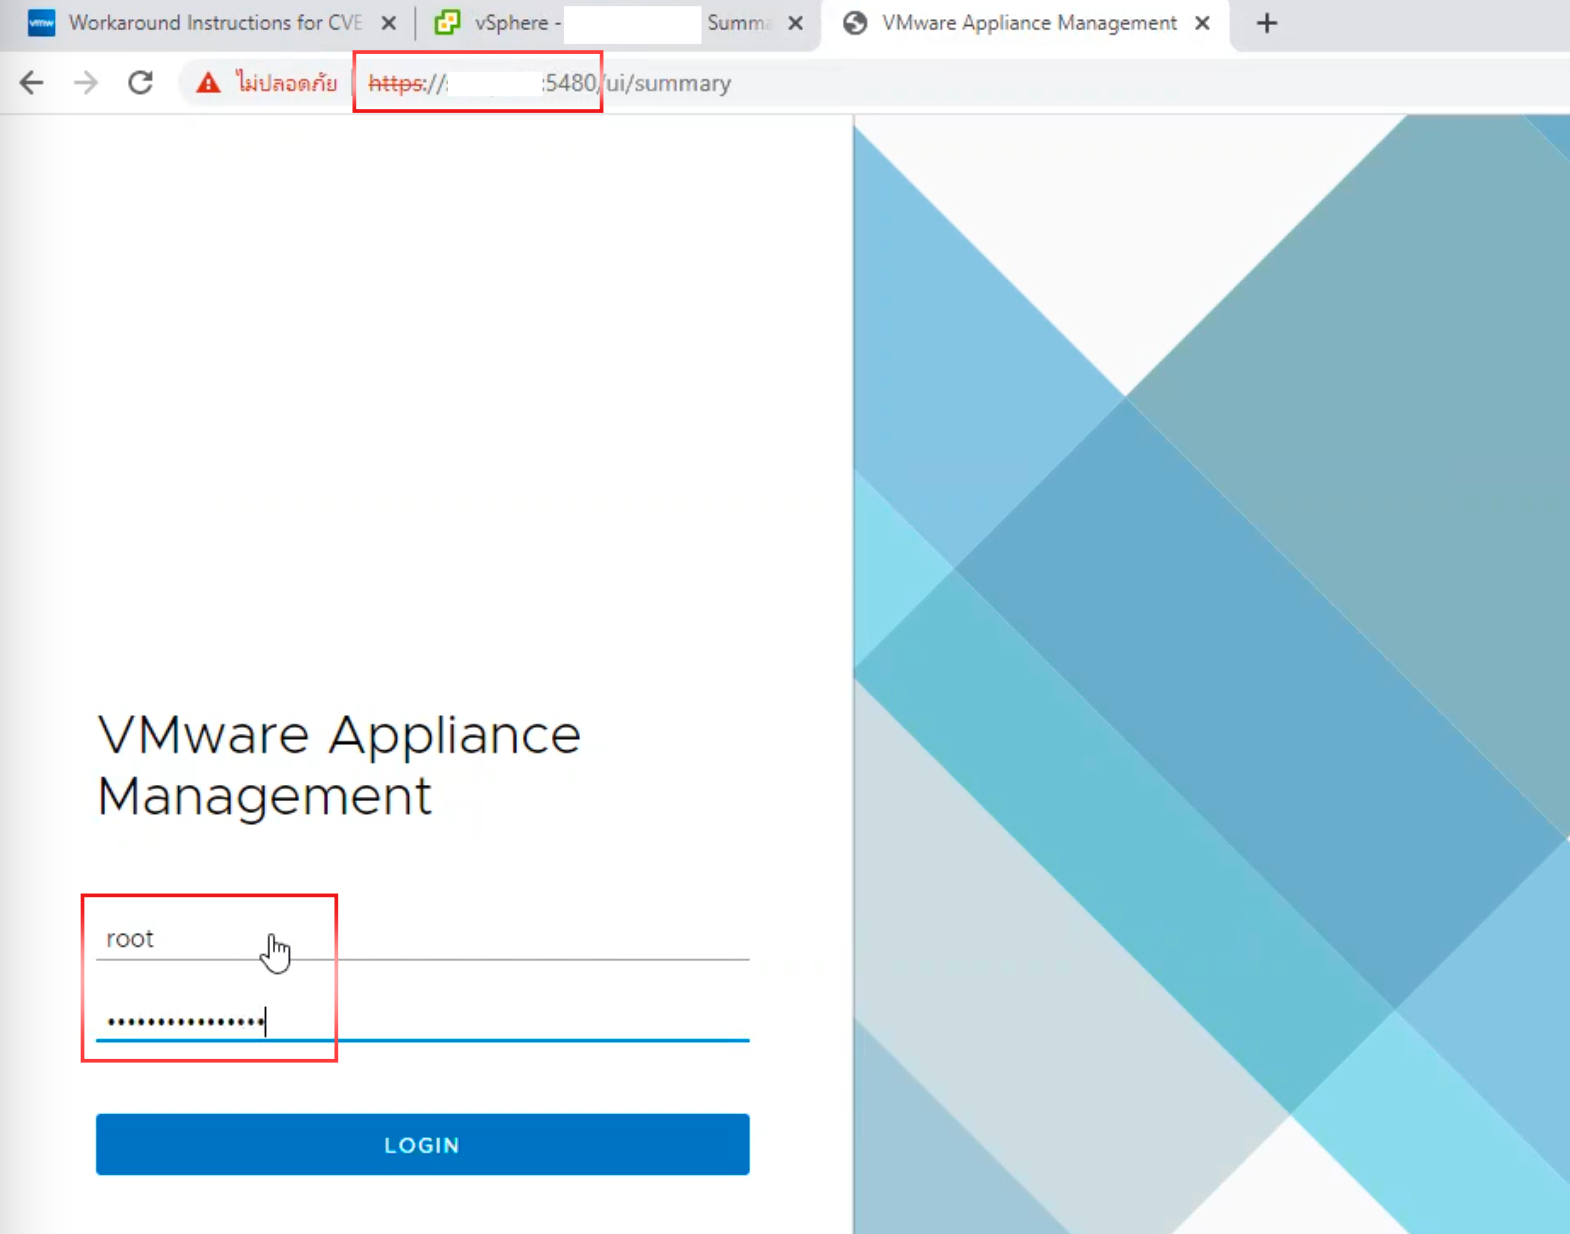
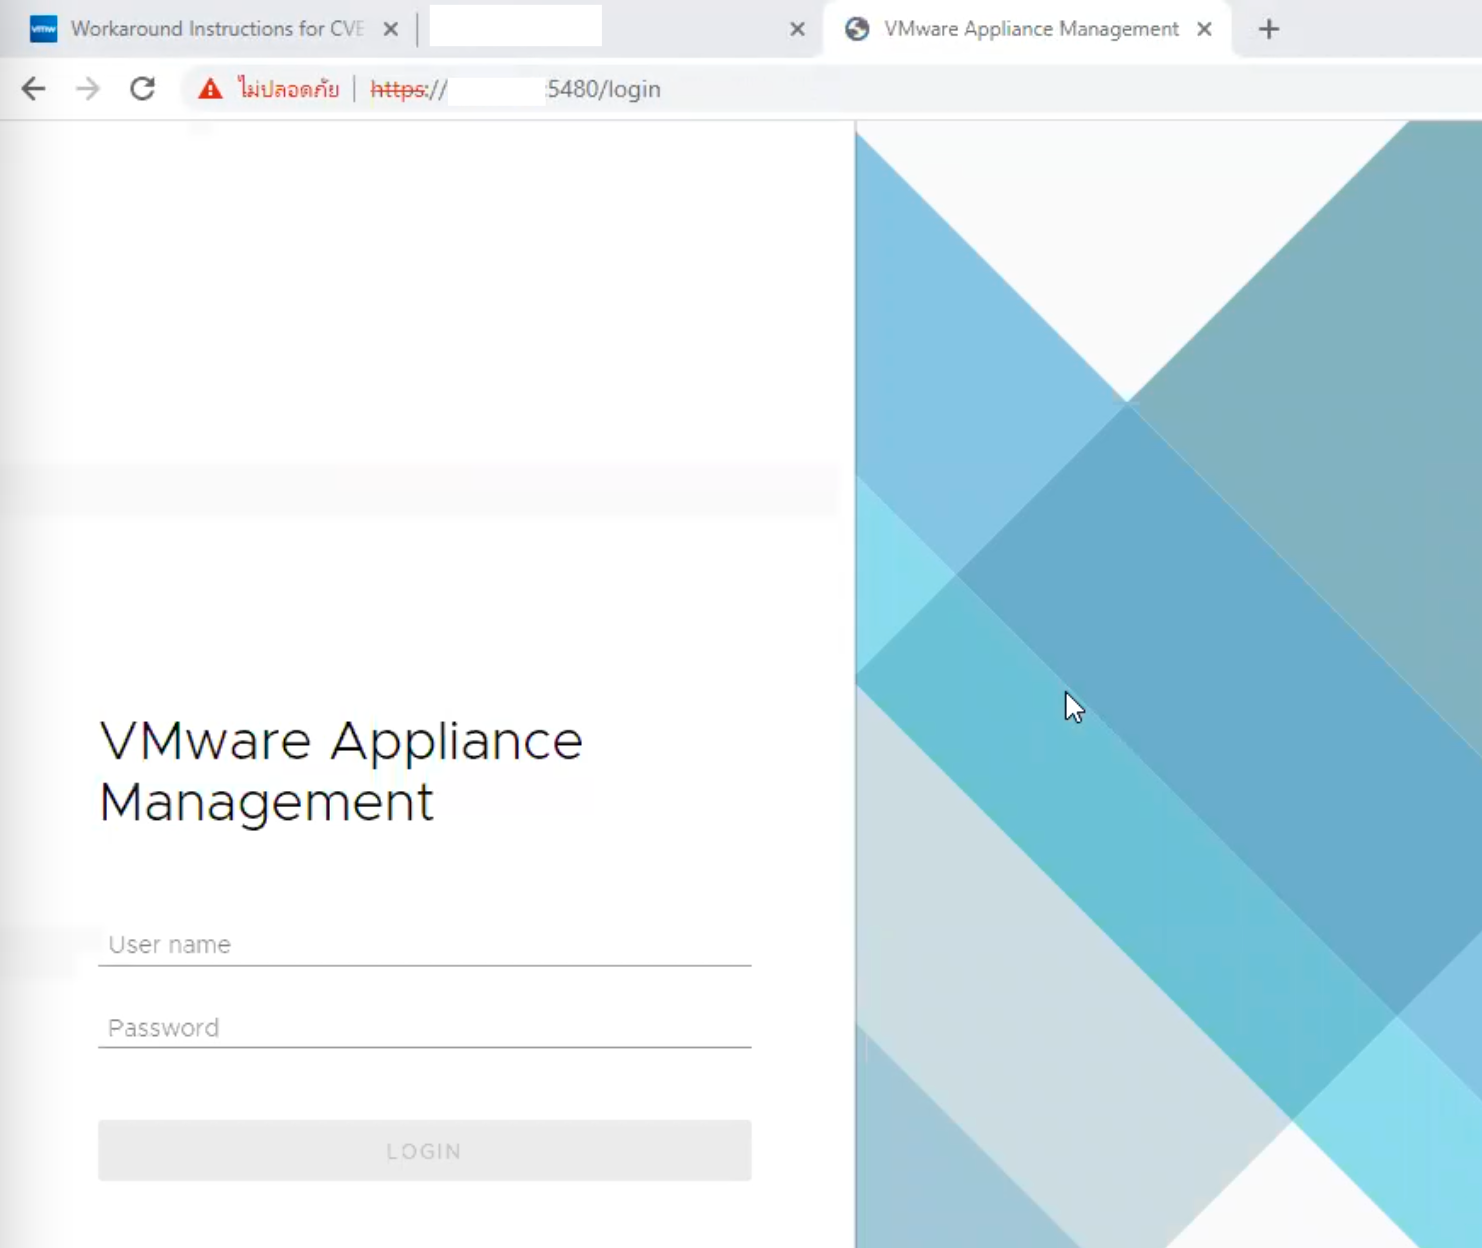
18. โดยประมาณ 87% vCenter Server จะกลับมาที่หน้า Log in อีกครั้งให้เราใส่ user “root”
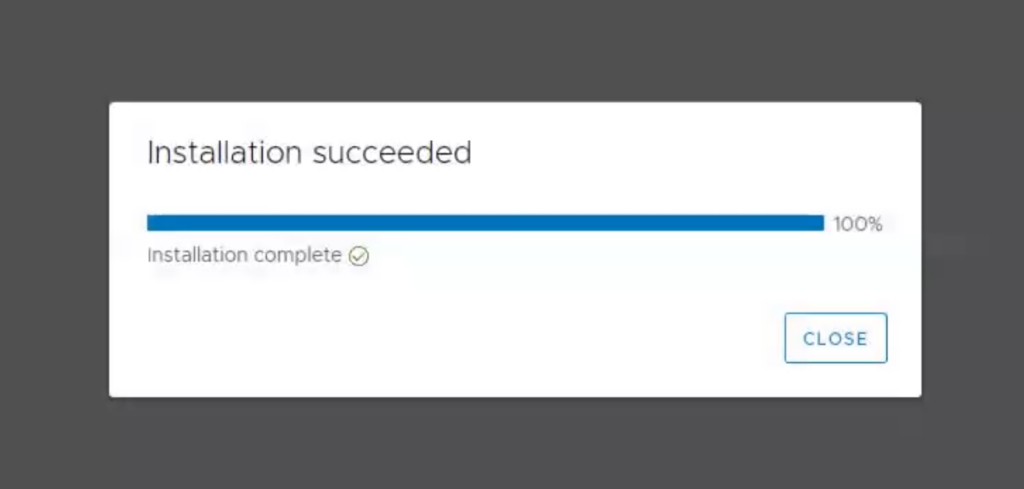
19. Installation Completed 100%
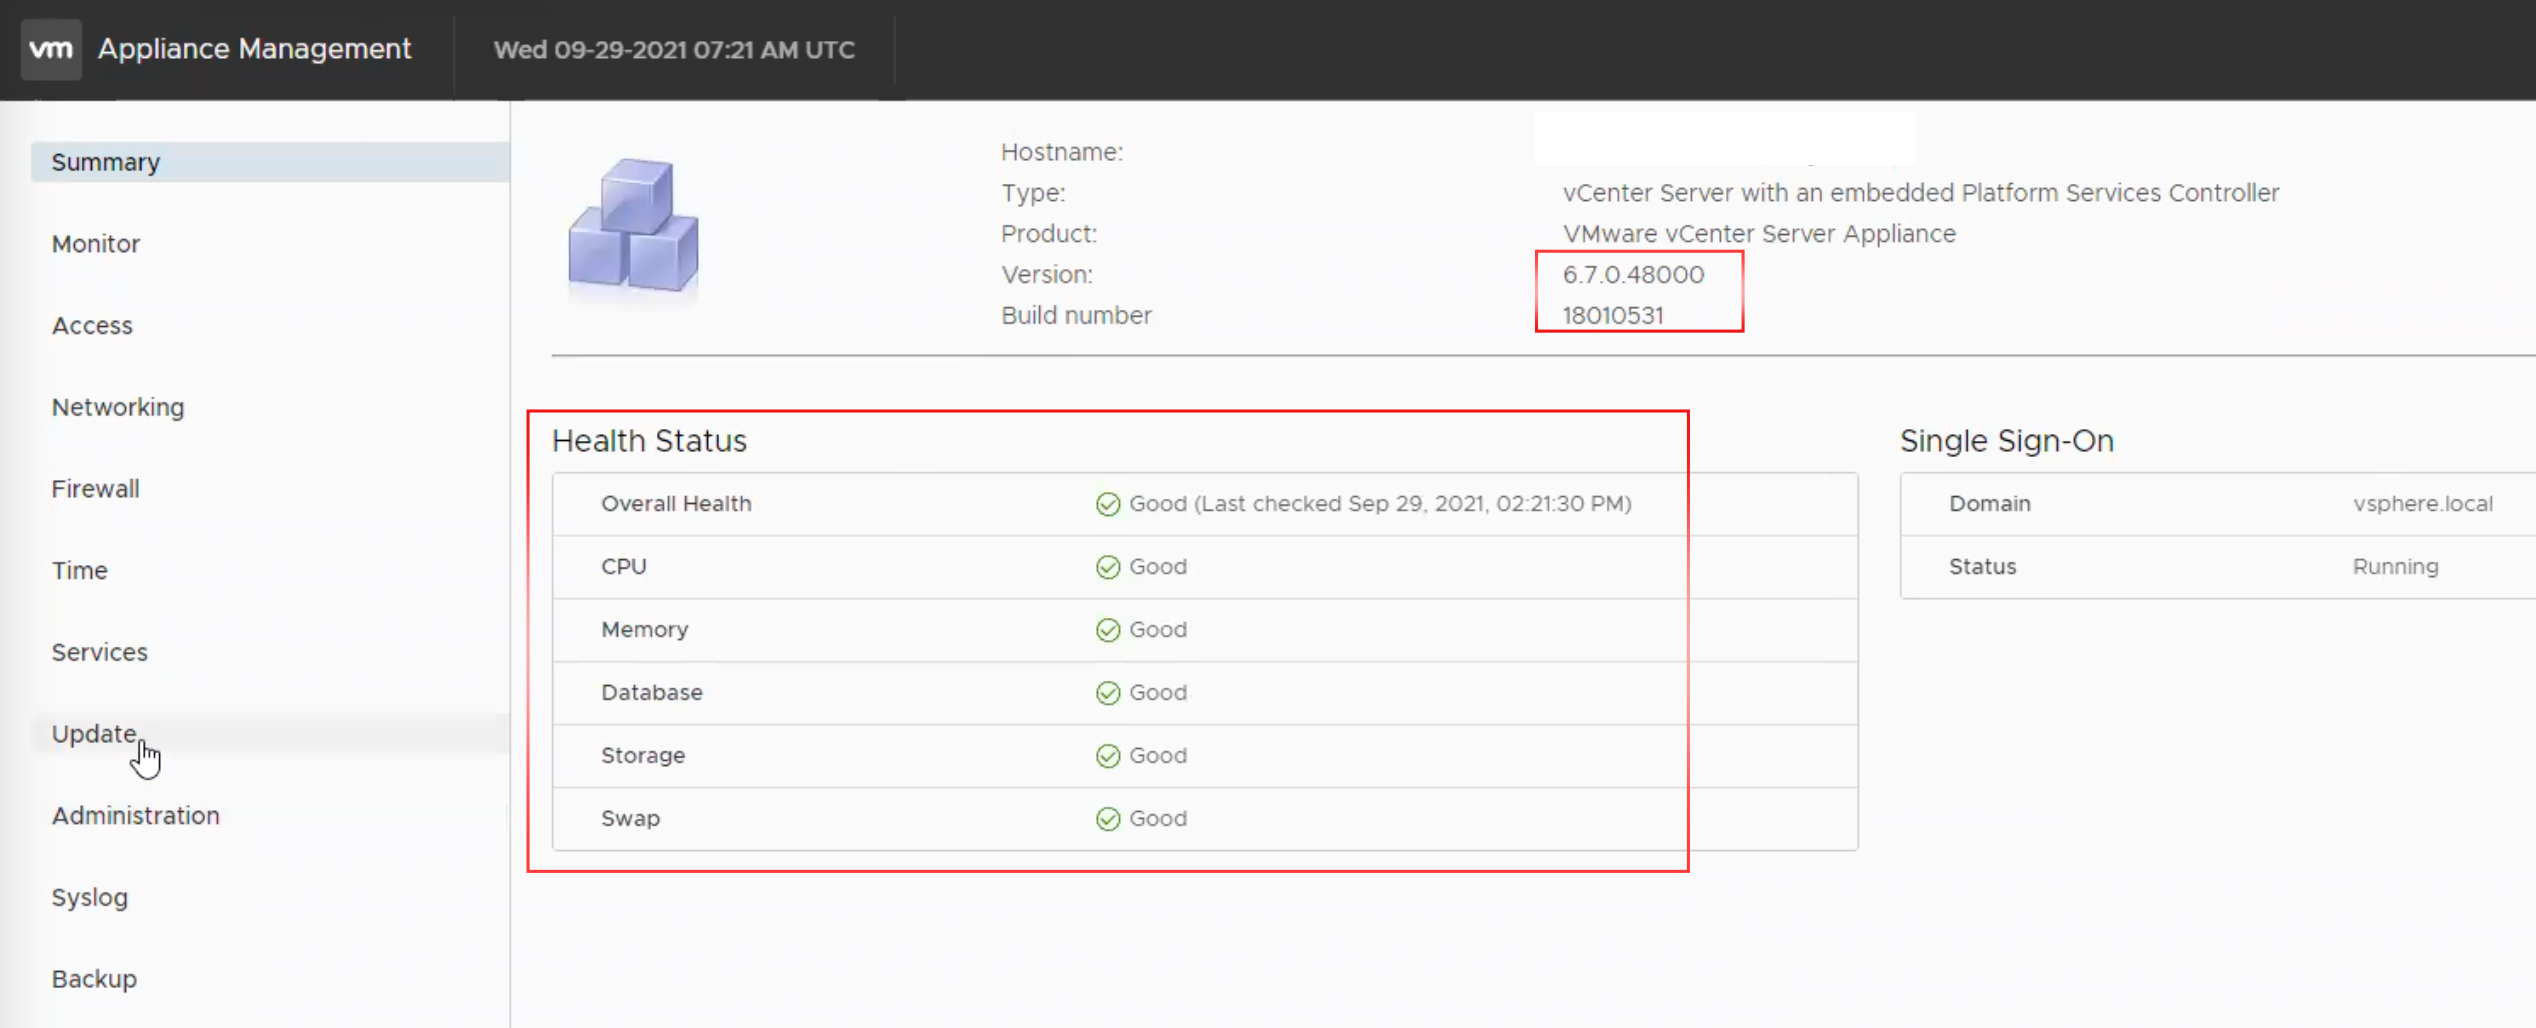
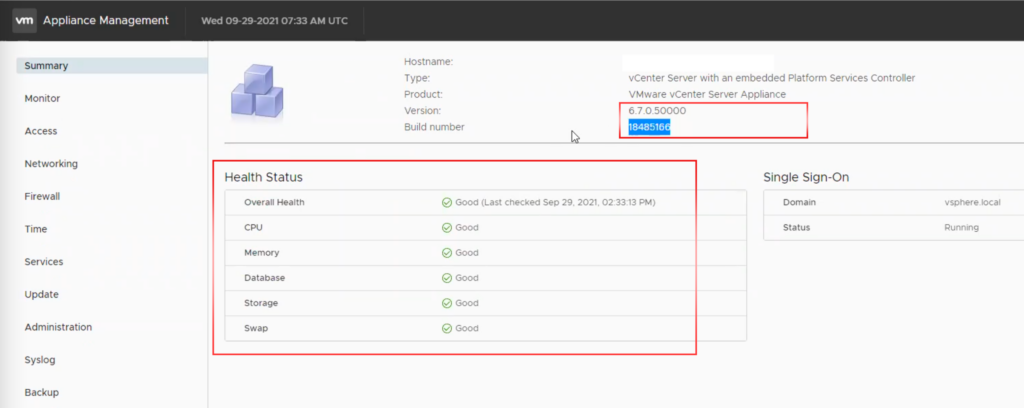
20. หลังจากเรา update เสร็จเรียบร้อย ก็จะพบว่า vCenter Server แสดง version ใหม่ที่เราทำการ update เสร็จเรียบร้อยแล้ว ให้ สังเกต Health Status จะต้อง แสดง status “Good” ทั้งหมด “vCenter Server 6.7.0.50000 – 18485166“