Pre-check the SDDC warning “Checks whether the SDDC Manager VM system directory has enough disk space”.

By Lerpong Intaraworrapath | 29th July 2022
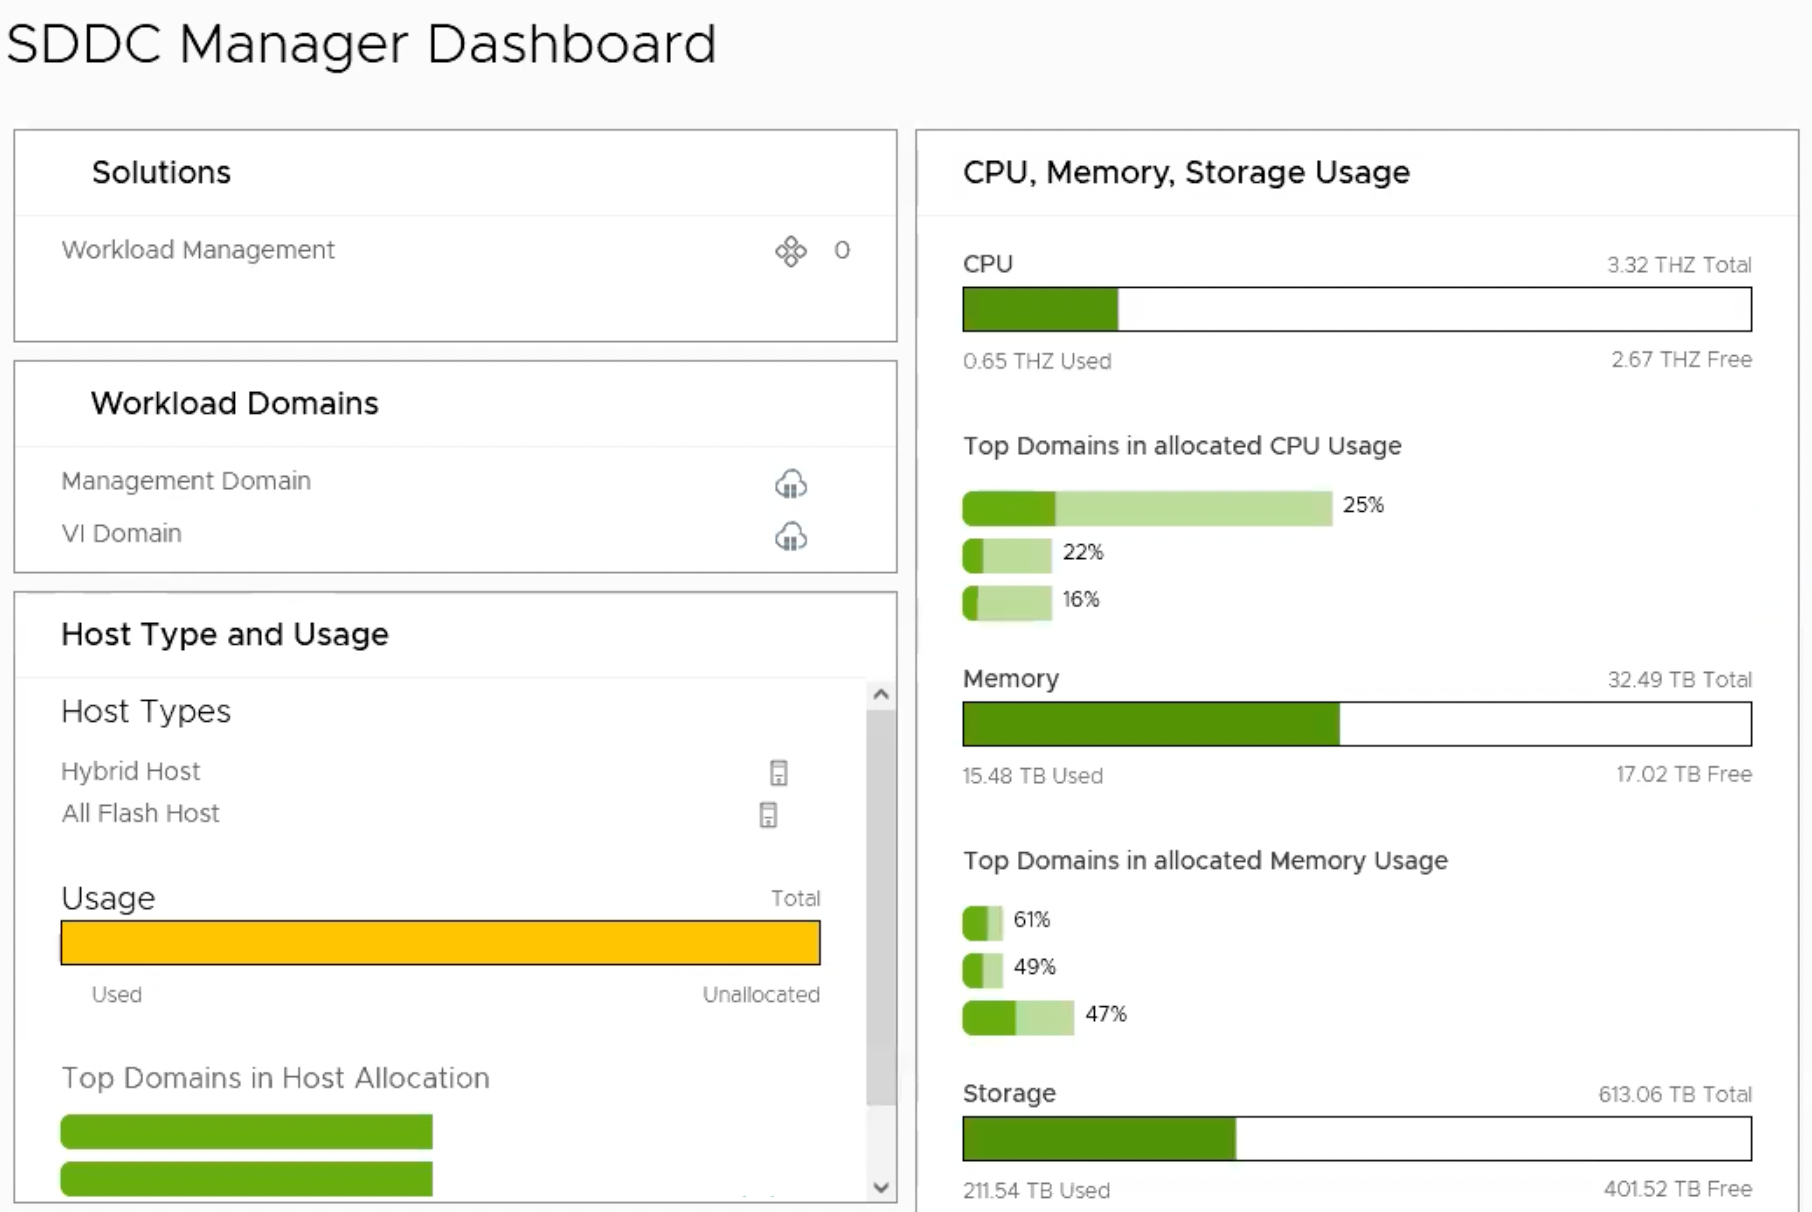
We intend to upgrade VMware Cloud Foundation (VCF) from 4.2.1 to 4.4.1.
Before upgrading VCF, we must do a pre-check on all VCF components.

The pre-check begins with the SDDC manager.

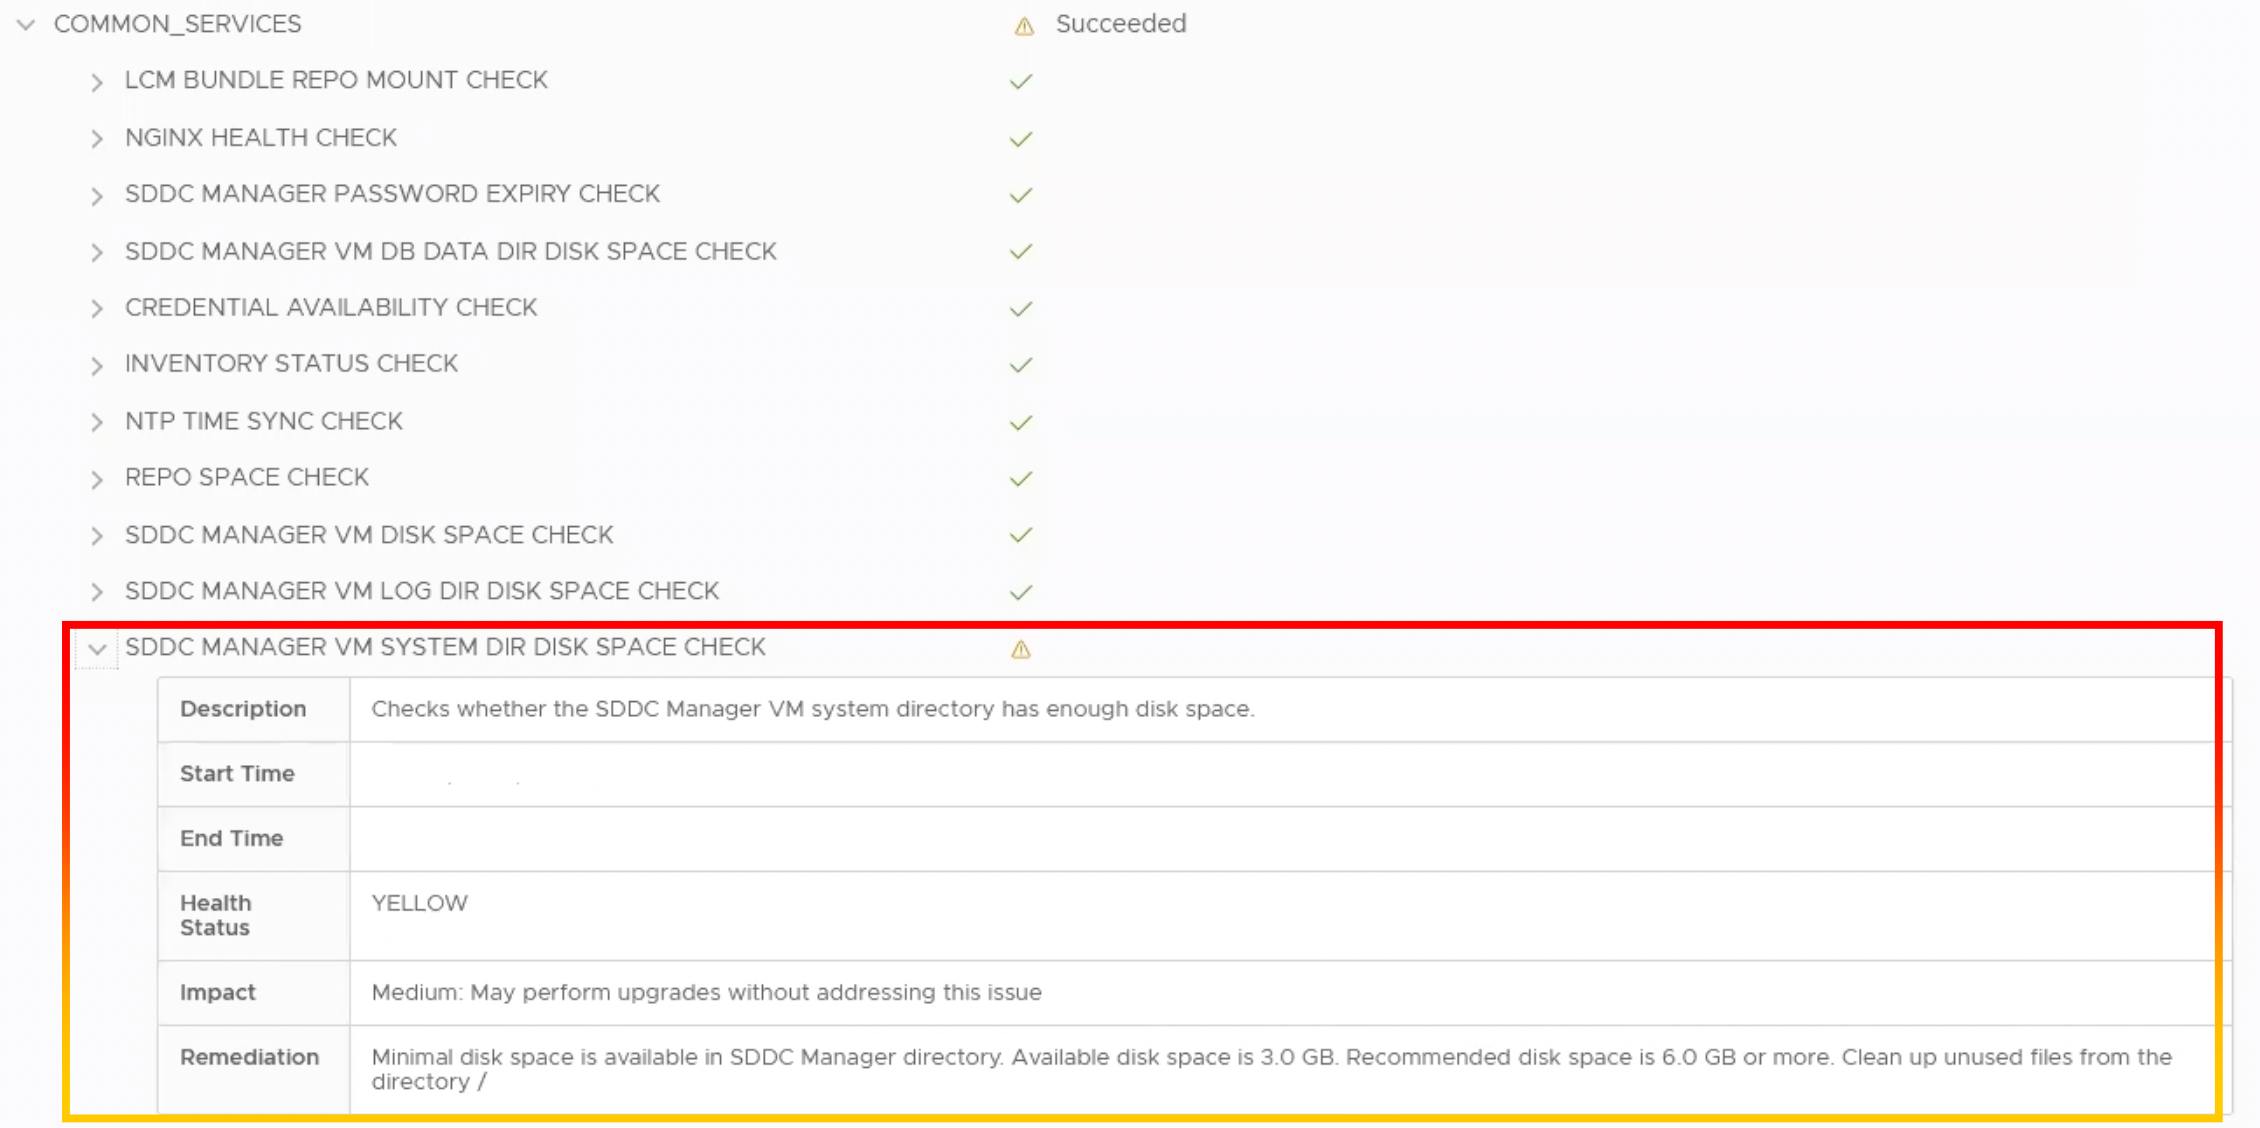
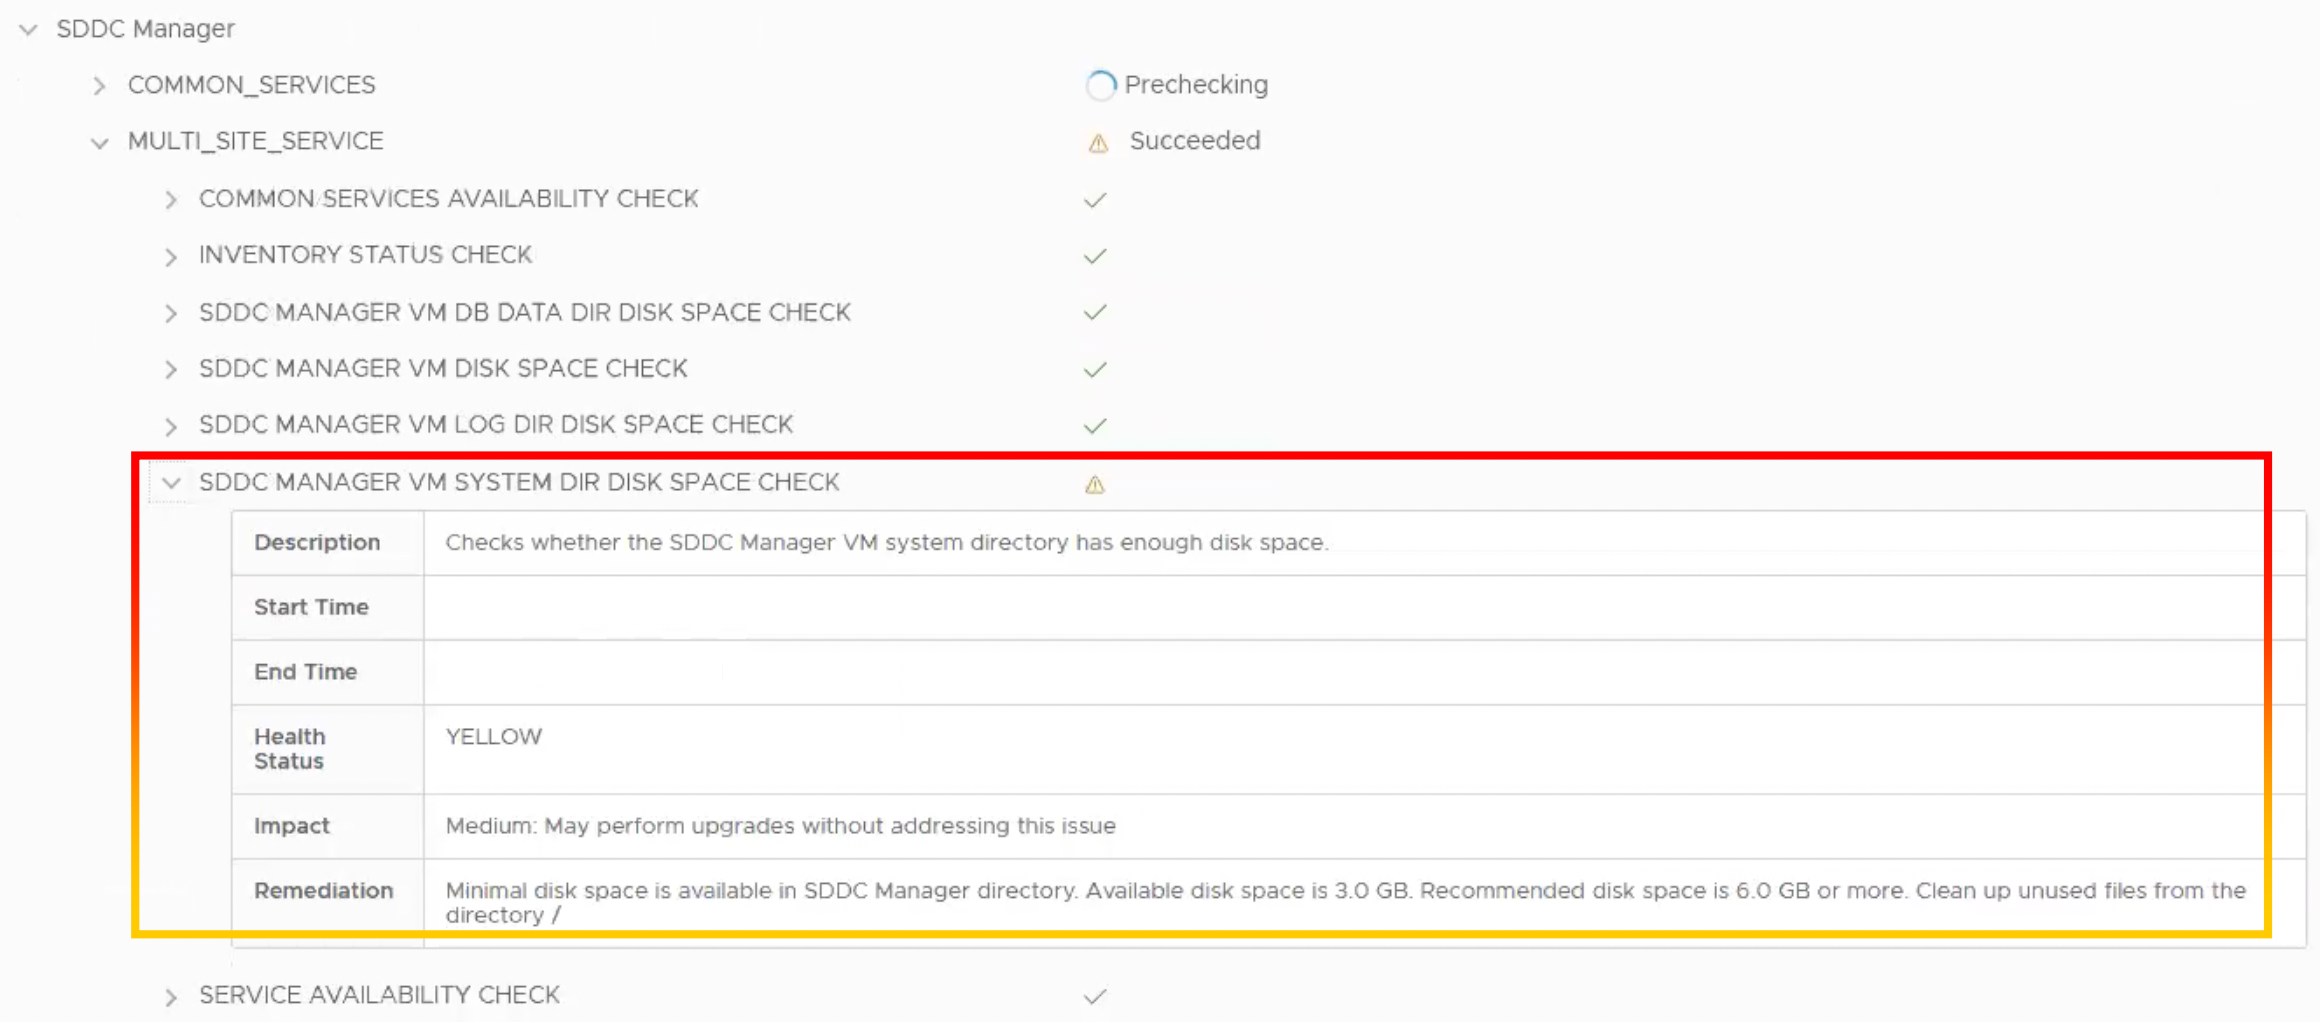
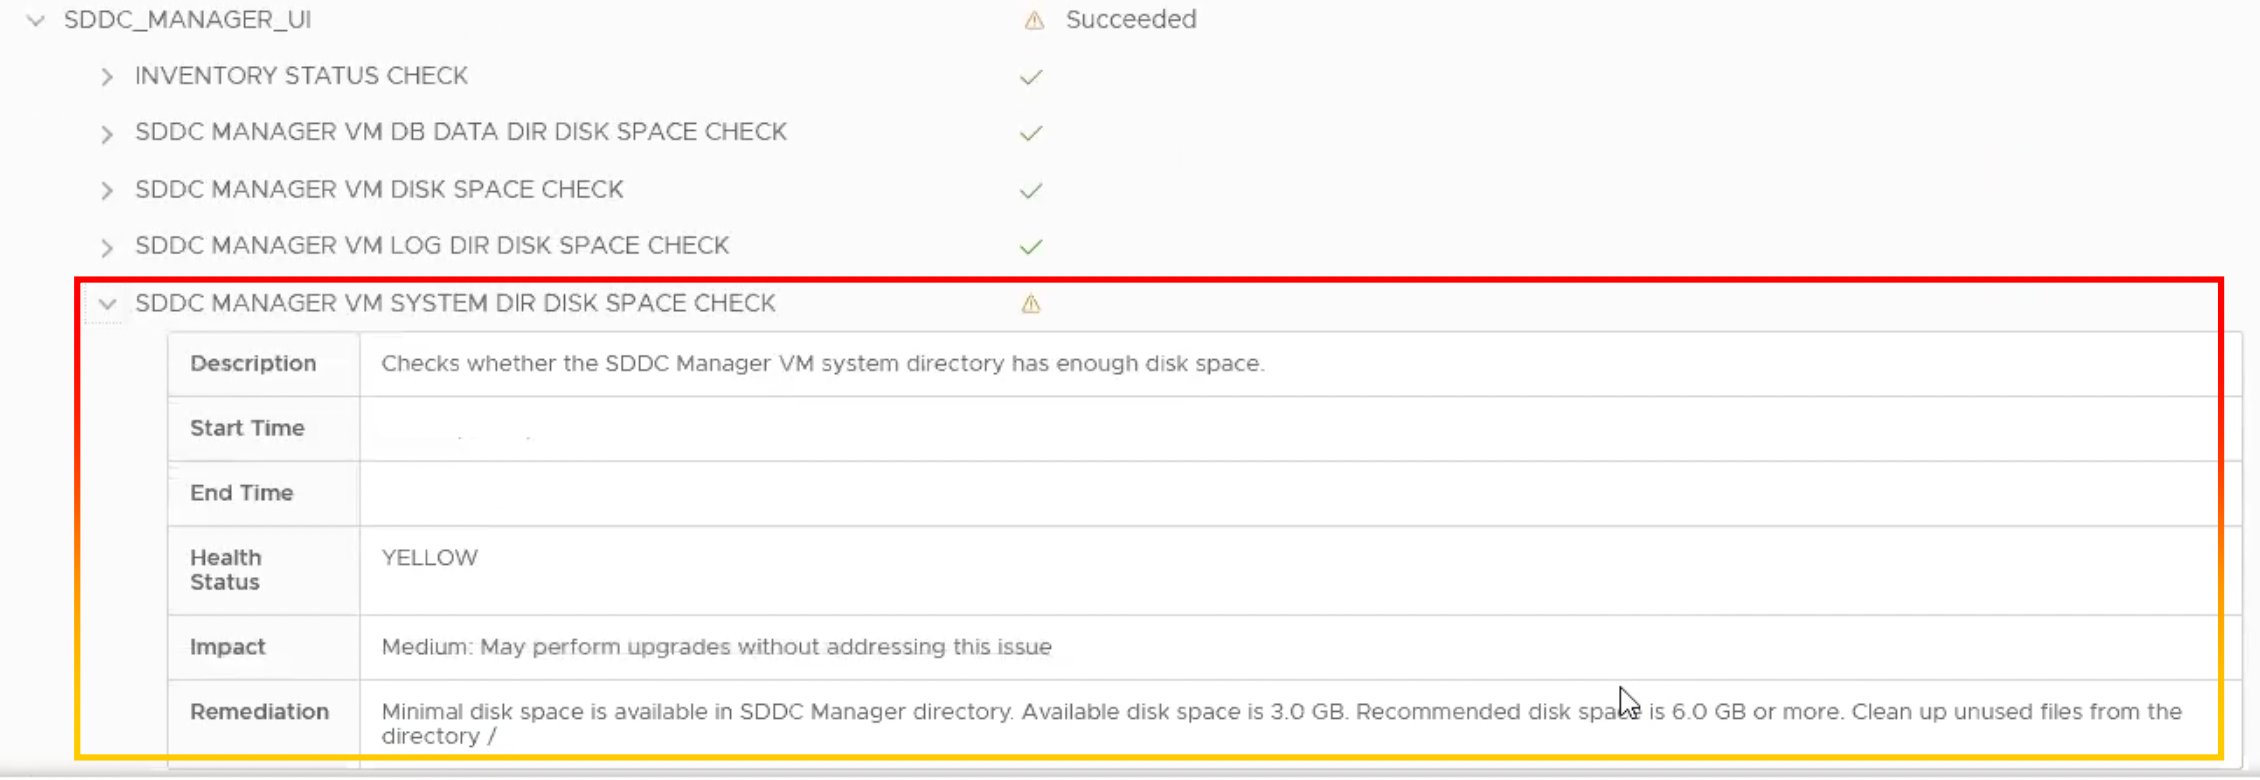
We noticed the warning “Checks whether the SDDC Manager VM system directory has enough disk space” during the SDDC manager pre-check.

DescriptionChecks whether the SDDC Manager VM system directory has enough disk space
Start Timexx/xx/xx
End Timexx/xx/xx
Health StatusYELLOW
ImpactMedium: May perform upgrades without addressing the issues
RemediationMinimal disk space is available in SDDC Manager directory Available disk space is 3.0 GB. Recommended disk space is 6.0 GB or more. Clean up unused files from the directory /

COMMON_SERVICES

MULTI_SITE_SERVICE

SDDC_MANAGER_UI
Steps to resolving these issues

The steps following do not require a reboot or restart of any SDDC Manager services.

1.SSH into the SDDC Manager as the VCF user.

2.To display space, we navigate to /var/log and use the “df -h” command. We discovered a path. Use 90% Avail 2.7G for /dev/sda4.

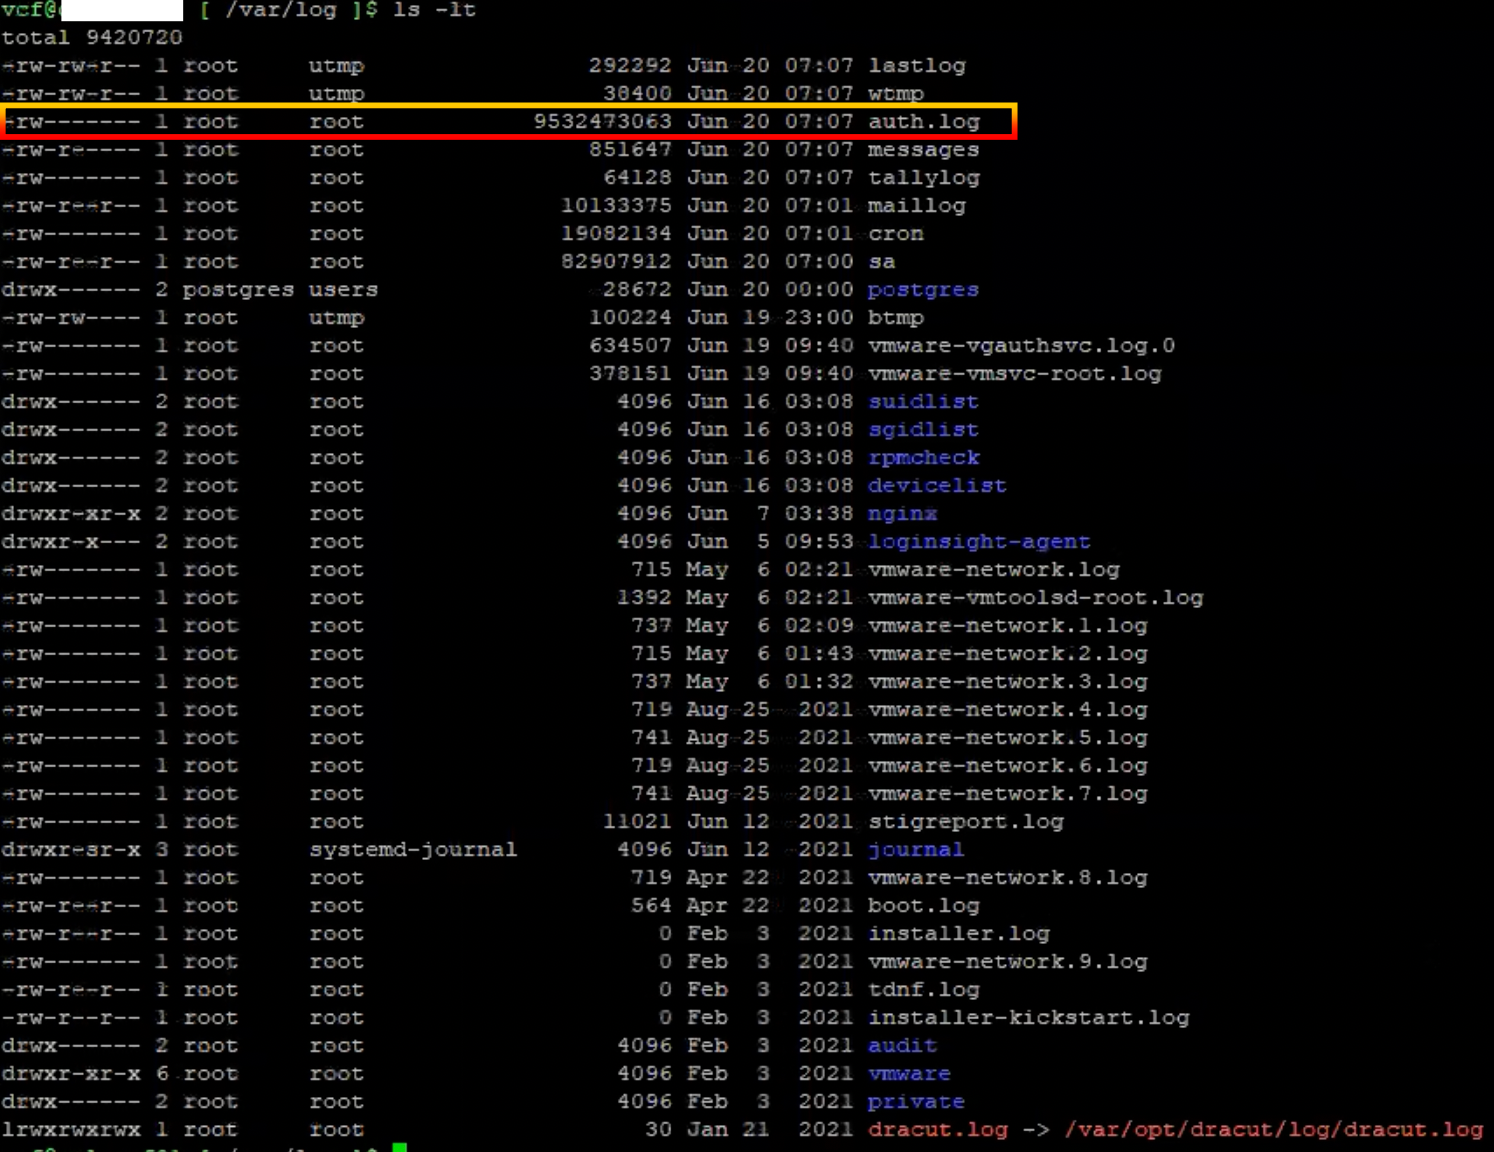
3.We used the command “ls -lt” to list in long format and sort by time and date. The file size of “auth.log” was 9.5GB.
4.To resolve this issue, we followed the blogs https://vinsanity.uk/2021/10/21/failed-pre-check-in-sddc-manager-error-disk-space-on-sddc-manager-vm-is-less-than-required/, but I will demonstrate for the specifics.

5.We must verify the file size in the audit log path.

6.Log in as the root user.

7.Verify the file size of the audit log file. The file size of “audit.log” was 9.5GB.

8.To identify and sort the large 5 files, use the command “find -type f -exec du -Sh {} + | sort -rh | head -n 5“.

9. To clear the size of the auth.log file, use the command “> auth.log.“.

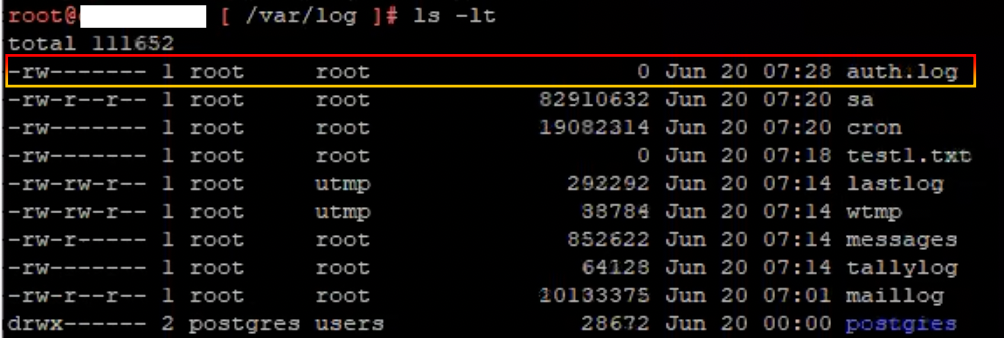
10.Verify the file size. Using the command “ls -lt,” we confirmed that the size of auth.log had been reduced.
11.Navigate to the audit path “cd audit“.

12.Verify the file size in the audit path “ls -lt“.

13.To clear the size of the audit.log file, use the command “> audit.log.

14.Verify the file size. Using the command “ls -lt,” we confirmed that the size of audit.log had been reduced.

15.Return to SDDC Manager and execute the pre-check once again.

16.SDDC Manager’s components had all succeeded.

Conclusion

The SDDC Manager UI provides a single point of control for managing and monitoring your VMware Cloud Foundation instance and for provisioning workload domains. Before upgrading VCF, we recommend that you do a pre-check, and if you find any errors or warnings, please resolve them before proceeding with the update.

Reference

https://vinsanity.uk/2021/10/21/failed-pre-check-in-sddc-manager-error-disk-space-on-sddc-manager-vm-is-less-than-required/

SHD – Skyline Health Diagnostics

By Lerpong Intaraworrapath | November 17th ,2021

SHD – Skyline Health Diagnostics

เมื่อมีเหตุการณ์ ที่ vSphere ESXi host down การทำงาน ของ vSAN หรือ VCF มีปัญหา และเราต้องการ investigate logs system จาก vSphere ESXi host หรือ ต้องการทราบ ว่า vSphere ESXi host มี error หรือ issues อะไร บ้าง เราจะทำได้อย่างไร

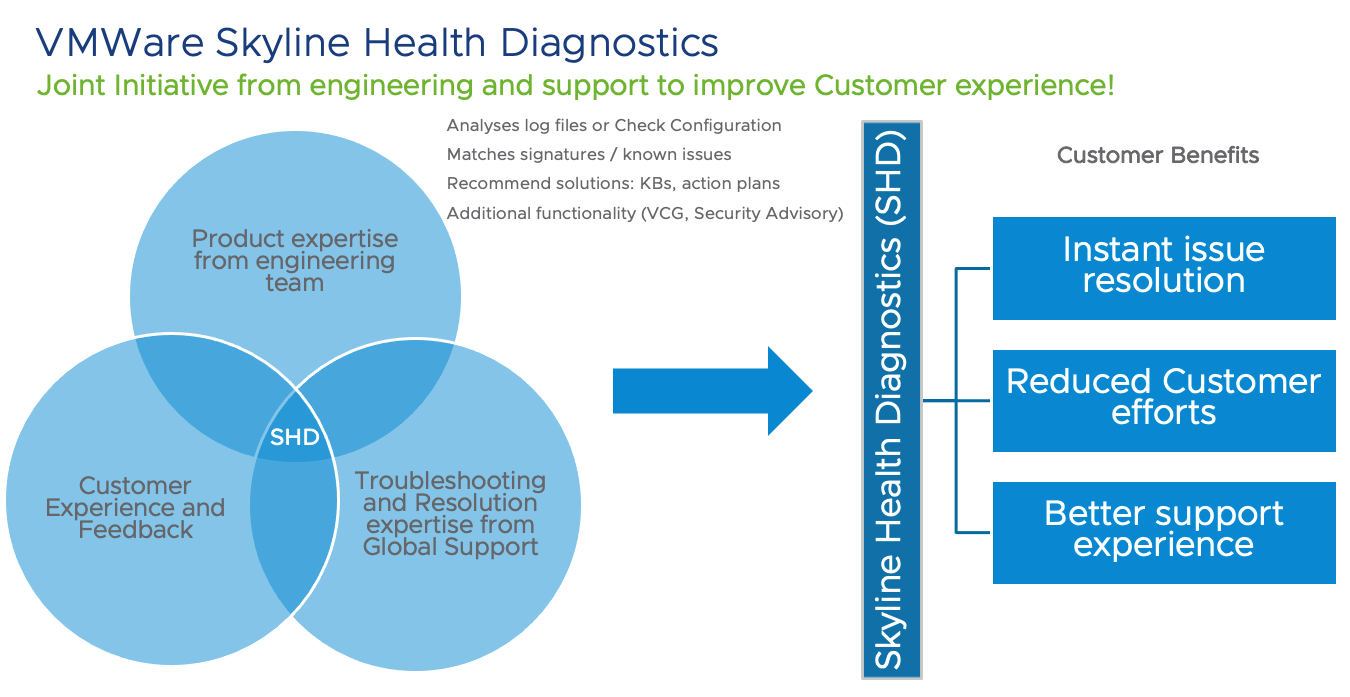
Skyline Health Diagnostics จะช่วยเราในการวิเคราะห์ และแสดงผล จาก bundle logs ที่เรา อัปโหลด เข้าไปใน SHD

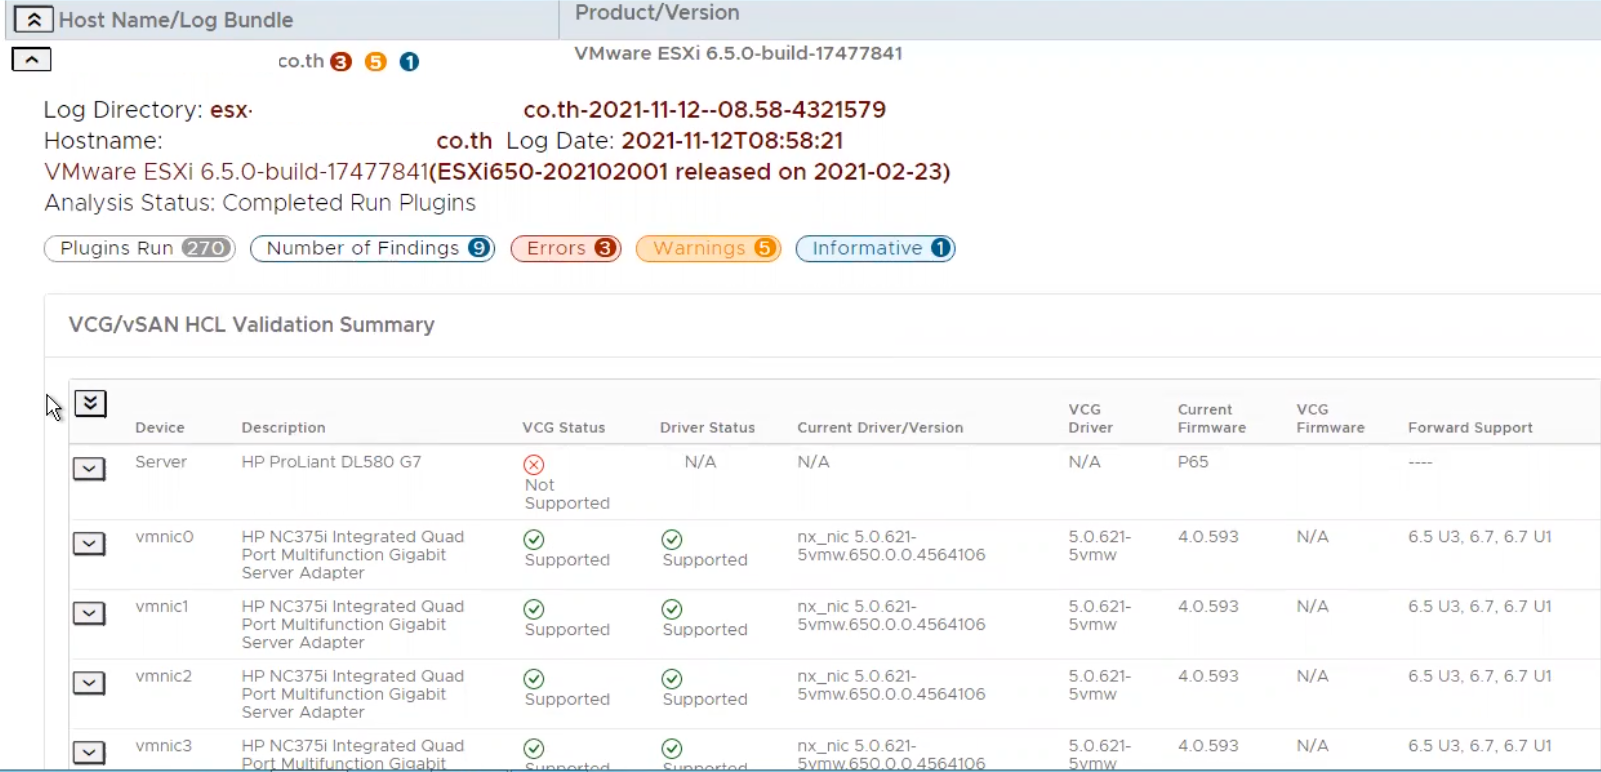
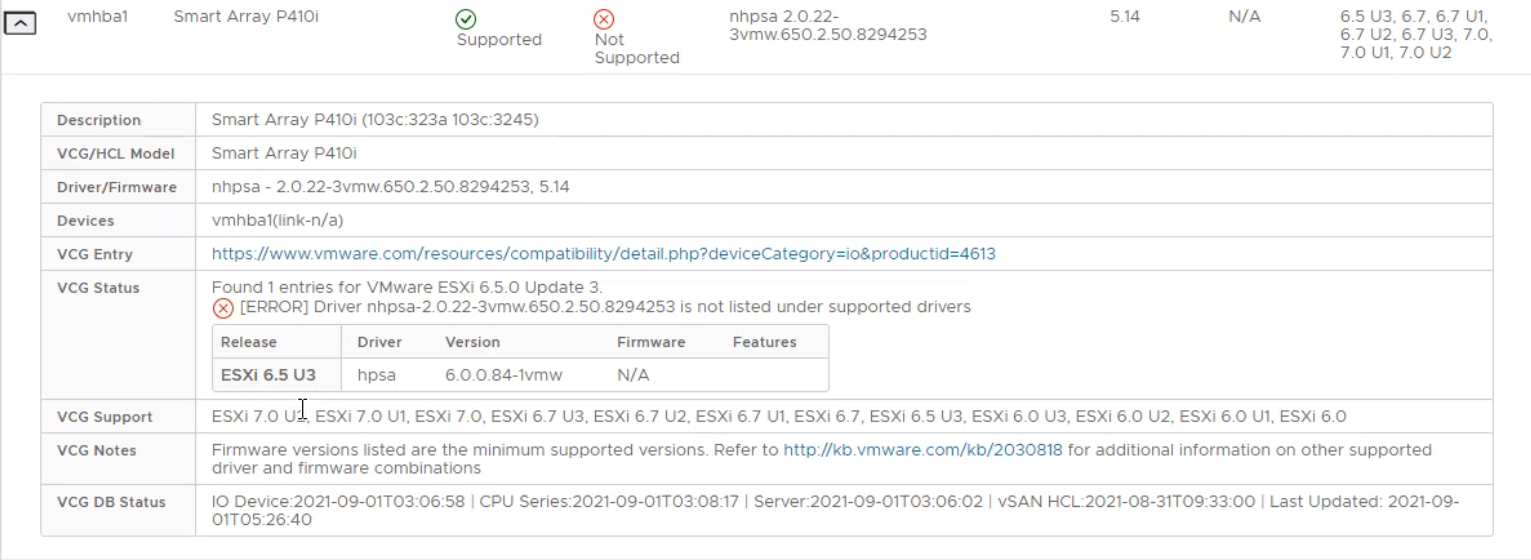
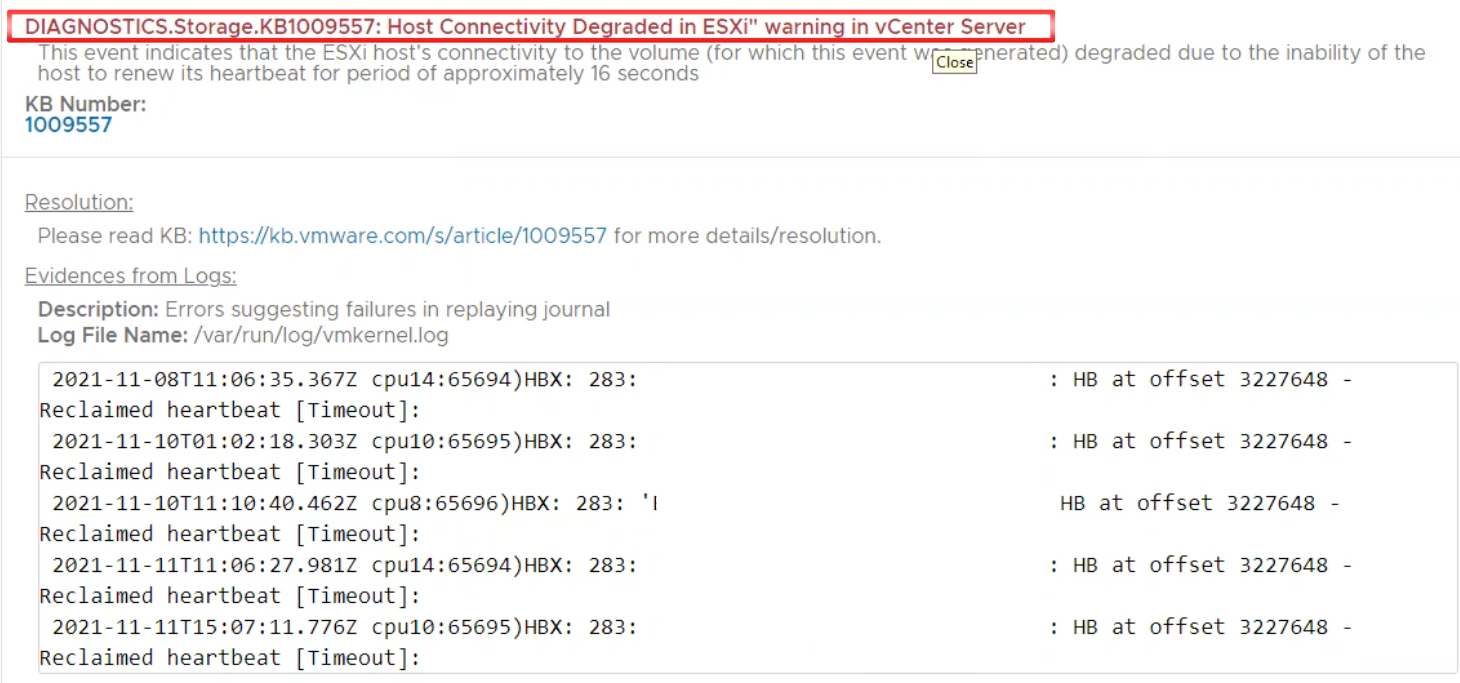
โดย report จะรายงานค่า error และ issues ที่เกิดขึ้นกับ vSphere ESXi host ในระบบของเรา รวมถึง vSAN VCG (VMware Compatibility Guide) ที่ช่วยเราตรวจสอบ compatibility guide, Network driver, Firmware ต่างๆ

SHD (Skyline Health Diagnostics) Overview

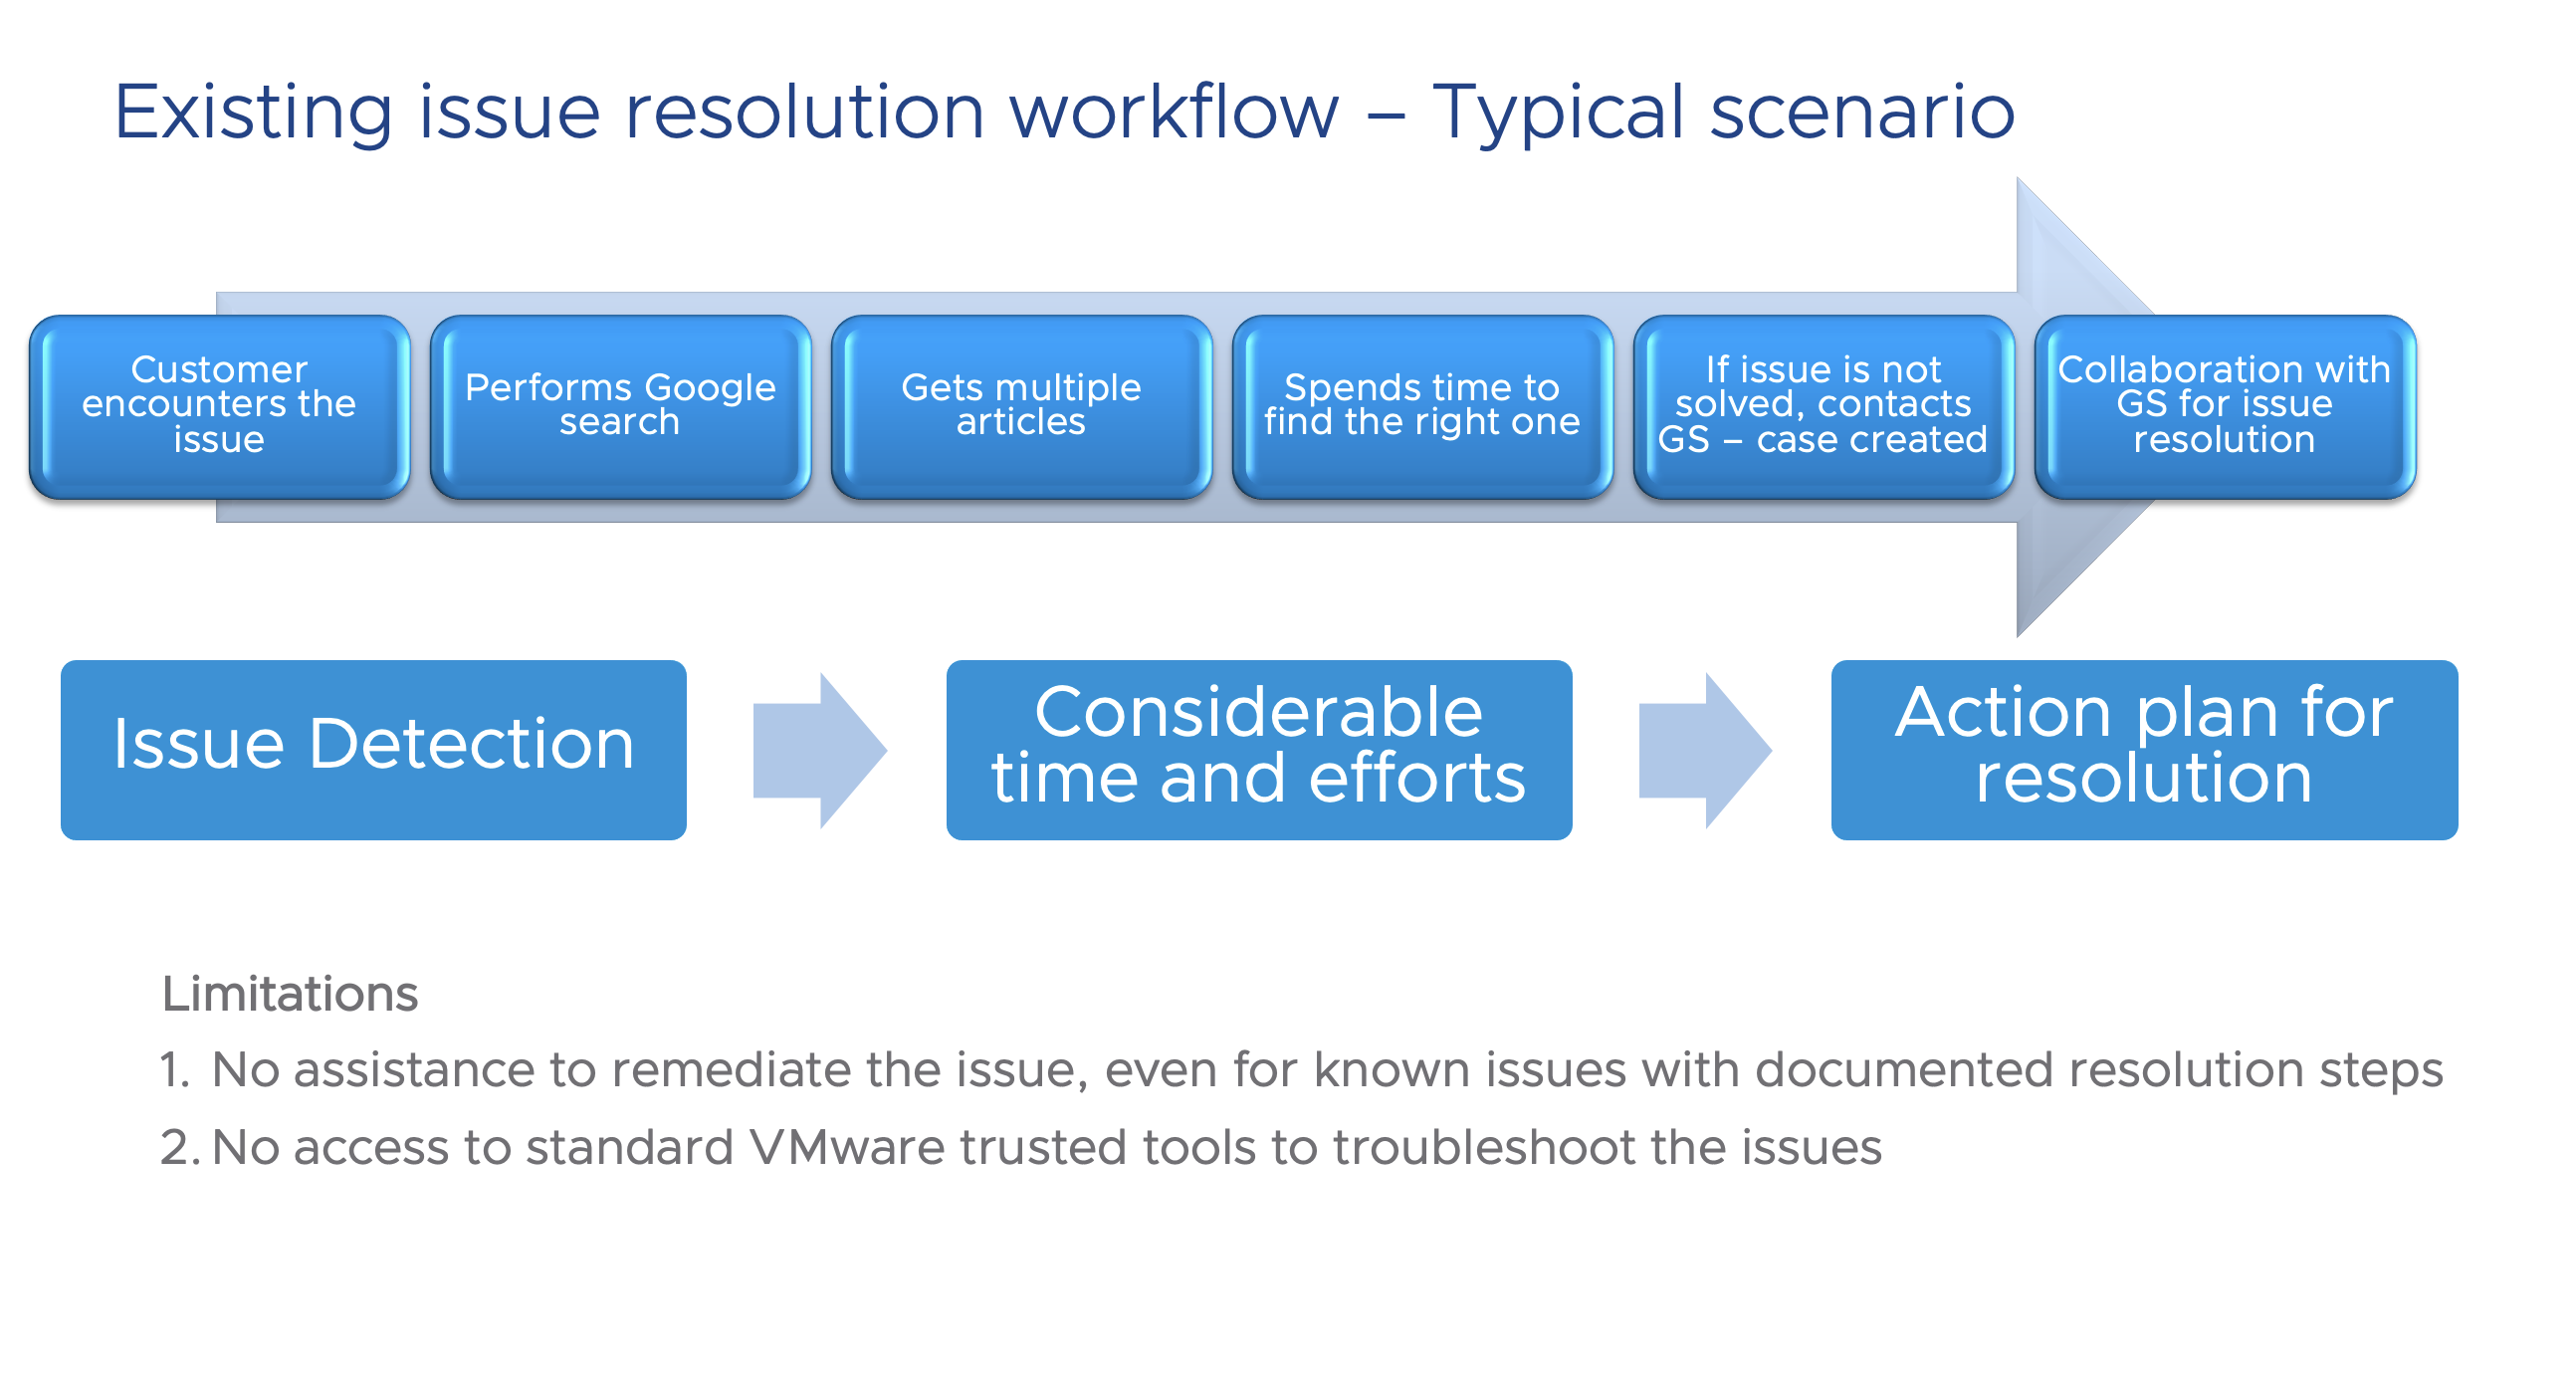
Existing issue resolution workflow

อันนี้จะเป็น workflow โดยทั่วไป เวลาเกิดปัญหา

  1. เมื่อพบปัญหา การทำงานของระบบ
  2. ส่วนใหญ่ ก็จะทำการค้นหาจาก Google
  3. เมื่อค้นจาก Google เราก็จะพบบทความที่หลากหลาย ที่เกี่ยวข้องกัน
  4. ใช้เวลา ในการค้นหาจนกว่าจะเจอบทความที่ใช่
  5. ถ้าปัญหา ยังไม่ถูกแก้ไข ก็จะ ติดต่อ GS (Global Support) ทำการเปิด เคส
  6. ทำงานร่วมกับ GS เพื่อแก้ปัญหา

เราจะ เห็นว่าจะ สามารถ แบ่งเป็น 3 step หลักๆ คือ

  • พบปัญหา
  • เวลาในการแก้ปัญหา
  • วิธีการแก้ปัญหา

SHD (Skyline Health Diagnostics) จะช่วยลดเวลาในการ troubleshoot ปัญหา และลดเวลาที่เราใช้ในแก้ปัญหา

VMware SHD for vSphere

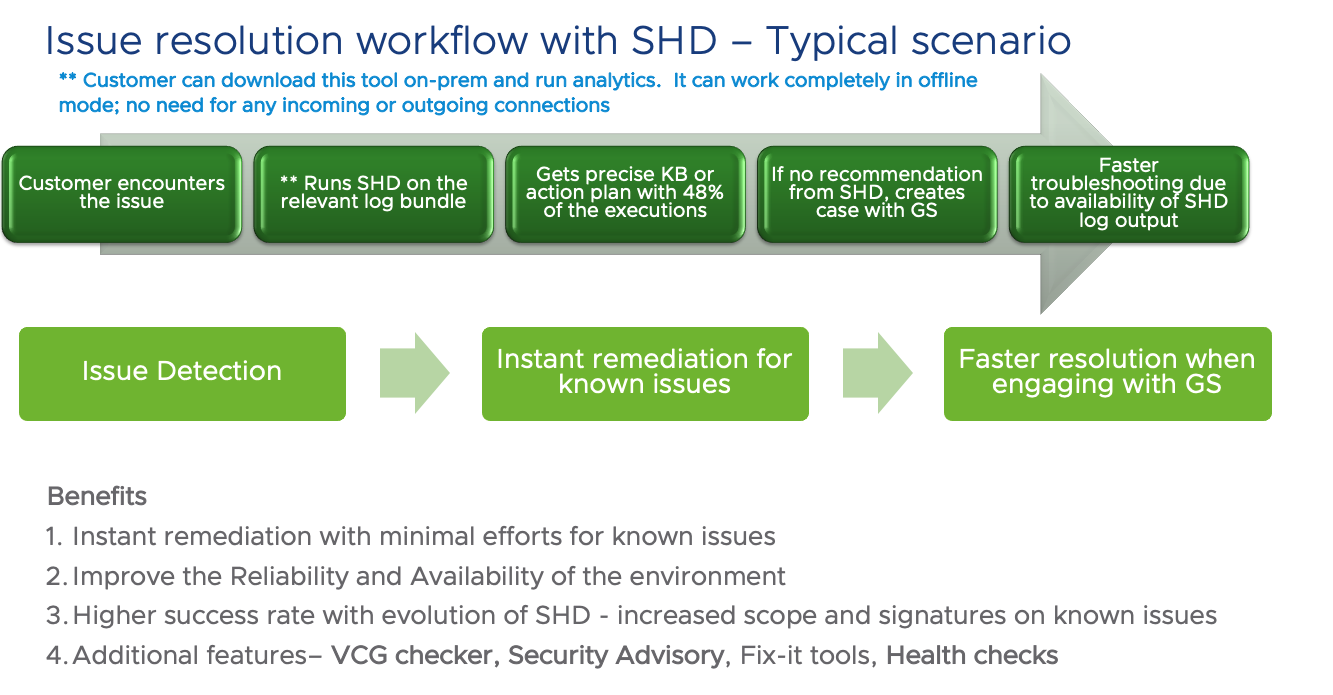
Issue resolution workflow with SHD

อันนี้จะเป็น SHD workflow เวลาเกิดปัญหา จะเป็นอย่างไร

  1. เมื่อพบปัญหา การทำงานของระบบ
  2. ทำการ Run SHD จาก log bundle ที่เกี่ยวข้อง
  3. จะได้ KB ที่เกี่ยวข้องกับปัญหา ที่เกิดขึ้น และ action plan
  4. ถ้าไม่พบคำแนะนำ จากปัญหาที่เกิดขึ้นให้ติดต่อ GS (Global Support) ทำการเปิด เคส
  5. จะเร็วขึ้นในการแก้ปัญหา จาก SHD log output

ขั้นตอนการ Deploy SHD (Skyline Health Diagnostics)

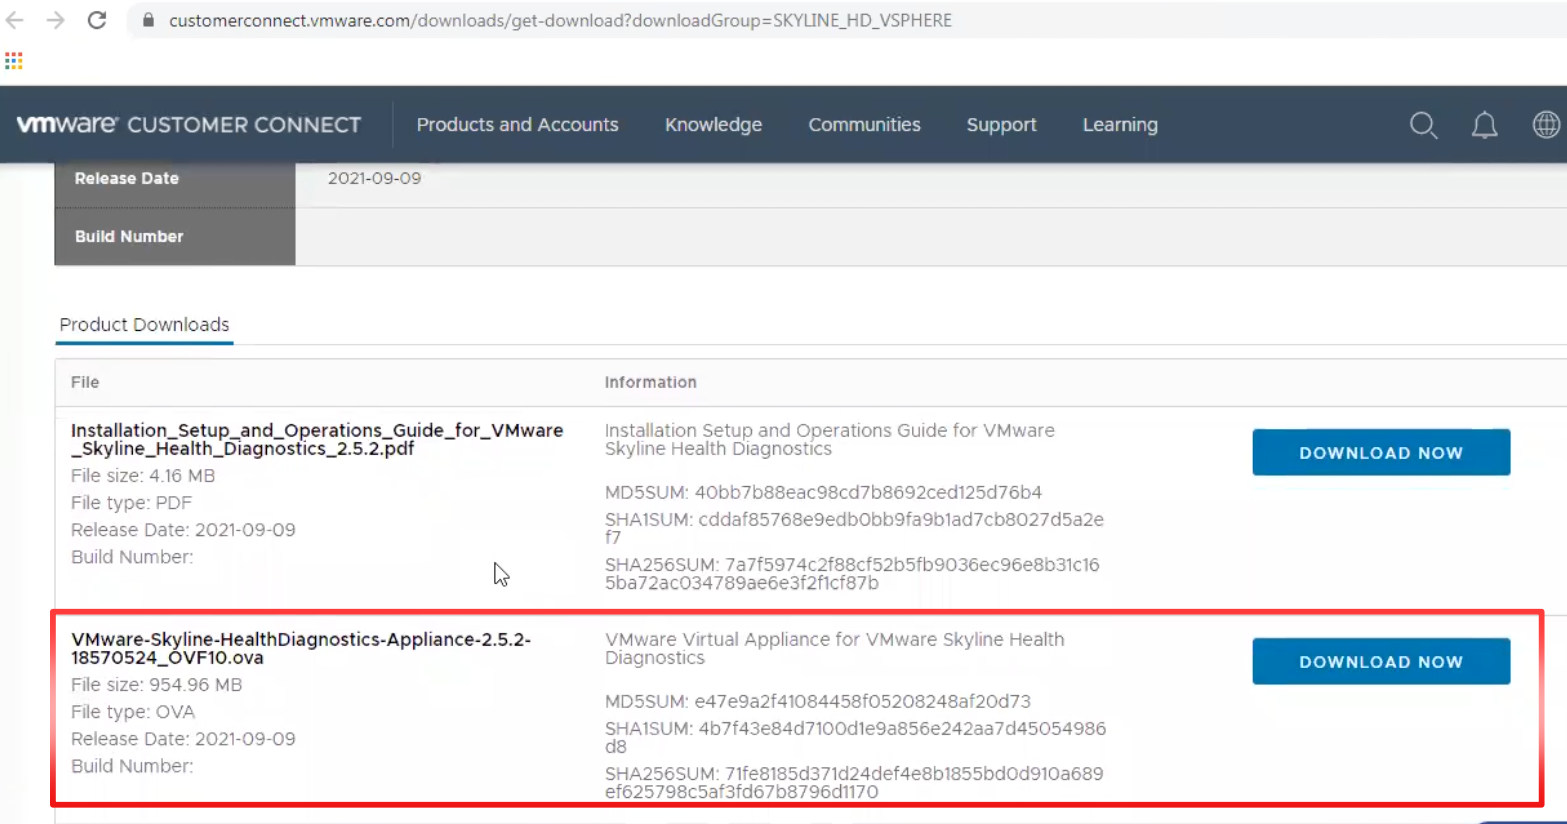
  1. ทำการ download SHD (Skyline Health Diagnostics) OVA file จาก link ด้านล่าง

https://customerconnect.vmware.com/downloads/get-download?downloadGroup=SKYLINE_HD_VSPHERE

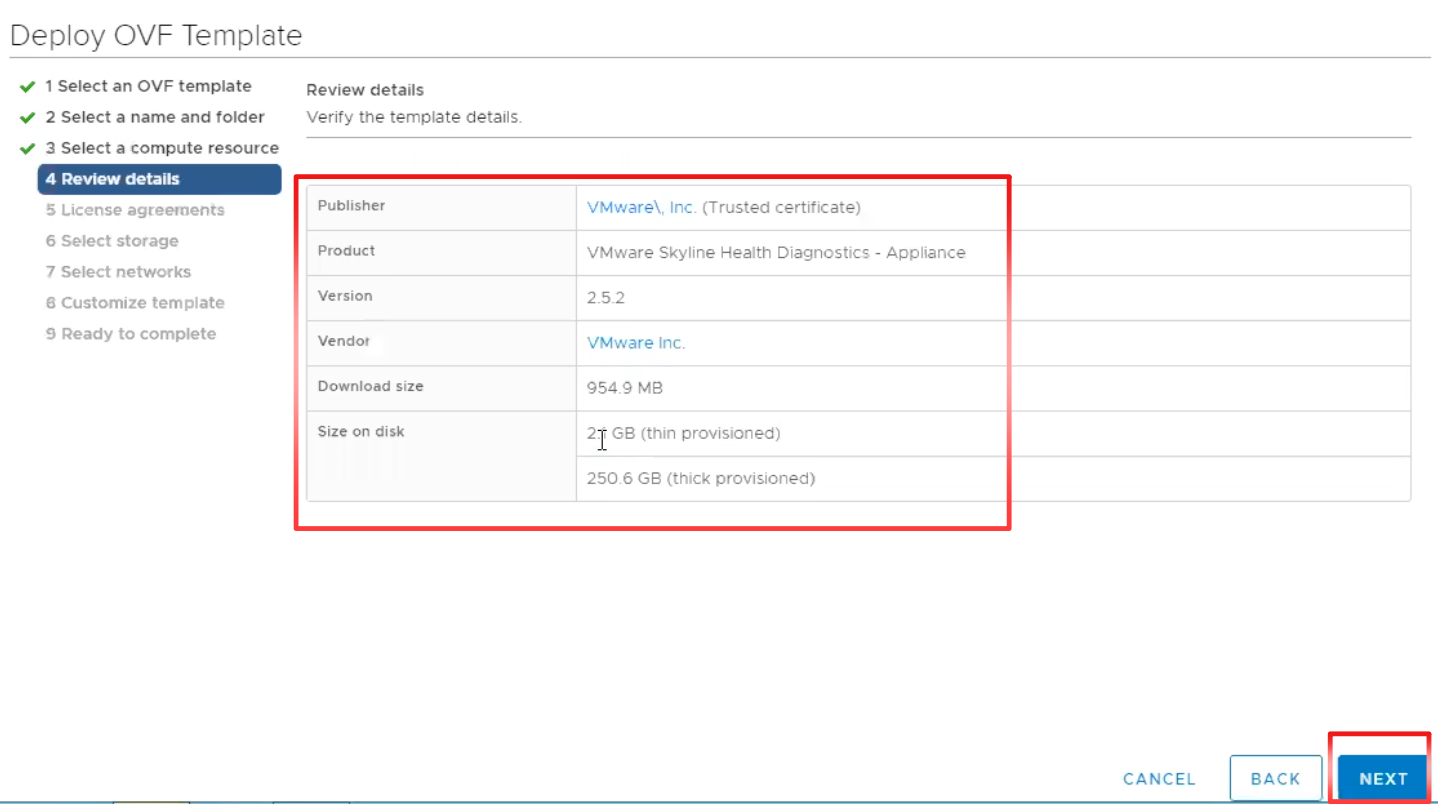
2. ทำการ เลือก OVA ไฟล์ ขนาดไฟล์ 954.96 MB (version 2.5.2), click “DOWNLOAD NOW“.

3. เมื่อทำการ download เสร็จเรียบร้อยแล้ว เราก็จะได้ไฟล์ OVA มา 1 ไฟล์

4. ทำการ connect vCenter Server เพื่อจะทำการ deploy SHD OVA ไฟล์.

5. ทำการเลือก location ที่เรา save OVA ไฟล์.

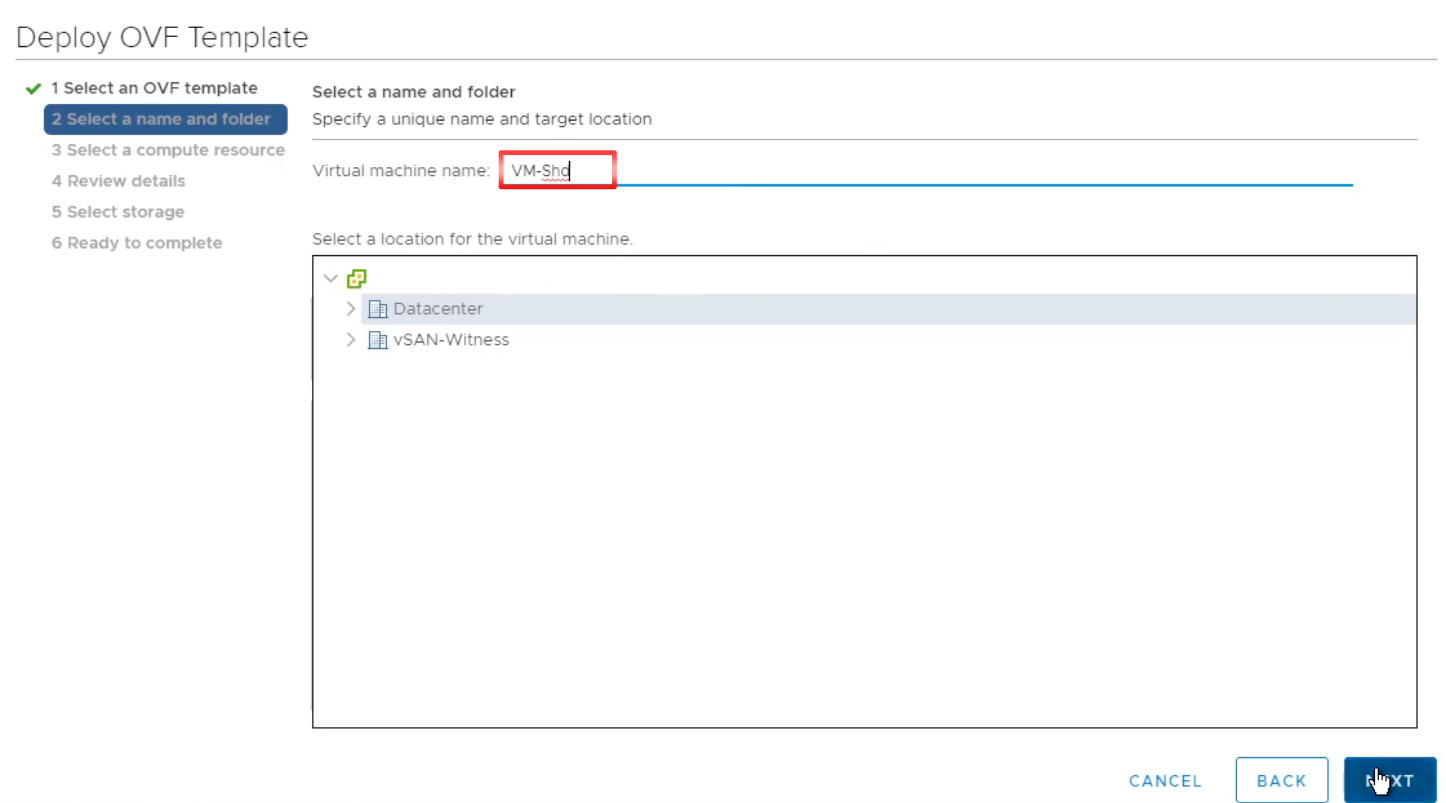
6. ทำการเลือก location และใส่ชื่อ virtual machine name (ในที่นี้ใช้ชื่อ VM-Shd), click “NEXT“.

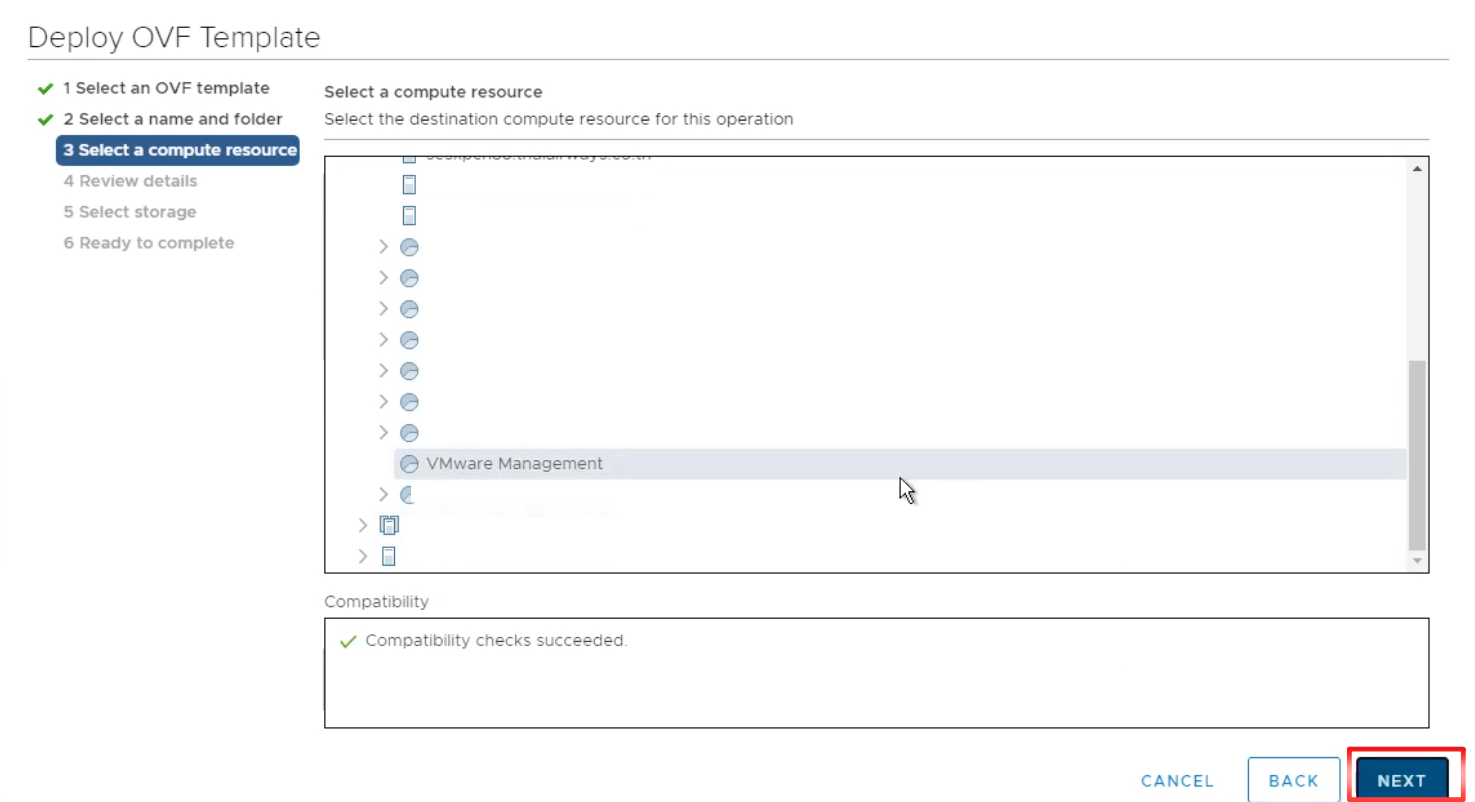
7. ทำการเลือก Compute resource, click “NEXT“.

8. Review details, click “NEXT“.

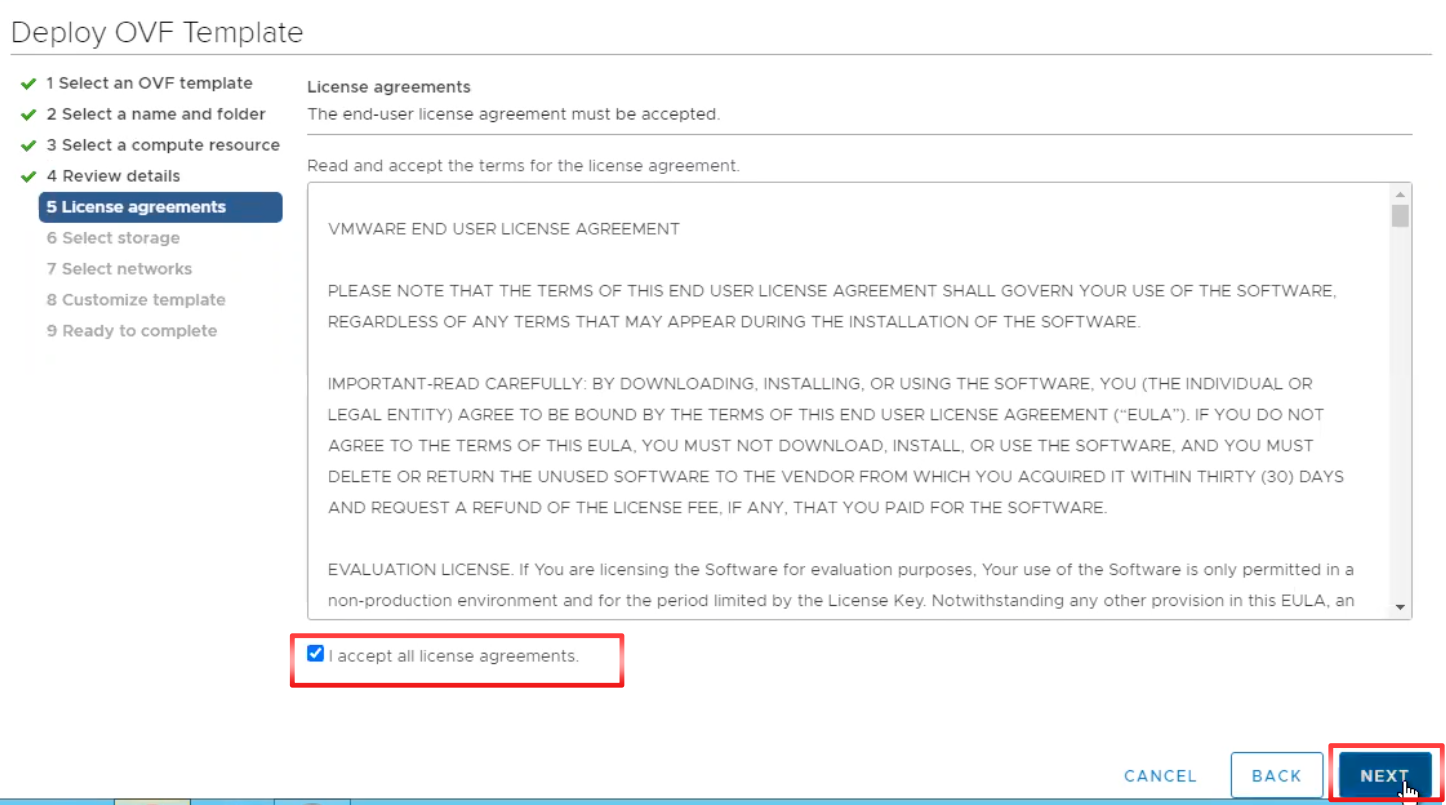
9. Accept License agreement, click “NEXT

10. ทำการเลือก Storage, click “NEXT“.

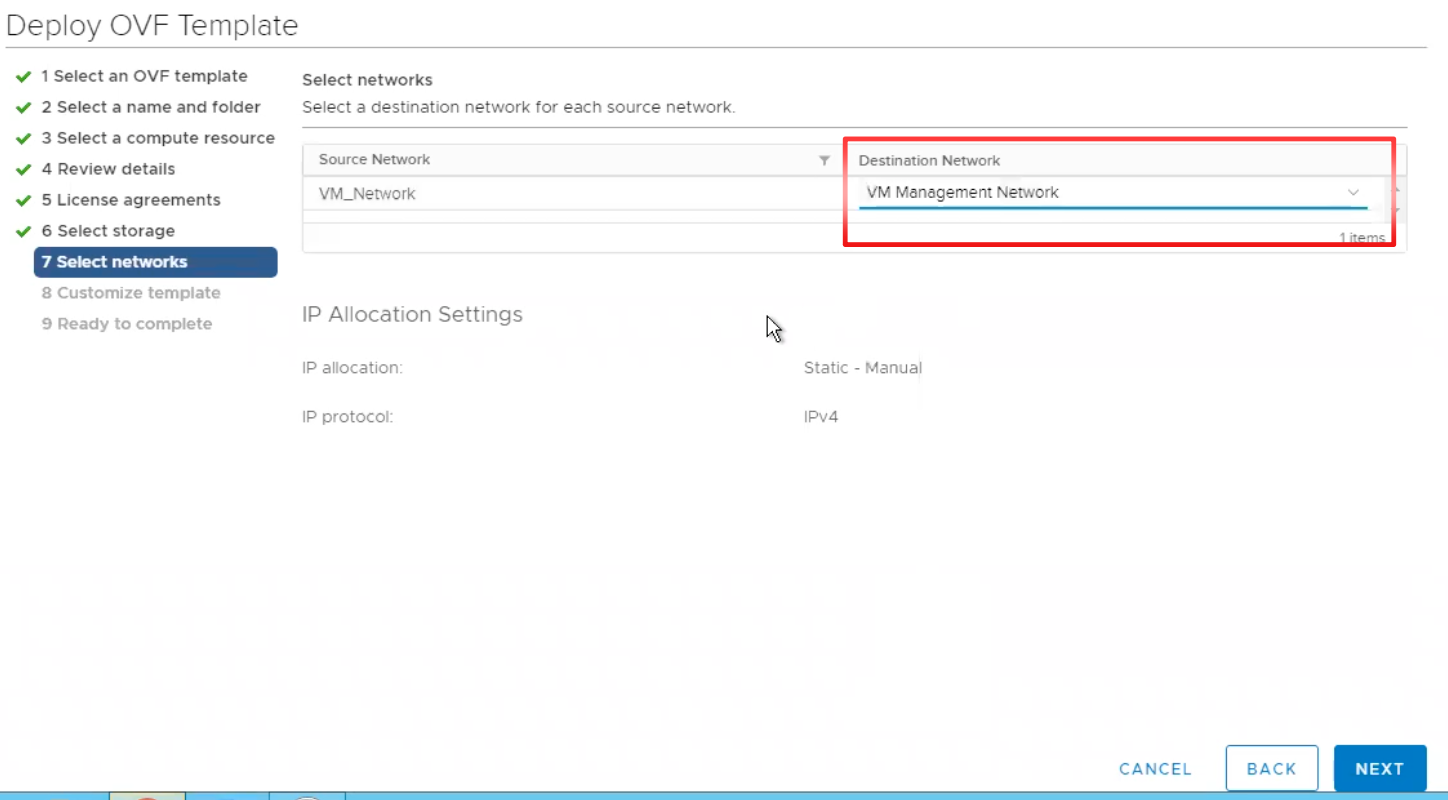
11. ทำการเลือก Network, click “NEXT“.

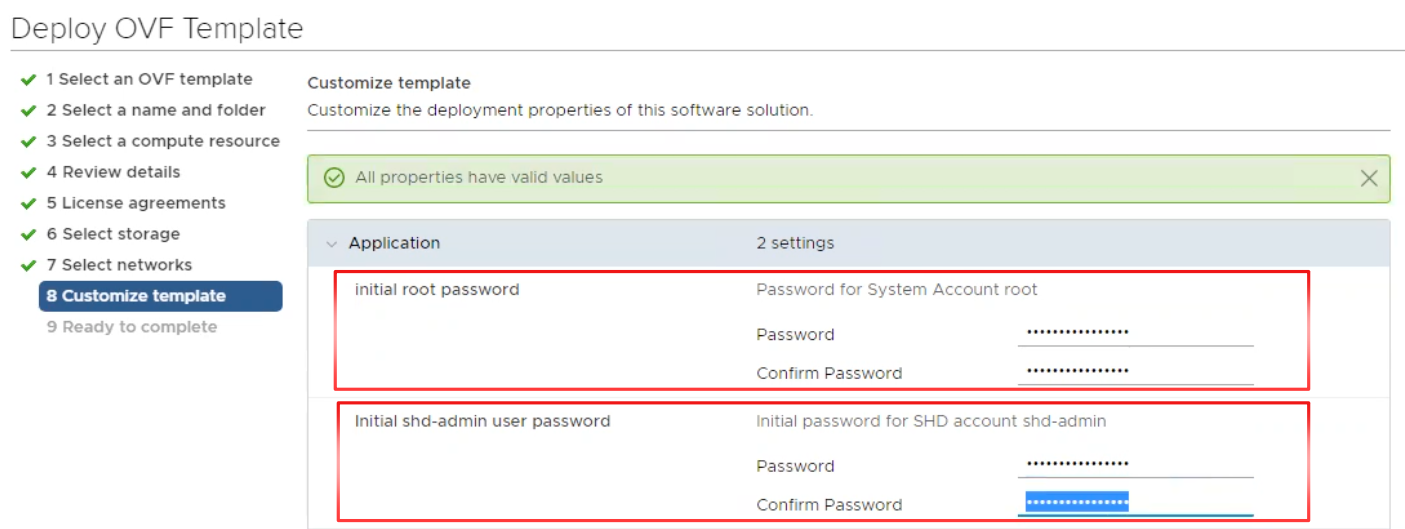
12.ใส่ Password สำหรับ root account และ shd-admin account

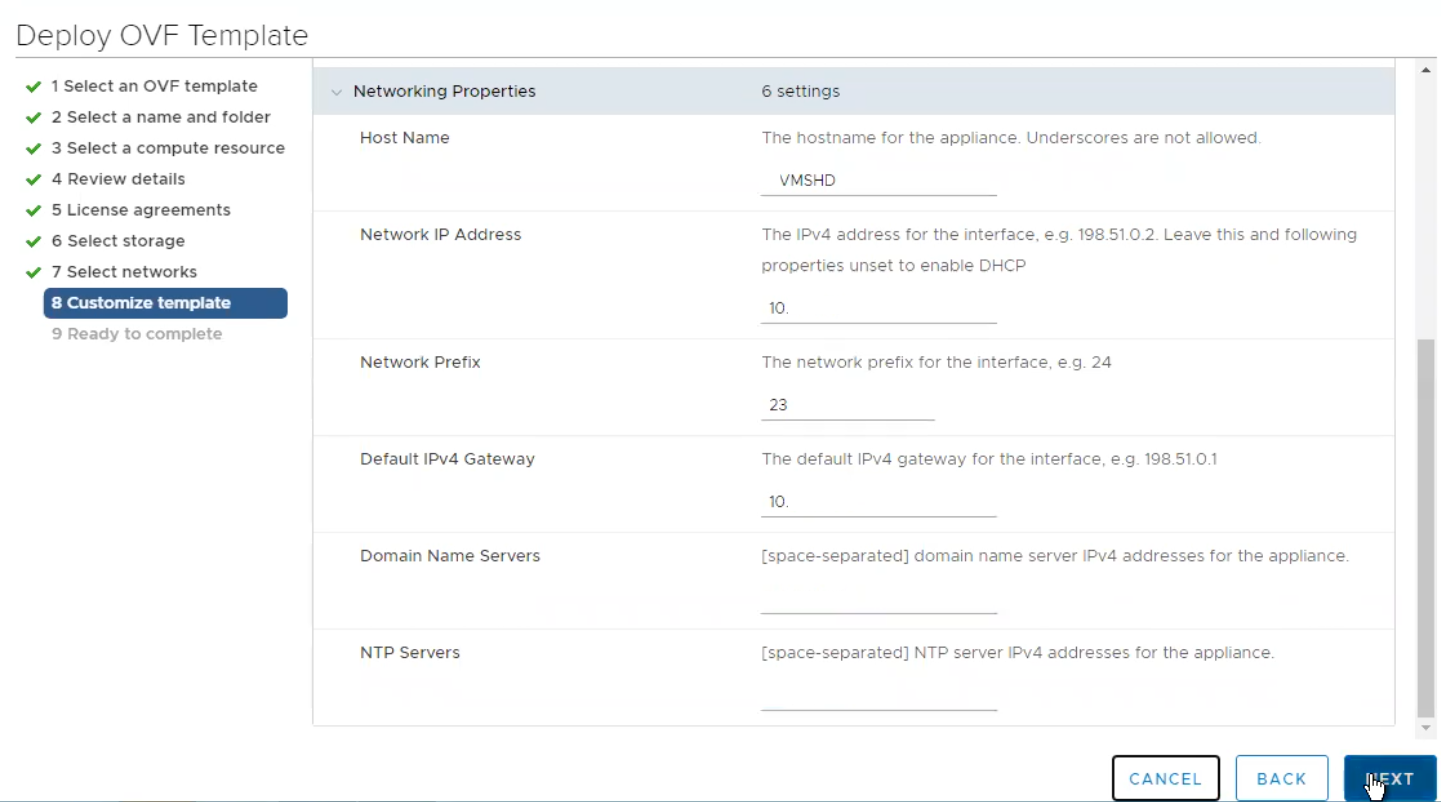
13.ใส่ค่าต่างๆ ให้ครบ หลังจากนั้นให้ click “NEXT“.

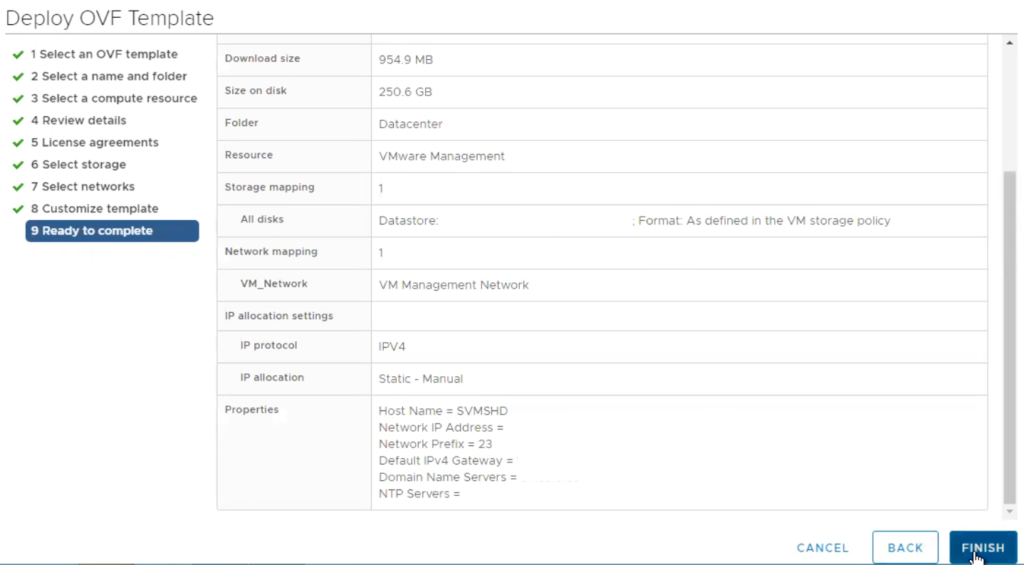
14. Read to complete, click “FINISH“.

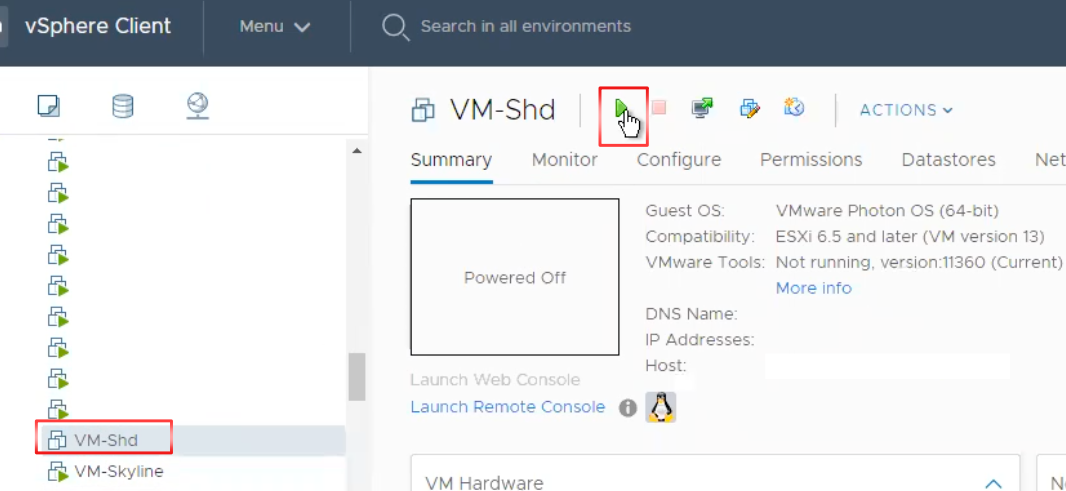
15.เมื่อเราทำ deploy เสร็จเรียบร้อยแล้วให้ เรา Power-on SHD VM (VM-Shd)

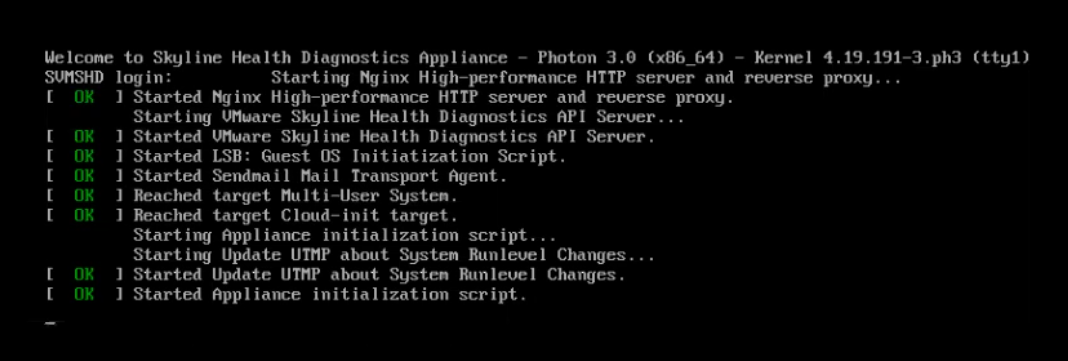
16.ทำรอสักพัก หลังจากนั้นให้ทำการ “Launch Web Console” เราจะ พบว่า VM-Shd จะทำการ start process เพื่อทำการ boot SHD

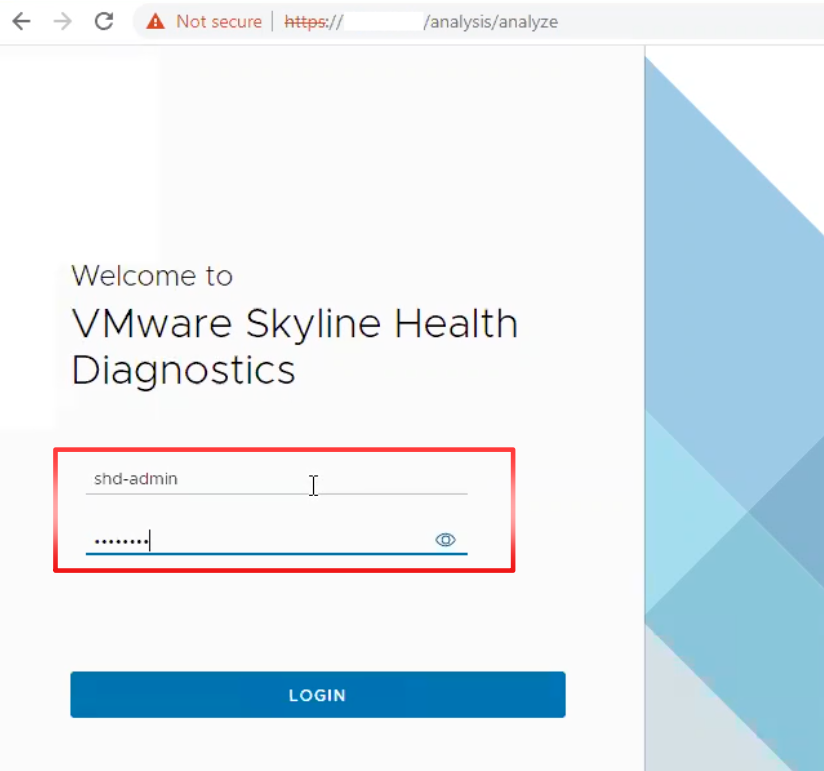
17. ต่อมาให้ เรา access SHD โดย เปิด browser ให้ใส่ IP address ของ SHD, login ด้วย user “shd-admin“.

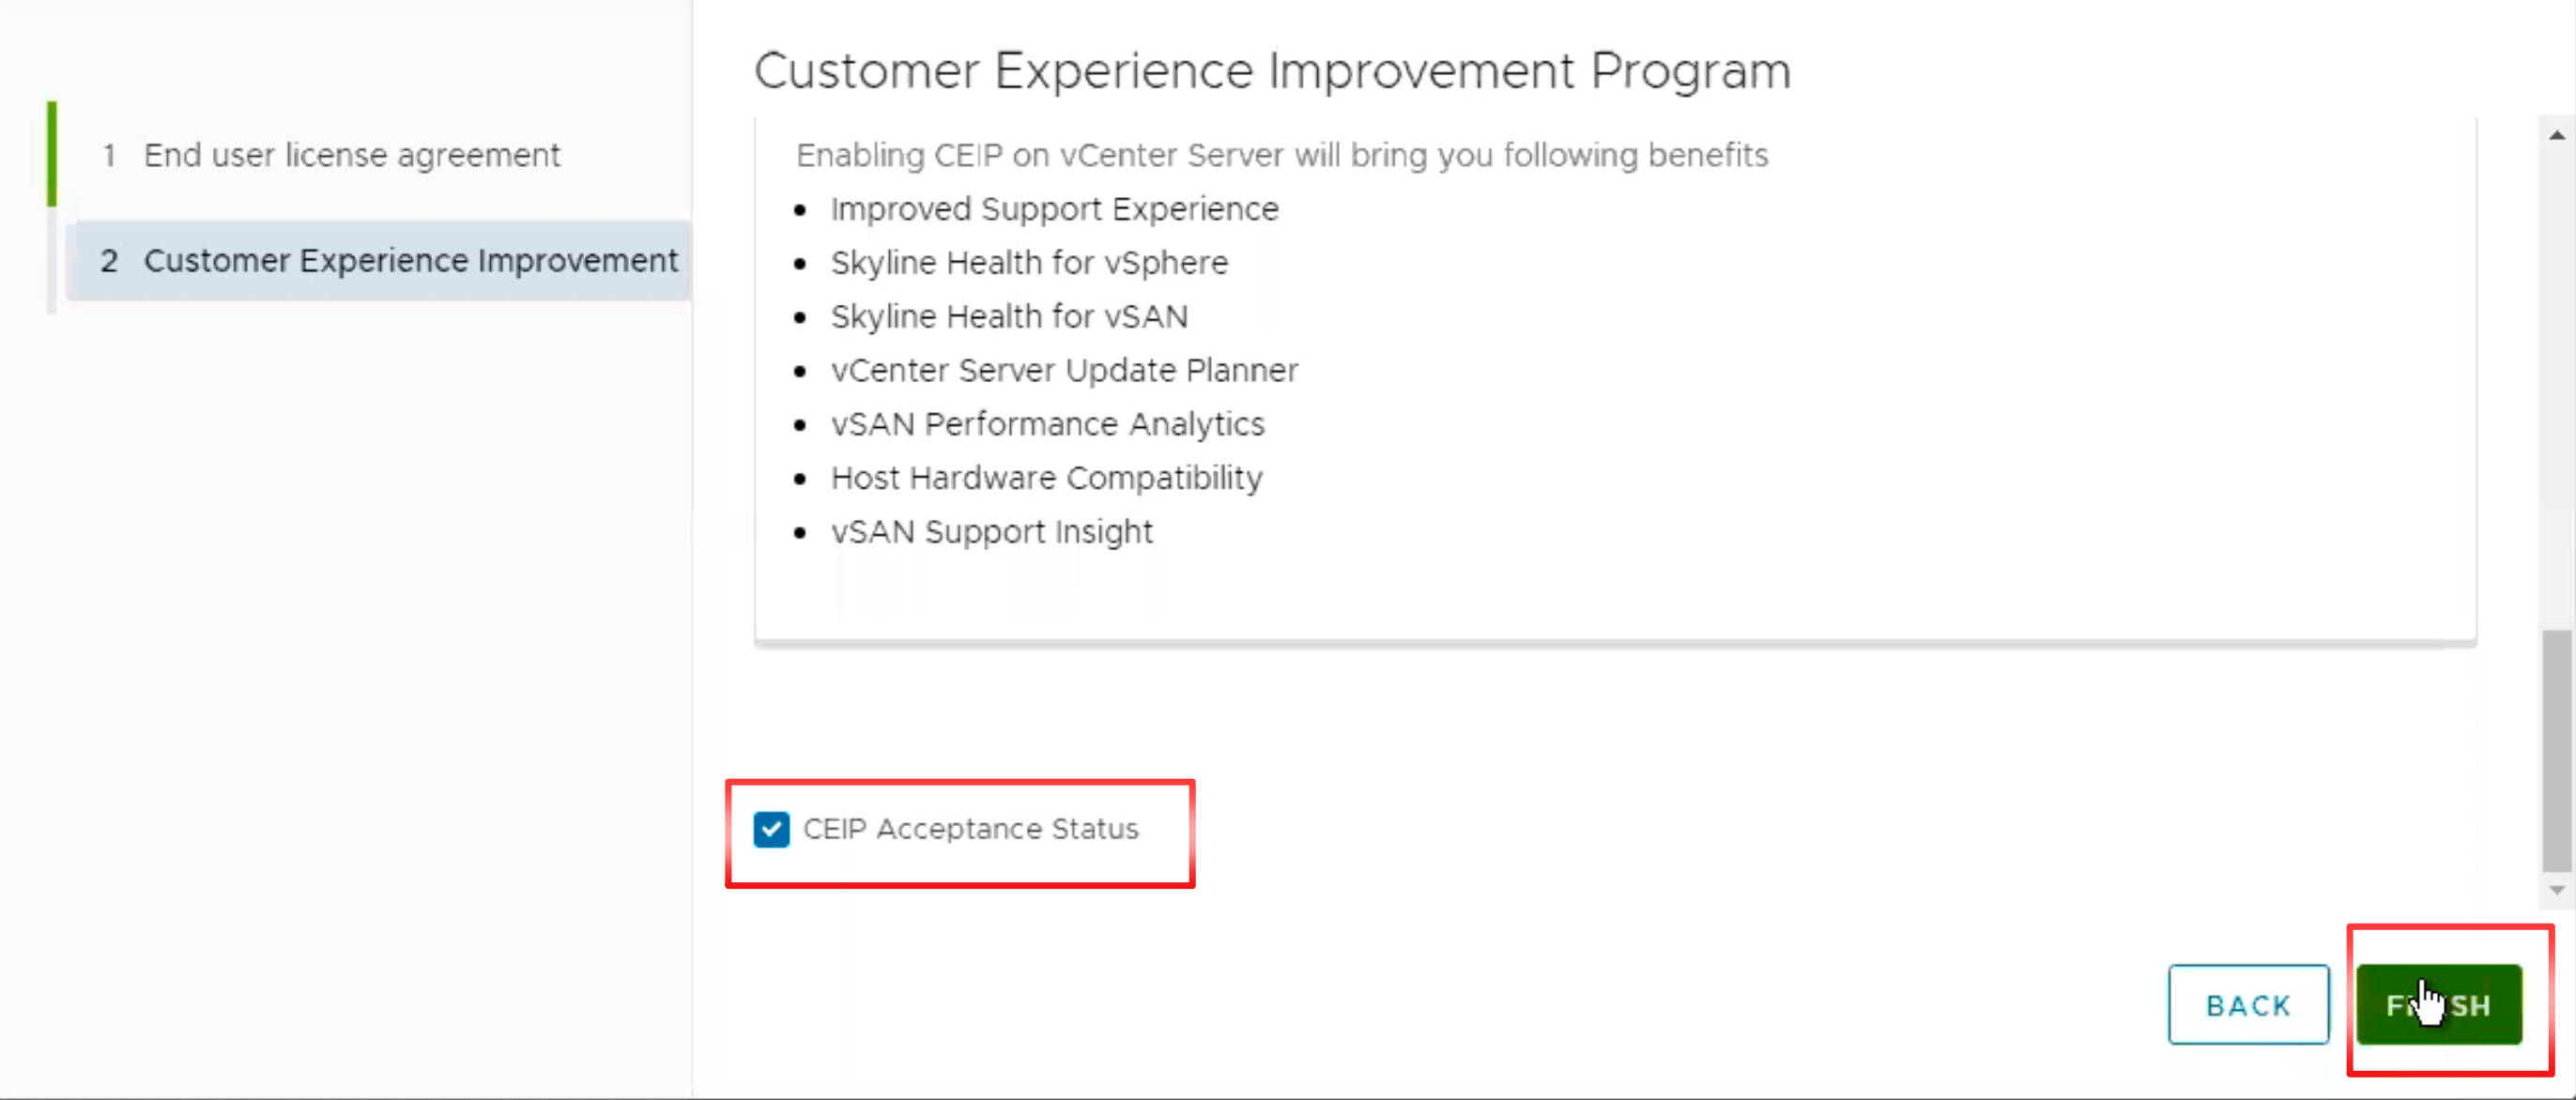
18. Click NEXT for “End user license agreement” และ “Customer Experience Improvement“, click “FINISH“.

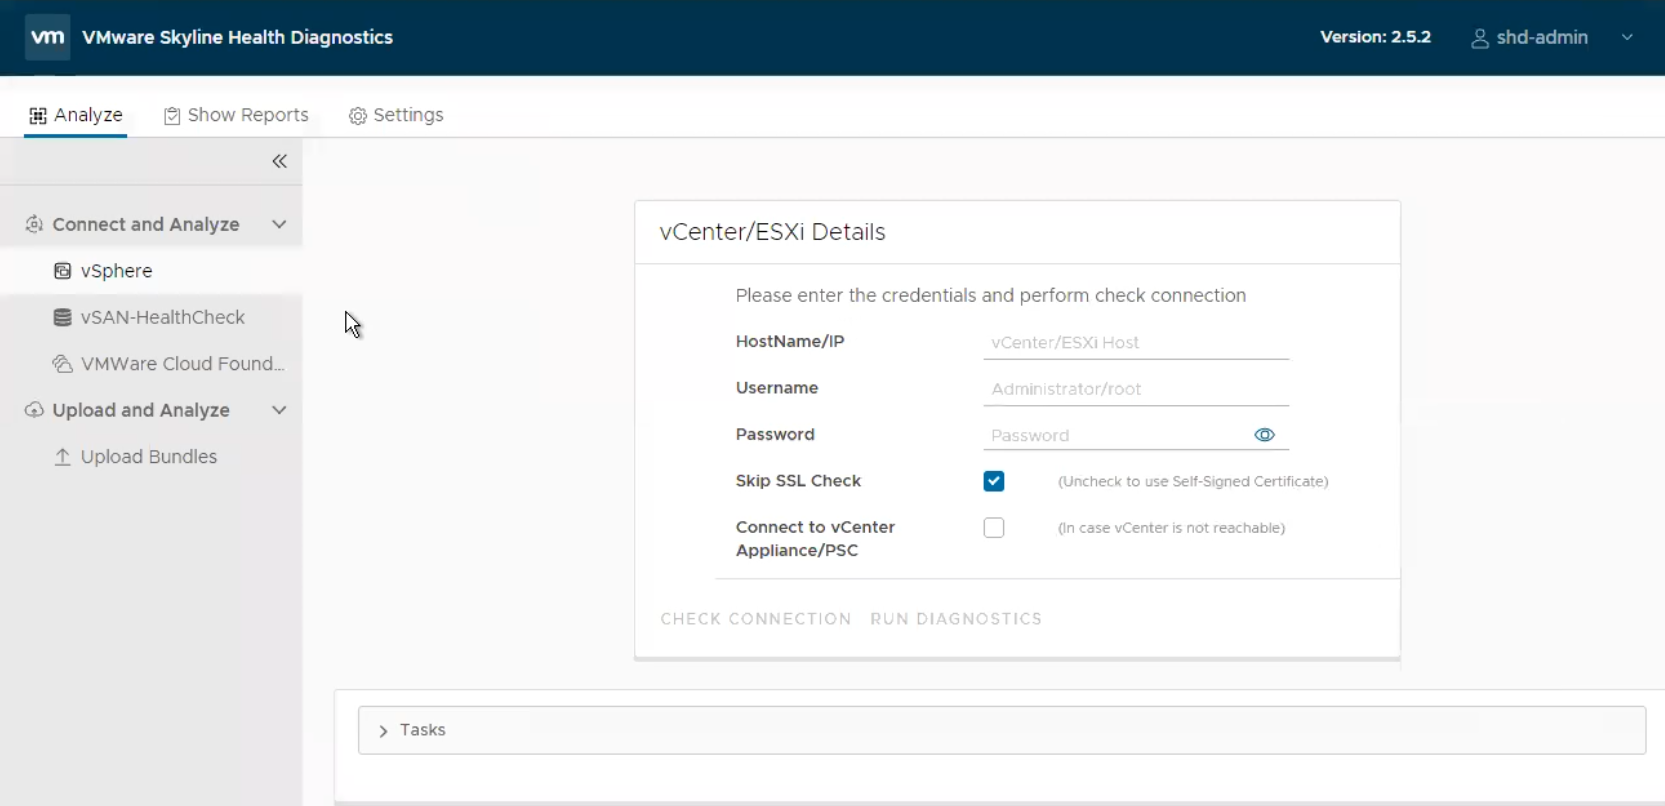
19. เราก็จะเข้ามาเจอหน้าแรกของ SHD (Skyline Diagnostics).

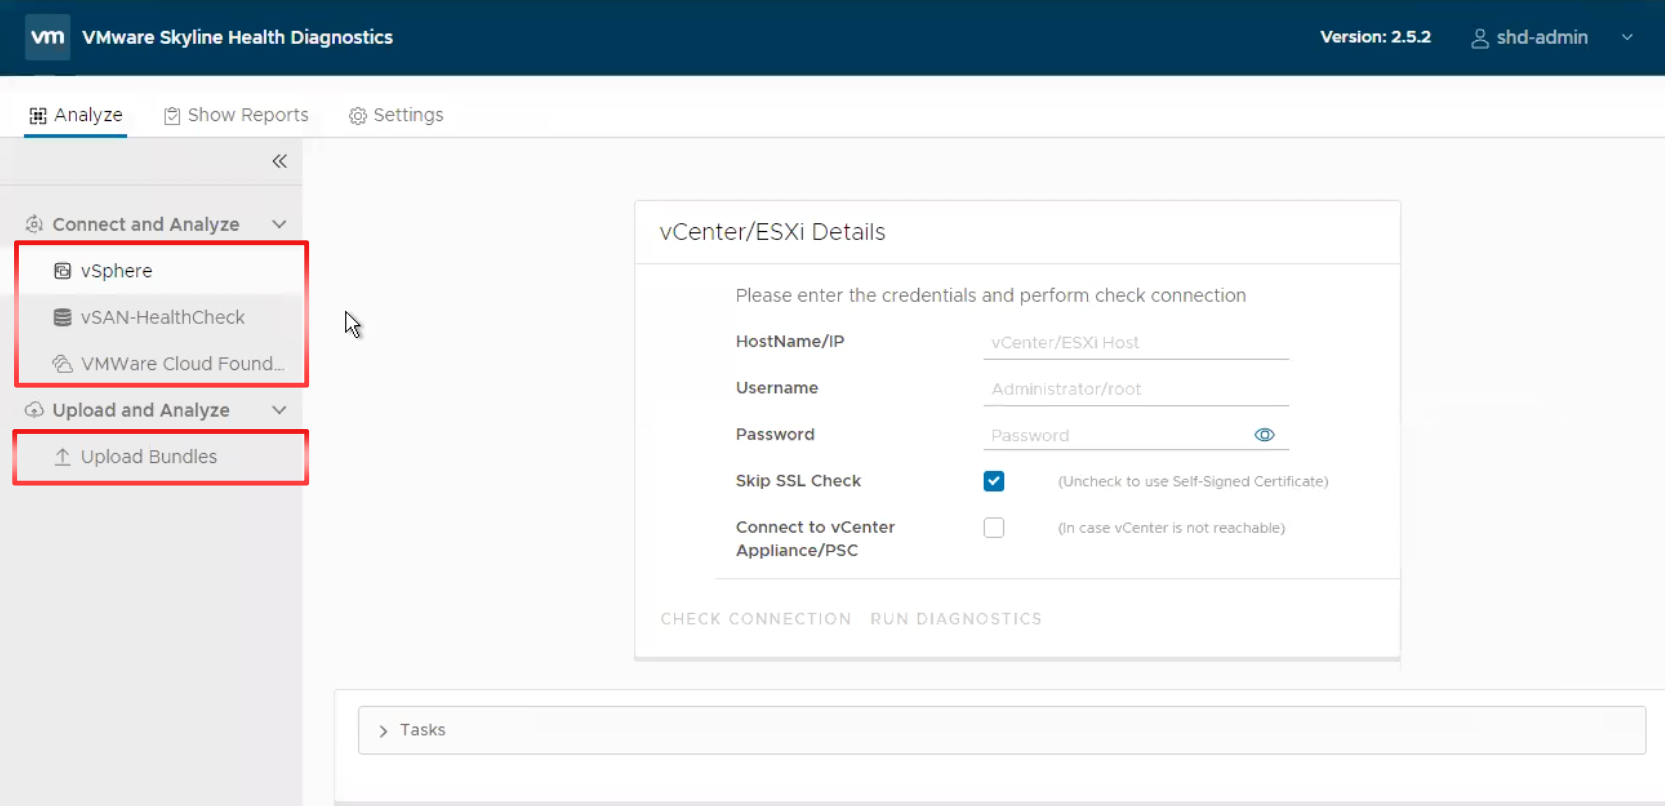
จากด้านซ้ายมือ เราจะเห็น menu ในการ connect system เพื่อจะทำการ download และ analyze log bundle

  1. Connect ผ่าน vSphere (vCenter Server)
  2. Connect ผ่าน vSAN-HealthCheck (vCenter Server)
  3. Connect ผ่าน VMware Cloud Foundation (SDDC)

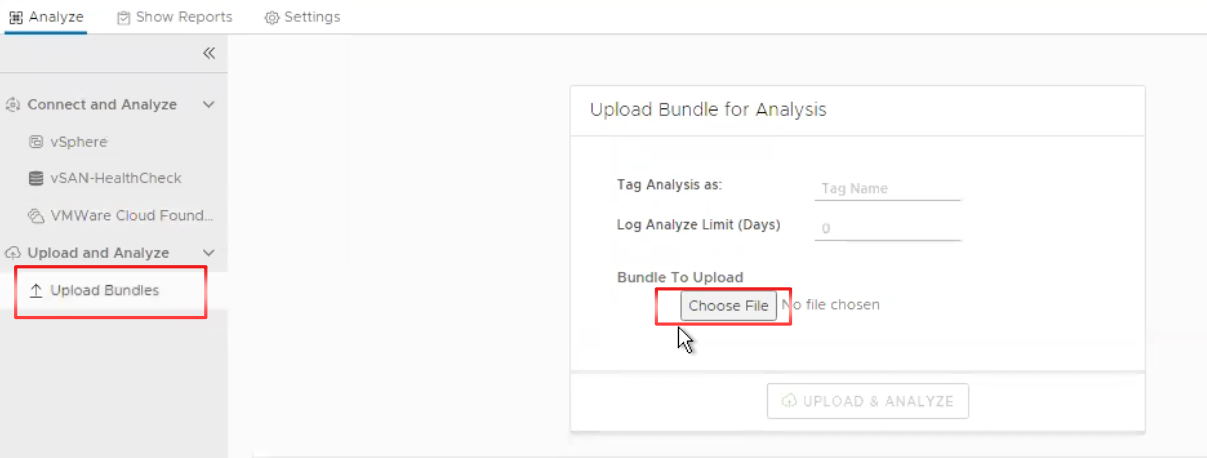
หรือเรา สามารถ upload bundle logs มาทำการ analyze ผ่านทาง SHD (Skyline Diagnostics)

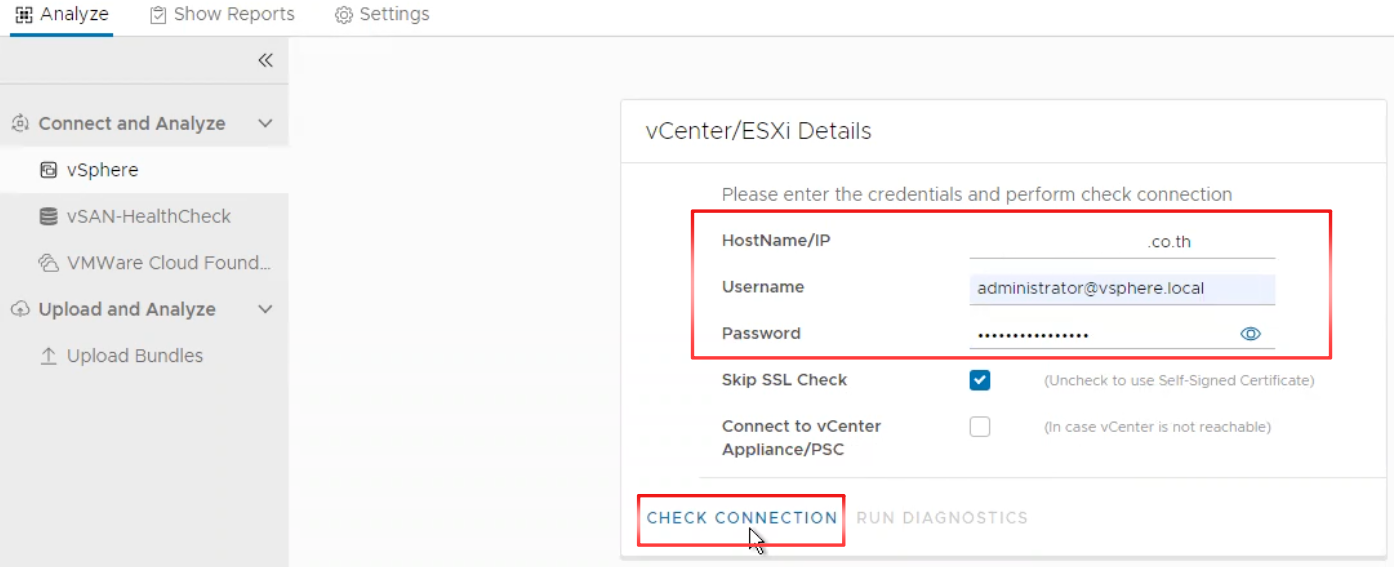
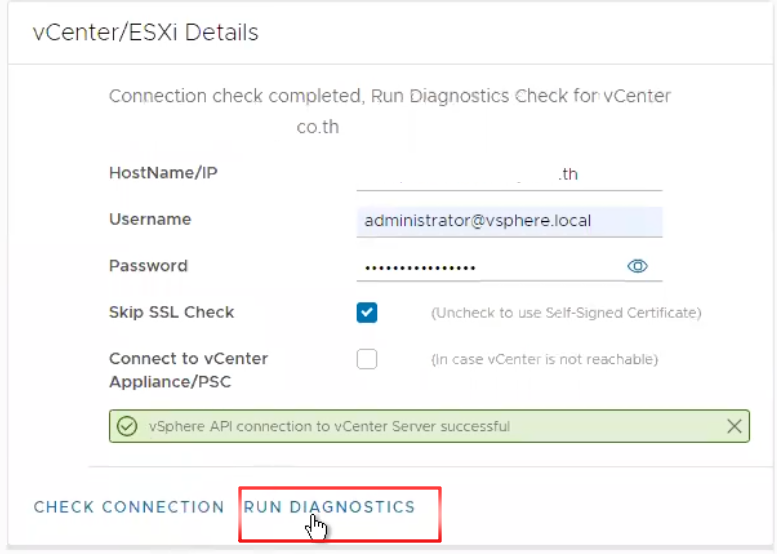
20. เราจะทำการ Analyze log bundle จาก vSphere. โดยเลือก vSphere จากด้าน เมนู ด้านซ้ายมือ หลังจากนั้นให้ เรา ใส่ รายละเอียด

  • vCenter server (FQDN or IP)
  • Username access vCenter Server
  • Password access vCenter Server

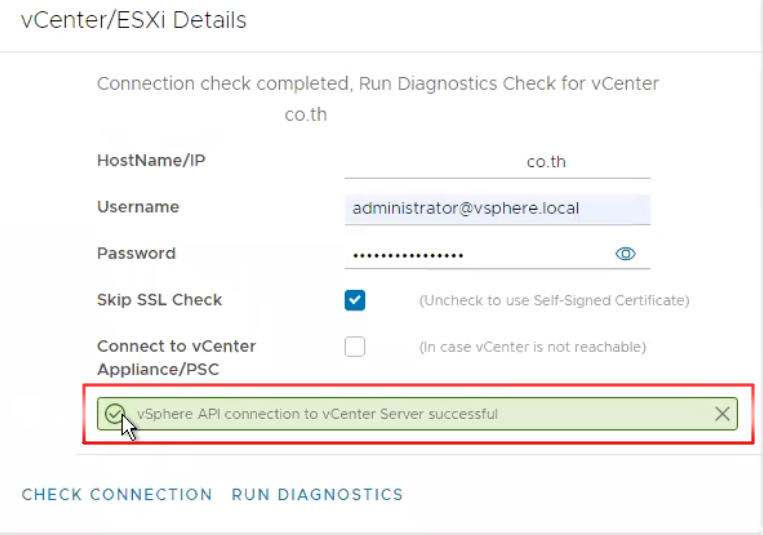
Click, “CHECK CONNECTION“.

21. ทำการ Click “RUN DIAGNOSTICS“.

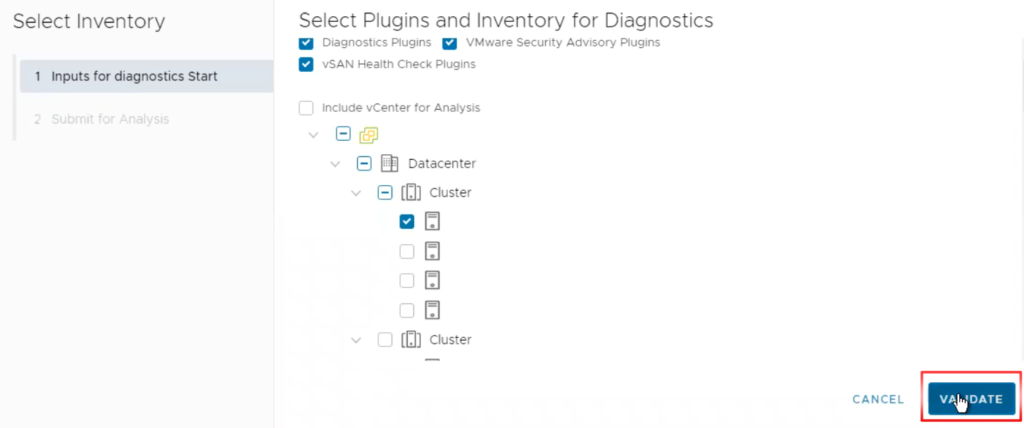
22. ทำการเลือก vSphere ESXi host ที่เราต้องการจะ Analyze logs (เราสามารถเลือกได้มากกว่า 1 host), click “VALIDATE“.

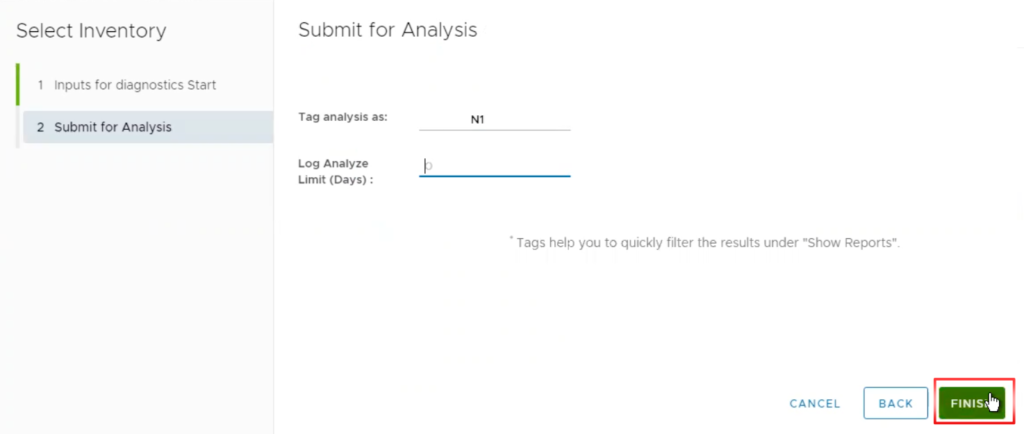
23. ใส่ชื่อ Report, click “FINISH“.

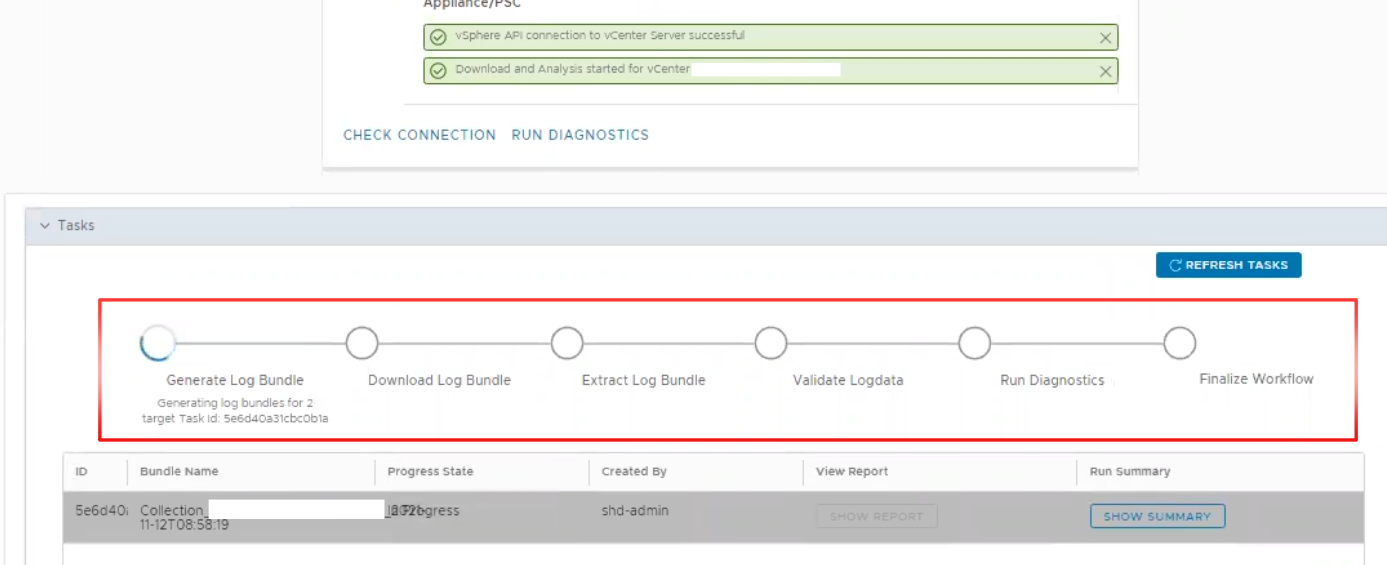
24. SHD ก็จะทำ การ download Log Bundle แล้วก็ Process ตาม workflow จนกระทั่ง Finalize Workflow จนได้เป็น Report ออกมา

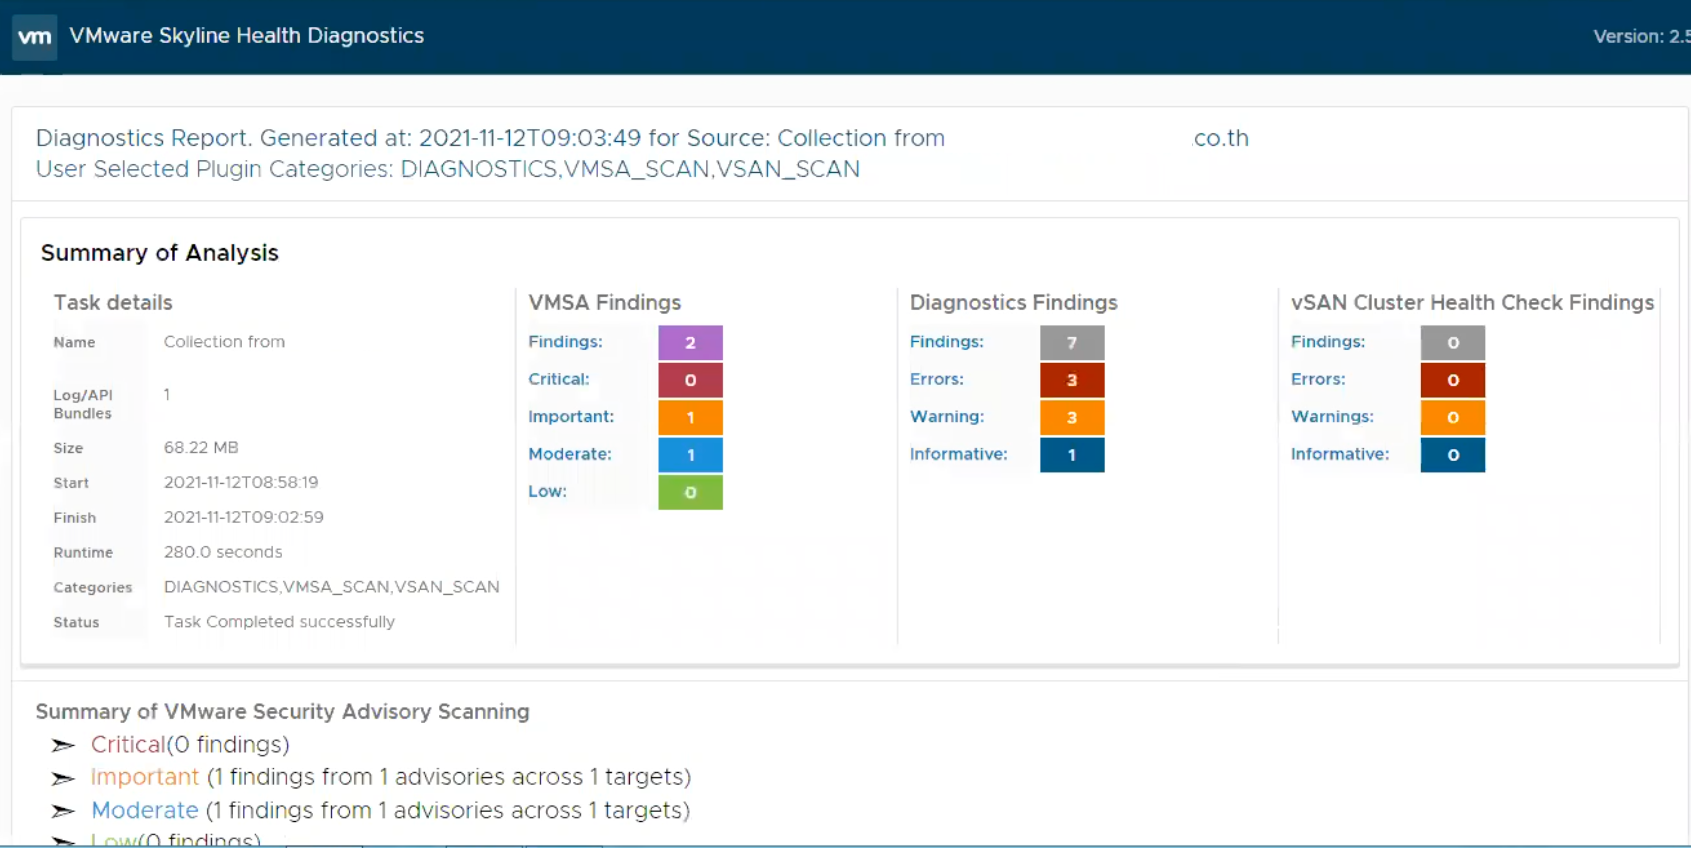
24. โดย Report เราสามารถ Click ดูจาก ปุ่ม “SHOW REPORT” หรือ เราจะเลือกไปที่ Show Reports tab แล้วเลือก download หรือ ให้แสดง Report ก็ได้

25. ตัวอย่าง SHD report

Conclusion

SHD (Skyline Health Diagnostics) จะเป็น Tool อีกหนึ่งตัวที่จะช่วยให้เราทำวิเคราะห์ Logs ได้ด้วยตัวเอง พร้อมทั้งมี Report ที่แสดง Log Analysis รวมถึง มี การ ตรวจสอบ vSAN VCG (VMware Compatibility Guide) ที่ช่วยเราตรวจสอบ compatibility guide, Network driver, Firmware ต่างๆใน vSphere environment ที่เราใช้งานให้ด้วย

Reference
Credit: ขอขอบคุณน้อง Nat (Napongtorn) สำหรับขั้นตอนการ run SHD